Sony XDSPD2000 User Manual (XDS-PD1000 and XDS-PD2000 Operation Manual for Fir - Page 98
Recording Continuous Timecode with FTP Connection, CIFS File Operations, Making CIFS connections
 |
View all Sony XDSPD2000 manuals
Add to My Manuals
Save this manual to your list of manuals |
Page 98 highlights
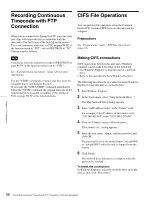
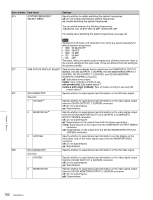
Recording Continuous Timecode with FTP Connection When you are connected to the unit by FTP, you can create new clips with timecode that is continuous with the timecode of the last frame of the last clip on the media. To record continuous timecode, set TCG on page P4 TC of the function menu to "INT", and set PRST/RGN to "TC". Then proceed as follows. Note Continuous timecode cannot be recorded if PRST/RGN on page P4 TC of the function menu is set to "VITC". See "Extended menu operations" (page 120) for more information. Use the "STOR" command to transfer clip files from the computer that is connected to this unit. If you issue the "SITE UMMD" command immediately before the "STOR" command, the original timecode of the transferred file is recorded, regardless of the setting of TCG on page P4 TC of the function menu. CIFS File Operations You can perform file operations using the Common Internet File System (CIFS) between this unit and the computer. Preparations See "Preparations" under "FTP File Operations" (page 93). Making CIFS connections CIFS connections between this unit and a Windows computer can be made with either of the following. • Use Windows Explorer to map this unit as a network drive • Refer to this unit directly from Windows Explorer The following describes the procedure for using Windows Explorer to map this unit as a network drive. 1 Start Windows Explorer. 2 In the Tools menu, select "Map Network Drive...". The Map Network Drive dialog appears. 3 Enter "\\\xds\" in the "Folder" field. For example, if the IP address of this unit is set to "192.168.001.010", enter "\\192.168.1.10\xds\". 4 Click on "Connect using a different name". The Connect As... dialog appears. 5 Enter the user name "admin" and the password, and click OK. The password is set to the model name ("xds-pd1000" or "xds-pd2000") when the unit is shipped from the factory. 6 Click Finish. The network drive allocation is complete when the password is verified. To break the connections In Windows Explorer, select the network drive and rightclick it, then click "Disconnect". Chapter 6 File Operations 98 Recording Continuous Timecode with FTP Connection / CIFS File Operations
-
 1
1 -
2
-
3
-
4
-
5
-
6
-
7
-
8
-
9
-
10
-
11
-
12
-
13
-
14
-
15
-
16
-
17
-
18
-
19
-
20
-
21
-
22
-
23
-
24
-
25
-
26
-
27
-
28
-
29
-
30
-
31
-
32
-
33
-
34
-
35
-
36
-
37
-
38
-
39
-
40
-
41
-
42
-
43
-
44
-
45
-
46
-
47
-
48
-
49
-
50
-
51
-
52
-
53
-
54
-
55
-
56
-
57
-
58
-
59
-
60
-
61
-
62
-
63
-
64
-
65
-
66
-
67
-
68
-
69
-
70
-
71
-
72
-
73
-
74
-
75
-
76
-
77
-
78
-
79
-
80
-
81
-
82
-
83
-
84
-
85
-
86
-
87
-
88
-
89
-
90
-
91
-
92
-
 93
93 -
 94
94 -
 95
95 -
 96
96 -
 97
97 -
 98
98 -
 99
99 -
 100
100 -
 101
101 -
 102
102 -
 103
103 -
104
-
105
-
106
-
107
-
108
-
109
-
110
-
111
-
112
-
113
-
114
-
115
-
116
-
117
-
118
-
119
-
120
-
121
-
122
-
123
-
124
-
125
-
126
-
127
-
128
-
129
-
130
-
131
-
132
-
133
-
134
-
135
-
136
-
137
-
138
-
139
-
140
-
141
-
142
-
143
-
144
-
145
-
146
-
147
-
148
-
149
-
150
-
151
-
152
-
153
-
154
-
155
-
156
-
157
-
158
-
159
-
160
-
161
 |
 |