Sony XDSPD2000 User Manual (XDS-PD1000 and XDS-PD2000 Operation Manual for Fir - Page 78
Playing a clip by thumbnail search, Setting clip flags, Locking (write-protecting) clips
 |
View all Sony XDSPD2000 manuals
Add to My Manuals
Save this manual to your list of manuals |
Page 78 highlights
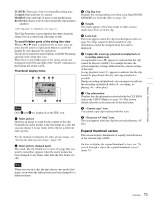
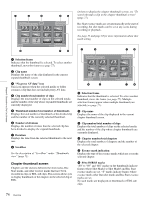
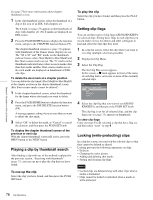
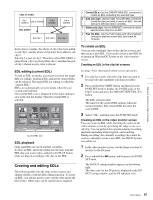
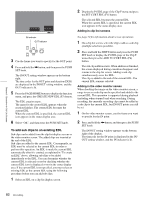
Chapter 5 Operations in Clip List Screens See page 74 for more information about chapter thumbnail screen. 1 In the clip thumbnail screen, select the thumbnail of a clip or the icon of an EDL with chapters set. The S mark (see page 73) appears on the thumbnails of clips with chapters set. (No S marks are displayed on EDL icons.) 2 Press the PAGE/HOME button to display the function menu, and press the CHAPTER function button (F5). The chapter thumbnail screen (see page 74) appears, with thumbnails of the frames where chapters are set. The "S0 to S9" and "RS" marks on the thumbnails indicate frames where Shot Mark0 to Shot Mark9 and Rec Start essence marks are set. The "S" marks on the thumbnails indicate frames where essence marks other than shot marks and Rec Start essence marks are set. No such marks are displayed on thumbnails of EDL sub clips. To delete the shot mark at a chapter position You can delete the shot mark (Shot Mark0 to Shot Mark9) at the chapter position in the chapter thumbnail screen. (Rec Start essence marks cannot be deleted.) 1 In the chapter thumbnail screen, select the thumbnail for the frame whose shot mark you want to delete. 2 Press the PAGE/HOME button to display the function menu, and press the EM DELETE function button (F4). A message appears asking if you are sure that you want to delete the shot mark. 3 Select "OK" to delete the mark, or "Cancel" to cancel the deletion, and then press the PUSH SET knob. To display the chapter thumbnail screen of the previous or next clip With the chapter thumbnail screen still active, press the PREV button or the NEXT button. Playing a clip by thumbnail search After finding a clip with one of the methods explained in the previous section, "Searching with thumbnails" (page 77), you can cue up or play the clip that you have found. To cue up the clip Select the clip you have found, and then press the PUSH SET knob. To play the clip Select the clip you have found, and then press the PLAY button. Setting clip flags You can set three types of clip flags (OK/NG/KP(KEEP)) for selected clips. Setting these flags in each clip that you record makes it easy for editors and other colleagues to find and select the clips that they need. 1 In a clip list screen, select the clip where you want to set a flag (multiple selections possible). 2 Display the Clip Menu. 3 Select Set Clip Flag. The Set Clip Flag screen appears. In this screen, a x mark appears in front of the name of each flag that is set in one or more of the currently selected clips. 4 Select the clip flag that you want to set (OK/NG/ KP(KEEP)), and then press the PUSH SET knob. The clip flag is set for all selected clips, and the clip flag icon (see page 73) appears on thumbnails. To clear clip flags Carry out steps 1 to 3, selecting a clip that has a flag set, and then select "none" in step 4. Locking (write-protecting) clips In a clip list screen, you can lock the selected clips so that they cannot be deleted or altered. Locking prevents the following operations on clips. • Deletion • Changing the index picture • Adding and deleting shot marks • Setting and clearing clip flags Notes • Locked clips are deleted along with other clips when a media is formatted. • Clips cannot be locked or unlocked when a media is write protected. 78 Clip Operations
-
 1
1 -
2
-
3
-
4
-
5
-
6
-
7
-
8
-
9
-
10
-
11
-
12
-
13
-
14
-
15
-
16
-
17
-
18
-
19
-
20
-
21
-
22
-
23
-
24
-
25
-
26
-
27
-
28
-
29
-
30
-
31
-
32
-
33
-
34
-
35
-
36
-
37
-
38
-
39
-
40
-
41
-
42
-
43
-
44
-
45
-
46
-
47
-
48
-
49
-
50
-
51
-
52
-
53
-
54
-
55
-
56
-
57
-
58
-
59
-
60
-
61
-
62
-
63
-
64
-
65
-
66
-
67
-
68
-
69
-
70
-
71
-
72
-
 73
73 -
 74
74 -
 75
75 -
 76
76 -
 77
77 -
 78
78 -
 79
79 -
 80
80 -
 81
81 -
 82
82 -
 83
83 -
84
-
85
-
86
-
87
-
88
-
89
-
90
-
91
-
92
-
93
-
94
-
95
-
96
-
97
-
98
-
99
-
100
-
101
-
102
-
103
-
104
-
105
-
106
-
107
-
108
-
109
-
110
-
111
-
112
-
113
-
114
-
115
-
116
-
117
-
118
-
119
-
120
-
121
-
122
-
123
-
124
-
125
-
126
-
127
-
128
-
129
-
130
-
131
-
132
-
133
-
134
-
135
-
136
-
137
-
138
-
139
-
140
-
141
-
142
-
143
-
144
-
145
-
146
-
147
-
148
-
149
-
150
-
151
-
152
-
153
-
154
-
155
-
156
-
157
-
158
-
159
-
160
-
161
 |
 |
