Sony XDSPD2000 User Manual (XDS-PD1000 and XDS-PD2000 Operation Manual for Fir - Page 31
Preparations, Supplying Power, Initial Setup
 |
View all Sony XDSPD2000 manuals
Add to My Manuals
Save this manual to your list of manuals |
Page 31 highlights
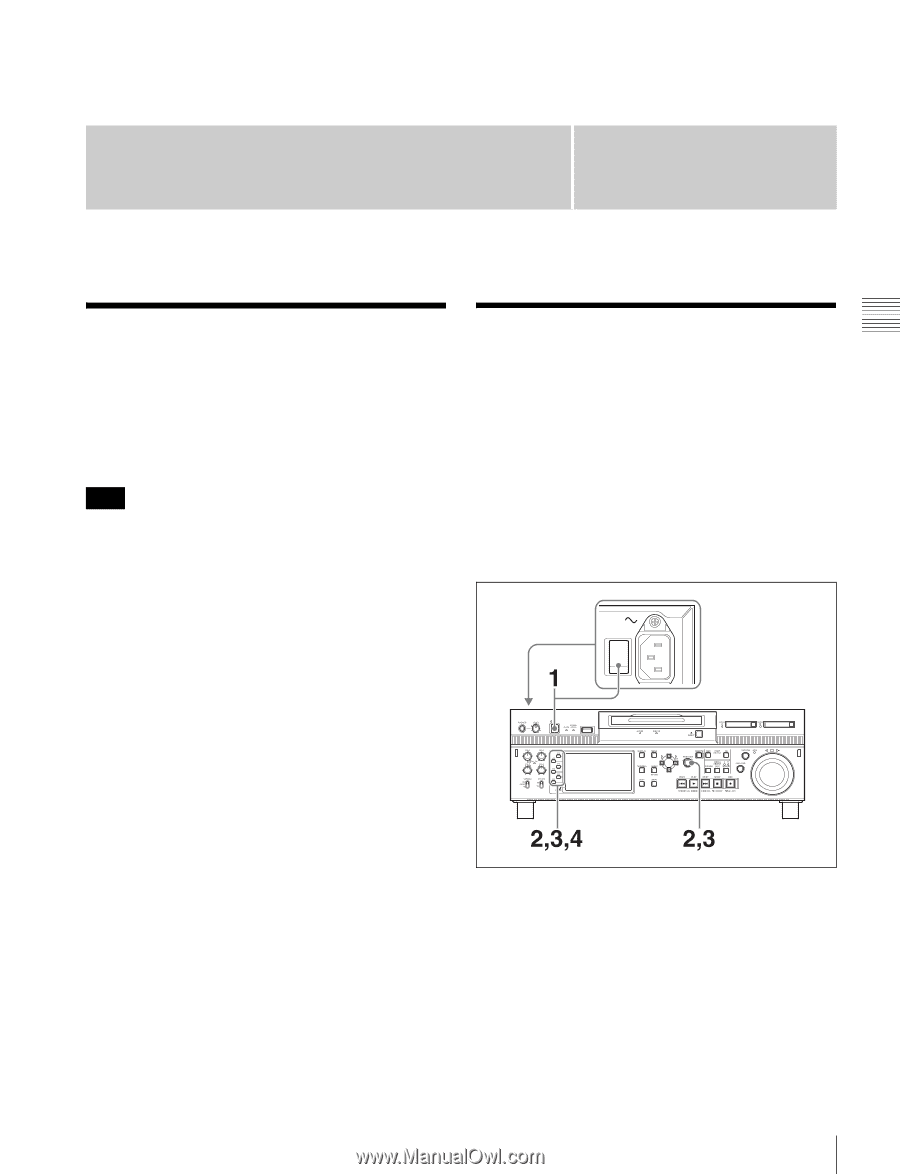
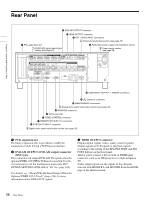
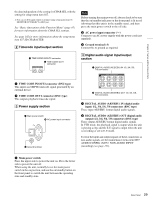
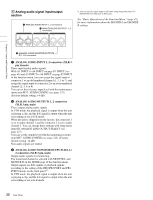
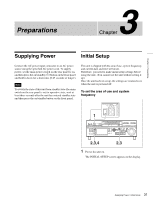
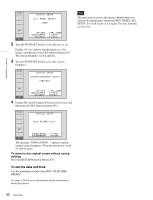
Preparations 3 Chapter Supplying Power Initial Setup Connect the AC power input connector to an AC power source using the specified AC power cord. To supply power, set the main power switch on the rear panel to on, and then press the on/standby (1) button on the front panel and hold it down for a short time (0.25 seconds or longer). Note To switch the state of this unit from standby state (the main switch on the rear panel is on) to operative state, wait at least three seconds after the unit has entered standby state and then press the on/standby button on the front panel. This unit is shipped with the area of use, system frequency, and current date and time still unset. Therefore, you need to make initial setup settings before using the unit. (You cannot use the unit without setting it up.) Once the unit has been set up, the settings are retained even when the unit is powered off. To set the area of use and system frequency Chapter 3 Preparations 1 Power the unit on. The INITIAL SETUP screen appears on the display. 31 Supplying Power / Initial Setup
-
 1
1 -
2
-
3
-
4
-
5
-
6
-
7
-
8
-
9
-
10
-
11
-
12
-
13
-
14
-
15
-
16
-
17
-
18
-
19
-
20
-
21
-
22
-
23
-
24
-
25
-
 26
26 -
 27
27 -
 28
28 -
 29
29 -
 30
30 -
 31
31 -
 32
32 -
 33
33 -
 34
34 -
 35
35 -
 36
36 -
37
-
38
-
39
-
40
-
41
-
42
-
43
-
44
-
45
-
46
-
47
-
48
-
49
-
50
-
51
-
52
-
53
-
54
-
55
-
56
-
57
-
58
-
59
-
60
-
61
-
62
-
63
-
64
-
65
-
66
-
67
-
68
-
69
-
70
-
71
-
72
-
73
-
74
-
75
-
76
-
77
-
78
-
79
-
80
-
81
-
82
-
83
-
84
-
85
-
86
-
87
-
88
-
89
-
90
-
91
-
92
-
93
-
94
-
95
-
96
-
97
-
98
-
99
-
100
-
101
-
102
-
103
-
104
-
105
-
106
-
107
-
108
-
109
-
110
-
111
-
112
-
113
-
114
-
115
-
116
-
117
-
118
-
119
-
120
-
121
-
122
-
123
-
124
-
125
-
126
-
127
-
128
-
129
-
130
-
131
-
132
-
133
-
134
-
135
-
136
-
137
-
138
-
139
-
140
-
141
-
142
-
143
-
144
-
145
-
146
-
147
-
148
-
149
-
150
-
151
-
152
-
153
-
154
-
155
-
156
-
157
-
158
-
159
-
160
-
161
 |
 |