Sony XDSPD2000 User Manual (XDS-PD1000 and XDS-PD2000 Operation Manual for Fir - Page 59
Playback, Playback target, Clip playback modes
 |
View all Sony XDSPD2000 manuals
Add to My Manuals
Save this manual to your list of manuals |
Page 59 highlights
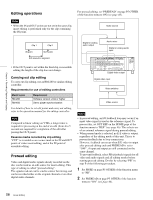
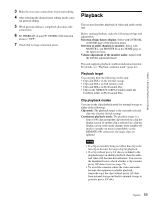
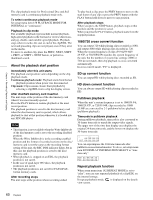
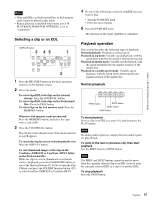
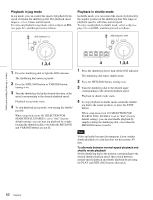
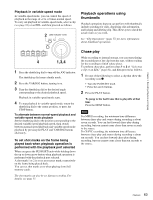
Chapter 4 Recording, Playback and Copying 3 Make the necessary connections for preread editing. 4 After selecting the desired insert editing mode, carry out preread editing. 5 When preread editing is completed, disconnect the connections. 6 Set PREREAD on page P5 OTHER of the function menu to "OFF". 7 Check that no loop connection exists. Playback This section describes playback of video and audio on the unit. Before starting playback, make the following settings and adjustments. Selection of time data to display: Select with CNTR SEL on HOME page of the function menu. Selection of audio channels to monitor: Select with MONITR L and MONITR R on the HOME page of the function menu. Volume adjustment of the monitor audio: Adjust with the LEVEL adjustment knob. This unit supports playback condition indication function. For details, see "Playback condition mark" (page 43). Playback target You can play back the following on this unit: • Clips and EDLs on the internal storage • Clips and EDLs on SxS memory card • Clips and EDLs on Professional Disc • Clips in the XDROOT or BPAV folders under the UserData folder on Professional Disc. Clip playback modes You can set the clip playback mode for internal storage to either of the following. Clip mode: The playback target is the currently selected clip only (factory default setting). Continuous playback mode: The playback target is a loop of 100 clips around the clip selected on a clip list display screen. If another clip is selected on a clip list display screen or the mode changes from standby-off mode to standby-on mode (controllable via the REMOTE (9P) connector), the target clips are updated. Notes • If a clip is currently being recorded, that clip is the last clip to become the target clip for playback. • If a clip without proxy AV data is included in the playback target in shuttle playback, then the audio and video will become discontinuous. You can use the thumbnail icon to check whether a clip contains proxy AV data or not (see page 73). • To avoid the situation where the video and audio become discontinuous in shuttle playback, transcode copy the clips without proxy AV data from internal storage and back to internal storage to generate proxy AV data. 59 Playback
-
 1
1 -
2
-
3
-
4
-
5
-
6
-
7
-
8
-
9
-
10
-
11
-
12
-
13
-
14
-
15
-
16
-
17
-
18
-
19
-
20
-
21
-
22
-
23
-
24
-
25
-
26
-
27
-
28
-
29
-
30
-
31
-
32
-
33
-
34
-
35
-
36
-
37
-
38
-
39
-
40
-
41
-
42
-
43
-
44
-
45
-
46
-
47
-
48
-
49
-
50
-
51
-
52
-
53
-
 54
54 -
 55
55 -
 56
56 -
 57
57 -
 58
58 -
 59
59 -
 60
60 -
 61
61 -
 62
62 -
 63
63 -
 64
64 -
65
-
66
-
67
-
68
-
69
-
70
-
71
-
72
-
73
-
74
-
75
-
76
-
77
-
78
-
79
-
80
-
81
-
82
-
83
-
84
-
85
-
86
-
87
-
88
-
89
-
90
-
91
-
92
-
93
-
94
-
95
-
96
-
97
-
98
-
99
-
100
-
101
-
102
-
103
-
104
-
105
-
106
-
107
-
108
-
109
-
110
-
111
-
112
-
113
-
114
-
115
-
116
-
117
-
118
-
119
-
120
-
121
-
122
-
123
-
124
-
125
-
126
-
127
-
128
-
129
-
130
-
131
-
132
-
133
-
134
-
135
-
136
-
137
-
138
-
139
-
140
-
141
-
142
-
143
-
144
-
145
-
146
-
147
-
148
-
149
-
150
-
151
-
152
-
153
-
154
-
155
-
156
-
157
-
158
-
159
-
160
-
161
 |
 |