ZyXEL V630 User Guide - Page 126
Phone Book Add or Edit Screen, Phone Book
 |
View all ZyXEL V630 manuals
Add to My Manuals
Save this manual to your list of manuals |
Page 126 highlights
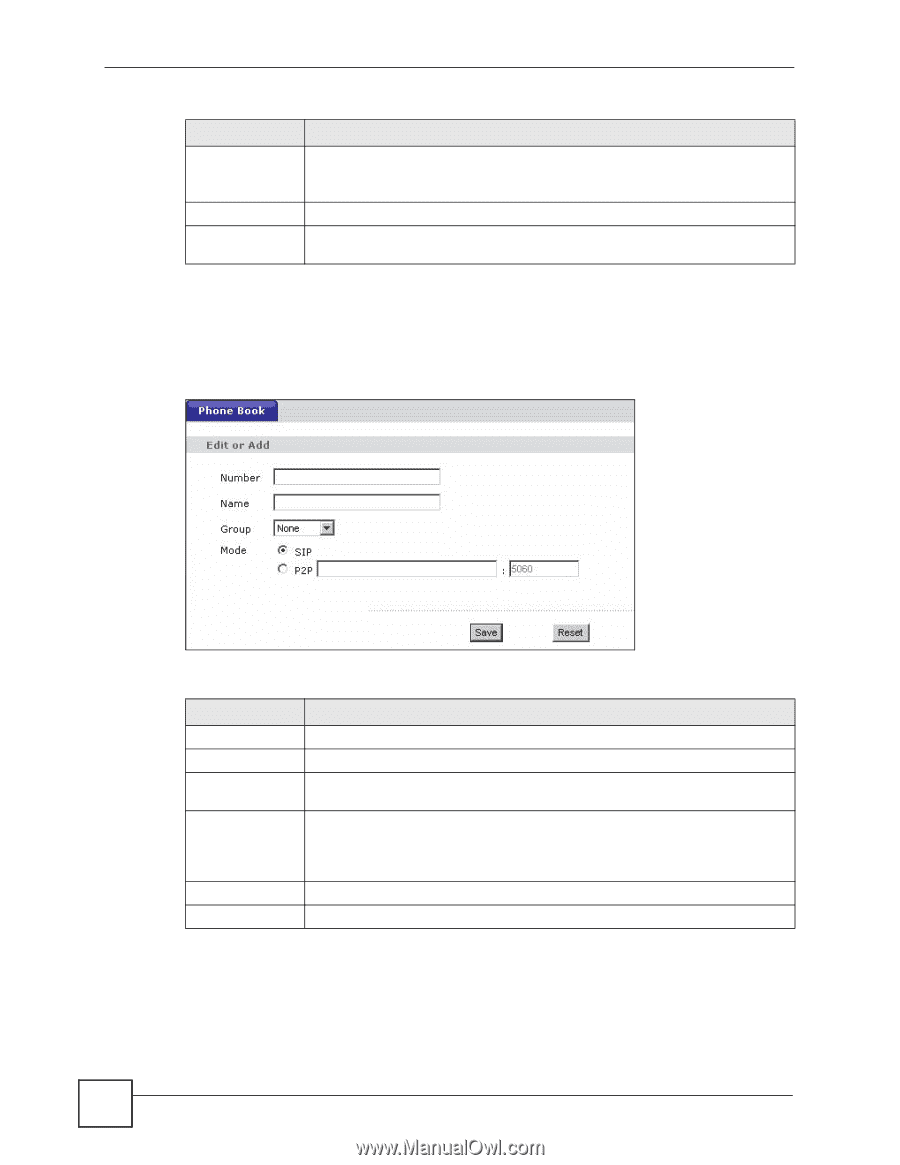
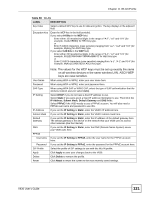
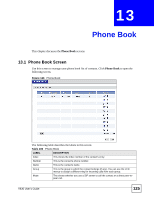
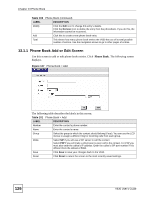
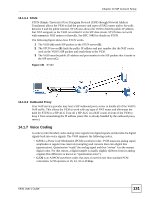
Chapter 13 Phone Book Table 100 Phone Book (continued) LABEL DESCRIPTION Modify Click the Edit icon to change this entry's details. Click the Remove icon to delete the entry from the phonebook. If you do this, the information cannot be recovered. Add Click this to create a new phone book entry. Total This shows how many phone book entries the V630 has out of its total possible number of entries. Use the navigation arrows to go to other pages of entries. 13.1.1 Phone Book Add or Edit Screen Use this screen to add or edit phone book entries. Click Phone Book. The following screen displays. Figure 127 Phone Book > Add The following table describes the labels in this screen. Table 101 Phone Book > Add LABEL DESCRIPTION Number Enter the contact's phone number. Name Enter the contact's name. Group Select the group to which the contact should belong (if any). You can use the LCD menus to assign a different ring for incoming calls from each group. Mode Select SIP if you will use a SIP server to call the contact. Select P2P if you will make a direct peer-to-peer call to the contact. For P2P you must also enter the callee's IP address. Enter the callee's SIP port number if it is different from the default of 5060. Save Click Save to save your changes back to the V630. Reset Click Reset to return the screen to the most recently saved settings. 126 V630 User's Guide
-
 1
1 -
2
-
3
-
4
-
5
-
6
-
7
-
8
-
9
-
10
-
11
-
12
-
13
-
14
-
15
-
16
-
17
-
18
-
19
-
20
-
21
-
22
-
23
-
24
-
25
-
26
-
27
-
28
-
29
-
30
-
31
-
32
-
33
-
34
-
35
-
36
-
37
-
38
-
39
-
40
-
41
-
42
-
43
-
44
-
45
-
46
-
47
-
48
-
49
-
50
-
51
-
52
-
53
-
54
-
55
-
56
-
57
-
58
-
59
-
60
-
61
-
62
-
63
-
64
-
65
-
66
-
67
-
68
-
69
-
70
-
71
-
72
-
73
-
74
-
75
-
76
-
77
-
78
-
79
-
80
-
81
-
82
-
83
-
84
-
85
-
86
-
87
-
88
-
89
-
90
-
91
-
92
-
93
-
94
-
95
-
96
-
97
-
98
-
99
-
100
-
101
-
102
-
103
-
104
-
105
-
106
-
107
-
108
-
109
-
110
-
111
-
112
-
113
-
114
-
115
-
116
-
117
-
118
-
119
-
120
-
 121
121 -
 122
122 -
 123
123 -
 124
124 -
 125
125 -
 126
126 -
 127
127 -
 128
128 -
 129
129 -
 130
130 -
 131
131 -
132
-
133
-
134
-
135
-
136
-
137
-
138
-
139
-
140
-
141
-
142
-
143
-
144
-
145
-
146
-
147
-
148
-
149
-
150
-
151
-
152
-
153
-
154
-
155
-
156
-
157
-
158
-
159
-
160
-
161
-
162
-
163
-
164
-
165
-
166
-
167
-
168
-
169
-
170
-
171
-
172
-
173
-
174
-
175
-
176
-
177
-
178
-
179
-
180
-
181
-
182
-
183
-
184
-
185
-
186
-
187
-
188
-
189
-
190
-
191
-
192
-
193
-
194
-
195
-
196
-
197
-
198
-
199
-
200
-
201
-
202
-
203
-
204
-
205
-
206
-
207
-
208
-
209
-
210
-
211
-
212
-
213
-
214
-
215
-
216
-
217
-
218
-
219
-
220
 |
 |