ZyXEL V630 User Guide - Page 81
Editing the New SIP Profile, Network > SIP Profiles > Add to Profile
 |
View all ZyXEL V630 manuals
Add to My Manuals
Save this manual to your list of manuals |
Page 81 highlights
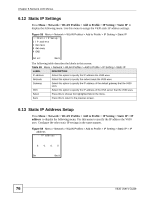
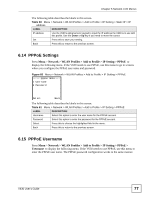
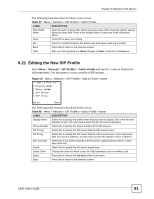
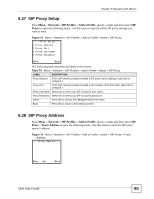
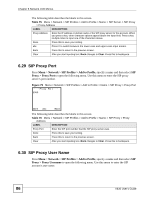
Chapter 6 Network LCD Menus The following table describes the labels in this screen. Table 67 Menu > Network > SIP Profiles > Add to Profile LABEL DESCRIPTION New Profile Name Input the name of the profile. When you press a key, other character options appear above the input field. Press a key multiple times to input one of the characters above. Done Press this to save your setting. abc Press # to switch between the lower-case and upper-case input modes. Back Press this to return to the previous screen. Clear After you start inputting text, Back changes to Clear. Press this to backspace. 6.21 Editing the New SIP Profile Press Menu > Network > SIP Profiles > Add to Profile and specify a name to display the following menu. Use this menu to create a profile of SIP settings. Figure 67 Menu > Network > SIP Profiles > Add to Profile > Name ---Add to Profile--1 Display Name 2 Phone Number 3 SIP Server 4 SIP Proxy Select Back The following table describes the labels in this screen. Table 68 Menu > Network > SIP Profiles > Add to Profile > Name LABEL DESCRIPTION Display Name Select this to specify the profile name that you want to display. This is the title that displays on the LCD main screen when the SIP account is registered. Phone Number Select this to specify the phone number of the SIP account. SIP Server Select this to specify the SIP server that the SIP account uses. SIP Proxy Select this to specify the SIP server that the SIP account uses. If you have more than one server's address, use this menu to enter the registrar server's address. NAT traversal Select this if you need to specify a STUN server, outbound proxy server, or NAT keep alive time. Expire Select this to specify the SIP server expire time. Codec Order Change the order for which codec the V630 attempts to use in making a call. Select Press this to choose the highlighted field in the menu. Back Press this to return to the previous screen. V630 User's Guide 81
-
 1
1 -
2
-
3
-
4
-
5
-
6
-
7
-
8
-
9
-
10
-
11
-
12
-
13
-
14
-
15
-
16
-
17
-
18
-
19
-
20
-
21
-
22
-
23
-
24
-
25
-
26
-
27
-
28
-
29
-
30
-
31
-
32
-
33
-
34
-
35
-
36
-
37
-
38
-
39
-
40
-
41
-
42
-
43
-
44
-
45
-
46
-
47
-
48
-
49
-
50
-
51
-
52
-
53
-
54
-
55
-
56
-
57
-
58
-
59
-
60
-
61
-
62
-
63
-
64
-
65
-
66
-
67
-
68
-
69
-
70
-
71
-
72
-
73
-
74
-
75
-
 76
76 -
 77
77 -
 78
78 -
 79
79 -
 80
80 -
 81
81 -
 82
82 -
 83
83 -
 84
84 -
 85
85 -
 86
86 -
87
-
88
-
89
-
90
-
91
-
92
-
93
-
94
-
95
-
96
-
97
-
98
-
99
-
100
-
101
-
102
-
103
-
104
-
105
-
106
-
107
-
108
-
109
-
110
-
111
-
112
-
113
-
114
-
115
-
116
-
117
-
118
-
119
-
120
-
121
-
122
-
123
-
124
-
125
-
126
-
127
-
128
-
129
-
130
-
131
-
132
-
133
-
134
-
135
-
136
-
137
-
138
-
139
-
140
-
141
-
142
-
143
-
144
-
145
-
146
-
147
-
148
-
149
-
150
-
151
-
152
-
153
-
154
-
155
-
156
-
157
-
158
-
159
-
160
-
161
-
162
-
163
-
164
-
165
-
166
-
167
-
168
-
169
-
170
-
171
-
172
-
173
-
174
-
175
-
176
-
177
-
178
-
179
-
180
-
181
-
182
-
183
-
184
-
185
-
186
-
187
-
188
-
189
-
190
-
191
-
192
-
193
-
194
-
195
-
196
-
197
-
198
-
199
-
200
-
201
-
202
-
203
-
204
-
205
-
206
-
207
-
208
-
209
-
210
-
211
-
212
-
213
-
214
-
215
-
216
-
217
-
218
-
219
-
220
 |
 |