HP Designjet T2300 HP Designjet T2300e MFP - User's Guide: English - Page 100
Printing in grayscale, In the Mac OS X 10.5 and 10.6 PostScript Print dialog T2300 PS
 |
View all HP Designjet T2300 manuals
Add to My Manuals
Save this manual to your list of manuals |
Page 100 highlights
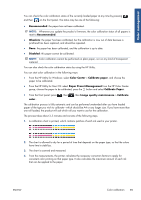
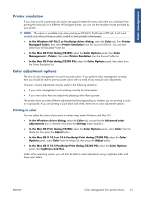
Color management ● The lightness slider simply makes the whole print lighter or darker. ● The color sliders can be used to fade or emphasize each of the primary colors in the print. The primary colors may be red, green and blue; or cyan, magenta and yellow; depending on the color model used in the image. The Reset button restores each slider to its default central position. Printing in grayscale You can adjust the gray balance of your print in similar ways under Windows and Mac OS: ● In the Windows driver dialog: select the Color tab, ensure that the Advanced color adjustments box is checked, then press the Settings button beside it. ● In the Mac OS Print dialog (T2300): select the Color Options panel, select Grayscale from the Mode list, then press the Adjust button. ● In the Mac OS X 10.5 and 10.6 PostScript Print dialog (T2300 PS): select the Color Options panel, select Grayscale from the Mode list, then press the Adjust button. ● In the Mac OS X 10.4 PostScript Print dialog (T2300 PS): select the Color Options panel, then Print in Grayscale, then the Gray balance tab. Under either operating system, you will then be able to make adjustments using separate controls for highlights, midtones and shadows. 92 Chapter 11 Color management ENWW
-
 1
1 -
2
-
3
-
4
-
5
-
6
-
7
-
8
-
9
-
10
-
11
-
12
-
13
-
14
-
15
-
16
-
17
-
18
-
19
-
20
-
21
-
22
-
23
-
24
-
25
-
26
-
27
-
28
-
29
-
30
-
31
-
32
-
33
-
34
-
35
-
36
-
37
-
38
-
39
-
40
-
41
-
42
-
43
-
44
-
45
-
46
-
47
-
48
-
49
-
50
-
51
-
52
-
53
-
54
-
55
-
56
-
57
-
58
-
59
-
60
-
61
-
62
-
63
-
64
-
65
-
66
-
67
-
68
-
69
-
70
-
71
-
72
-
73
-
74
-
75
-
76
-
77
-
78
-
79
-
80
-
81
-
82
-
83
-
84
-
85
-
86
-
87
-
88
-
89
-
90
-
91
-
92
-
93
-
94
-
 95
95 -
 96
96 -
 97
97 -
 98
98 -
 99
99 -
 100
100 -
 101
101 -
 102
102 -
 103
103 -
 104
104 -
 105
105 -
106
-
107
-
108
-
109
-
110
-
111
-
112
-
113
-
114
-
115
-
116
-
117
-
118
-
119
-
120
-
121
-
122
-
123
-
124
-
125
-
126
-
127
-
128
-
129
-
130
-
131
-
132
-
133
-
134
-
135
-
136
-
137
-
138
-
139
-
140
-
141
-
142
-
143
-
144
-
145
-
146
-
147
-
148
-
149
-
150
-
151
-
152
-
153
-
154
-
155
-
156
-
157
-
158
-
159
-
160
-
161
-
162
-
163
-
164
-
165
-
166
-
167
-
168
-
169
-
170
-
171
-
172
-
173
-
174
-
175
-
176
-
177
-
178
-
179
-
180
-
181
-
182
-
183
-
184
-
185
-
186
-
187
-
188
-
189
-
190
-
191
-
192
-
193
-
194
-
195
-
196
-
197
-
198
-
199
-
200
-
201
-
202
-
203
-
204
-
205
-
206
-
207
-
208
-
209
-
210
 |
 |