HP Designjet T2300 HP Designjet T2300e MFP - User's Guide: English - Page 151
Calibrate the scanner, Image Quality Maintenance
 |
View all HP Designjet T2300 manuals
Add to My Manuals
Save this manual to your list of manuals |
Page 151 highlights
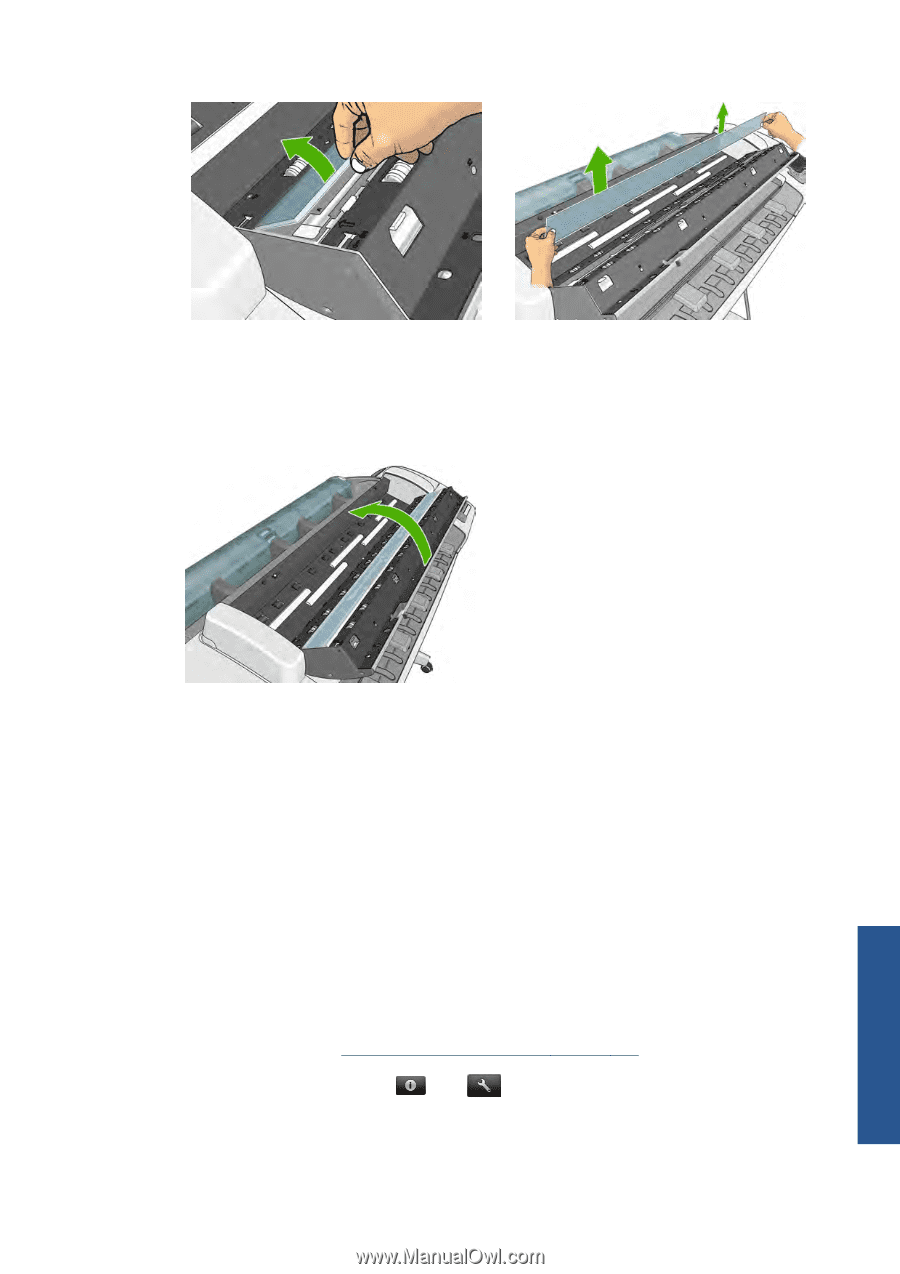
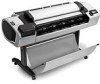
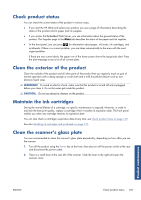
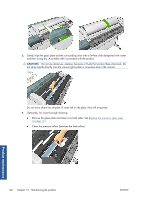
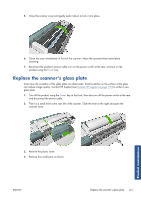
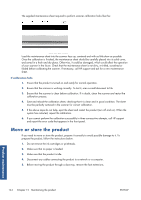
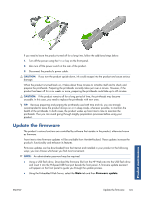
8. Insert the new glass. Be very careful not to scratch it. Press the four white plastic tabs until they click into place 9. Replace the four parts that you removed initially, to keep the plastic tabs in place. 10. Close the scanner cover and gently push it down to lock it into place. Product maintenance 11. Reconnect the product's power cable, turn on the power switch at the rear, and turn on the product using the Power key. Calibrate the scanner Your scanner has been calibrated at the factory, and theoretically CIS scanners do not need to be recalibrated during their lifetimes. Nevertheless, because of environmental changes, your scanner may start showing image defects that can be easily corrected by recalibrating the scanner. The whole procedure takes less than 10 minutes, and you are recommended to recalibrate the scanner whenever you see some undesired artifact or a lack of quality in scanned files or copies, bearing in mind the limitations of CIS technology already explained in this guide. If you perform calibration successfully and still have concerns about the image quality, please read the Image-quality troubleshooting guide in order to detect whether you are facing a product limitation, and may want to consider buying a CCD scanner. To calibrate the scanner 1. Clean the scanner. See Clean the scanner's glass plate on page 139. 2. Go to the front panel and press Calibrate scanner. , then , then Image Quality Maintenance > 3. Follow the instructions in the front panel. ENWW Calibrate the scanner 143
-
 1
1 -
2
-
3
-
4
-
5
-
6
-
7
-
8
-
9
-
10
-
11
-
12
-
13
-
14
-
15
-
16
-
17
-
18
-
19
-
20
-
21
-
22
-
23
-
24
-
25
-
26
-
27
-
28
-
29
-
30
-
31
-
32
-
33
-
34
-
35
-
36
-
37
-
38
-
39
-
40
-
41
-
42
-
43
-
44
-
45
-
46
-
47
-
48
-
49
-
50
-
51
-
52
-
53
-
54
-
55
-
56
-
57
-
58
-
59
-
60
-
61
-
62
-
63
-
64
-
65
-
66
-
67
-
68
-
69
-
70
-
71
-
72
-
73
-
74
-
75
-
76
-
77
-
78
-
79
-
80
-
81
-
82
-
83
-
84
-
85
-
86
-
87
-
88
-
89
-
90
-
91
-
92
-
93
-
94
-
95
-
96
-
97
-
98
-
99
-
100
-
101
-
102
-
103
-
104
-
105
-
106
-
107
-
108
-
109
-
110
-
111
-
112
-
113
-
114
-
115
-
116
-
117
-
118
-
119
-
120
-
121
-
122
-
123
-
124
-
125
-
126
-
127
-
128
-
129
-
130
-
131
-
132
-
133
-
134
-
135
-
136
-
137
-
138
-
139
-
140
-
141
-
142
-
143
-
144
-
145
-
 146
146 -
 147
147 -
 148
148 -
 149
149 -
 150
150 -
 151
151 -
 152
152 -
 153
153 -
 154
154 -
 155
155 -
 156
156 -
157
-
158
-
159
-
160
-
161
-
162
-
163
-
164
-
165
-
166
-
167
-
168
-
169
-
170
-
171
-
172
-
173
-
174
-
175
-
176
-
177
-
178
-
179
-
180
-
181
-
182
-
183
-
184
-
185
-
186
-
187
-
188
-
189
-
190
-
191
-
192
-
193
-
194
-
195
-
196
-
197
-
198
-
199
-
200
-
201
-
202
-
203
-
204
-
205
-
206
-
207
-
208
-
209
-
210
 |
 |