HP Designjet T2300 HP Designjet T2300e MFP - User's Guide: English - Page 83
Scan to file, Setup, Security, Disable USB drives
 |
View all HP Designjet T2300 manuals
Add to My Manuals
Save this manual to your list of manuals |
Page 83 highlights
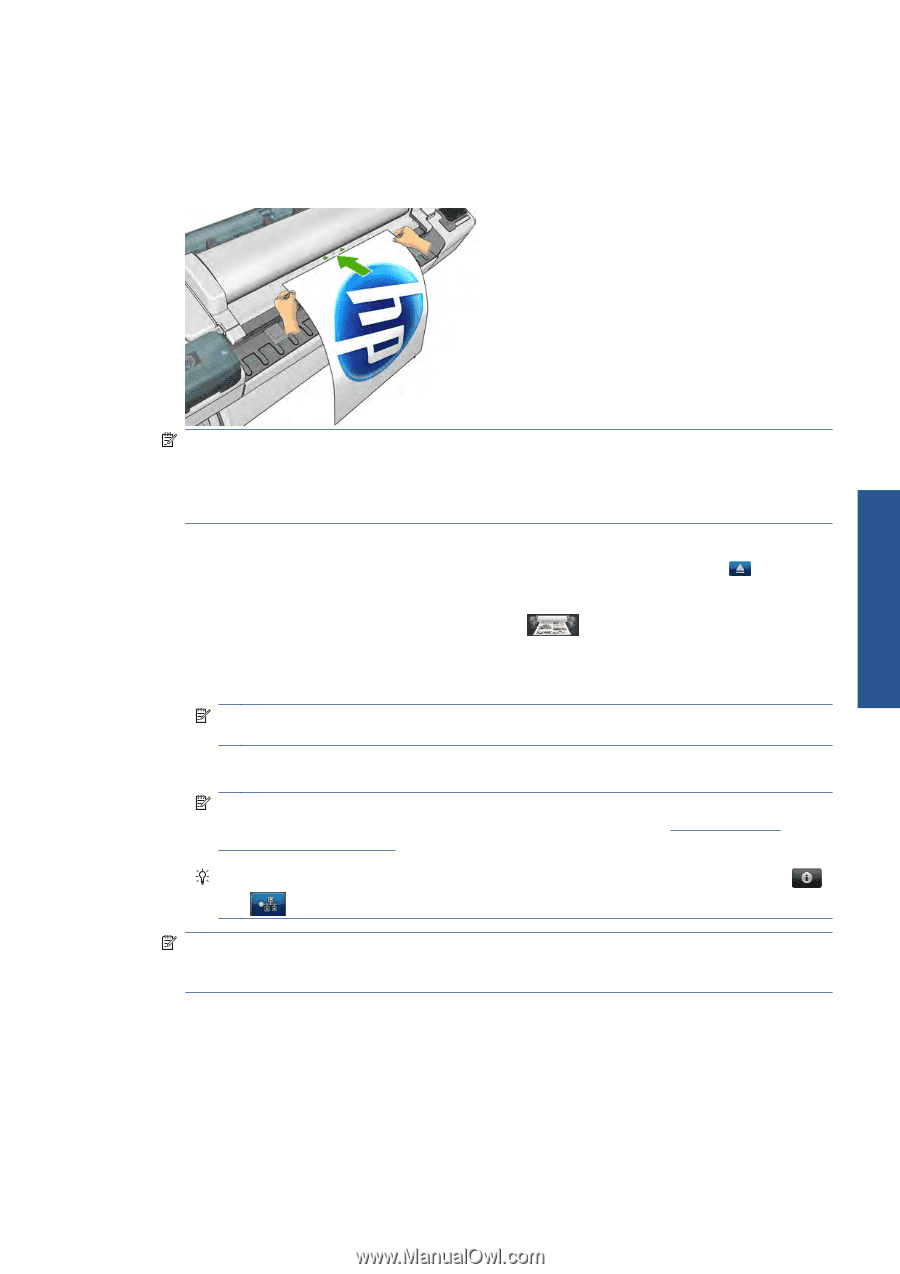
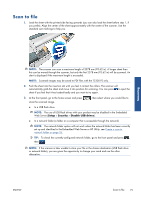
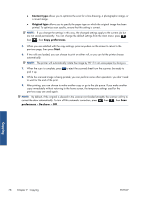
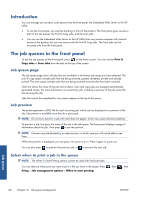
Scan to file 1. Load the sheet with the printed side facing upwards (you can also load the sheet before step 1, if you prefer). Align the center of the sheet approximately with the center of the scanner. Use the standard size markings to help you. Scanning NOTE: The scanner can scan a maximum length of 2378 mm (93.62 in). A longer sheet than this can be moved through the scanner, but only the first 2378 mm (93.62 in) will be scanned. An alert is displayed if the maximum length is exceeded. NOTE: Scanned images may be saved to PDF files with the T2300 PS only. 2. Push the sheet into the insertion slot until you feel it contact the rollers. The scanner will automatically grab the sheet and move it into position for scanning. You can press to eject the sheet if you feel that it has loaded badly and you want to try again. 3. At the front panel, go to the home screen and press store the scanned image. , then select where you would like to ● In a USB flash drive NOTE: The use of USB flash drives with your product may be disabled in the Embedded Web Server (Setup > Security > Disable USB drives). ● In a network folder (a folder on a computer that is accessible through the network) NOTE: The network folder option will not work unless the network folder has been correctly set up and identified in the Embedded Web Server or HP Utility: see Create a scan-tonetwork folder on page 26. TIP: To check the currently-configured network folder, go to the front panel and press , then . NOTE: If the scanner is later unable to store your file in the chosen destination (USB flash drive or network folder), you are given the opportunity to change your mind and use the other alternative. ENWW Scan to file 75
-
 1
1 -
2
-
3
-
4
-
5
-
6
-
7
-
8
-
9
-
10
-
11
-
12
-
13
-
14
-
15
-
16
-
17
-
18
-
19
-
20
-
21
-
22
-
23
-
24
-
25
-
26
-
27
-
28
-
29
-
30
-
31
-
32
-
33
-
34
-
35
-
36
-
37
-
38
-
39
-
40
-
41
-
42
-
43
-
44
-
45
-
46
-
47
-
48
-
49
-
50
-
51
-
52
-
53
-
54
-
55
-
56
-
57
-
58
-
59
-
60
-
61
-
62
-
63
-
64
-
65
-
66
-
67
-
68
-
69
-
70
-
71
-
72
-
73
-
74
-
75
-
76
-
77
-
 78
78 -
 79
79 -
 80
80 -
 81
81 -
 82
82 -
 83
83 -
 84
84 -
 85
85 -
 86
86 -
 87
87 -
 88
88 -
89
-
90
-
91
-
92
-
93
-
94
-
95
-
96
-
97
-
98
-
99
-
100
-
101
-
102
-
103
-
104
-
105
-
106
-
107
-
108
-
109
-
110
-
111
-
112
-
113
-
114
-
115
-
116
-
117
-
118
-
119
-
120
-
121
-
122
-
123
-
124
-
125
-
126
-
127
-
128
-
129
-
130
-
131
-
132
-
133
-
134
-
135
-
136
-
137
-
138
-
139
-
140
-
141
-
142
-
143
-
144
-
145
-
146
-
147
-
148
-
149
-
150
-
151
-
152
-
153
-
154
-
155
-
156
-
157
-
158
-
159
-
160
-
161
-
162
-
163
-
164
-
165
-
166
-
167
-
168
-
169
-
170
-
171
-
172
-
173
-
174
-
175
-
176
-
177
-
178
-
179
-
180
-
181
-
182
-
183
-
184
-
185
-
186
-
187
-
188
-
189
-
190
-
191
-
192
-
193
-
194
-
195
-
196
-
197
-
198
-
199
-
200
-
201
-
202
-
203
-
204
-
205
-
206
-
207
-
208
-
209
-
210
 |
 |