HP Designjet T2300 HP Designjet T2300e MFP - User's Guide: English - Page 137
Insert an ink cartridge, Ink and printheads
 |
View all HP Designjet T2300 manuals
Add to My Manuals
Save this manual to your list of manuals |
Page 137 highlights
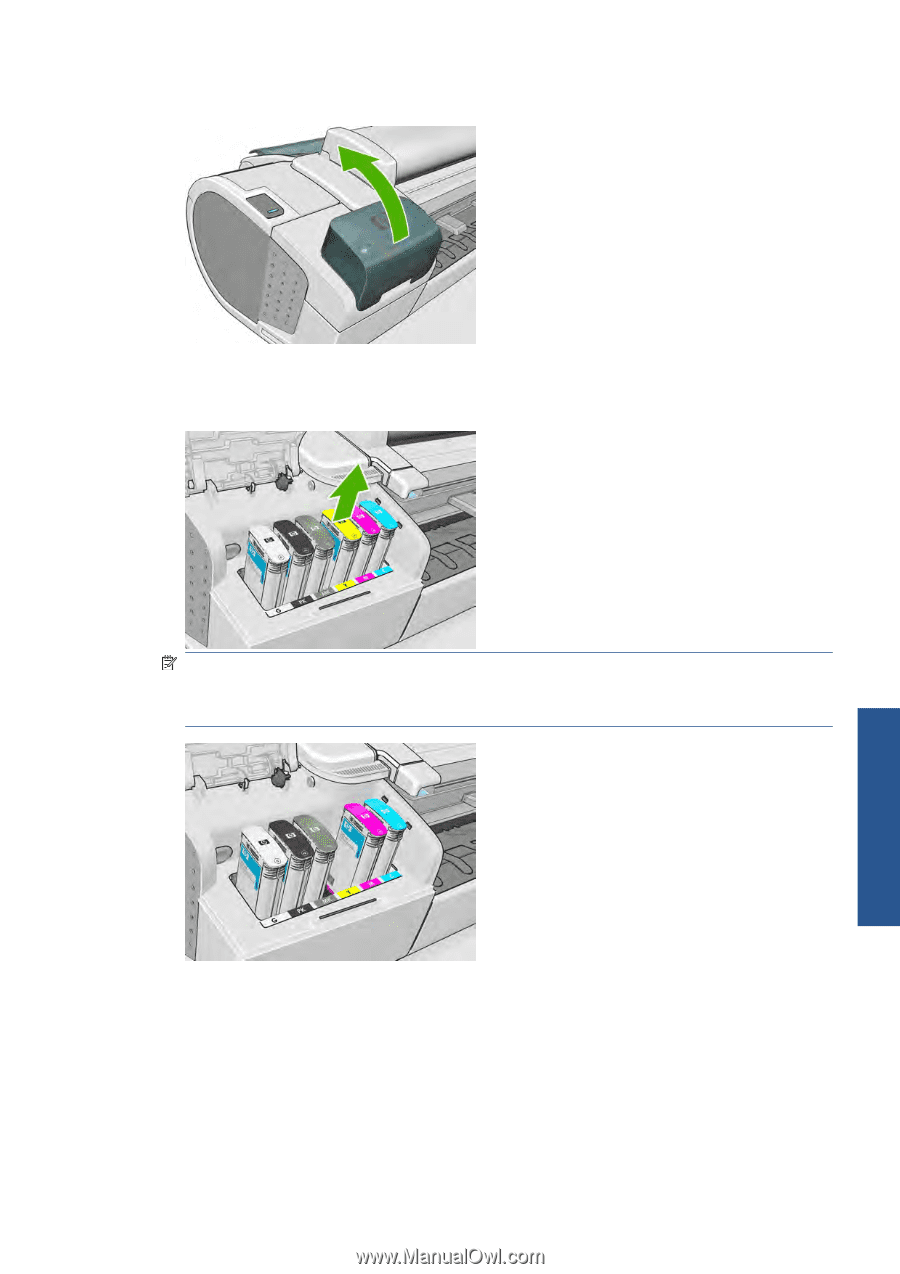
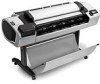
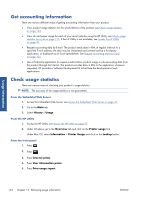
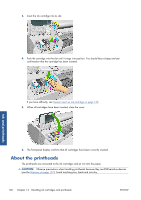
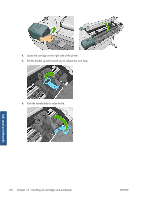
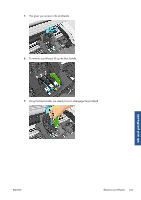
2. Open the ink cartridge cover on the left-hand side of the product. 3. Grip the cartridge you wish to remove. 4. Pull the cartridge straight up. NOTE: Avoid touching the end of the cartridge that is inserted into the product, as there may be ink on the connection. NOTE: Avoid storing partially used ink cartridges. Ink and printheads 5. The front-panel display identifies the missing ink cartridge. Insert an ink cartridge 1. Before removing the cartridge from its wrapping, shake it vigorously. 2. Unwrap the new ink cartridge, find the label identifying the ink color. Check that the letter or letters (in these illustrations, M for magenta) marking the empty slot, matches the letter or letters on the cartridge label. ENWW Insert an ink cartridge 129
-
 1
1 -
2
-
3
-
4
-
5
-
6
-
7
-
8
-
9
-
10
-
11
-
12
-
13
-
14
-
15
-
16
-
17
-
18
-
19
-
20
-
21
-
22
-
23
-
24
-
25
-
26
-
27
-
28
-
29
-
30
-
31
-
32
-
33
-
34
-
35
-
36
-
37
-
38
-
39
-
40
-
41
-
42
-
43
-
44
-
45
-
46
-
47
-
48
-
49
-
50
-
51
-
52
-
53
-
54
-
55
-
56
-
57
-
58
-
59
-
60
-
61
-
62
-
63
-
64
-
65
-
66
-
67
-
68
-
69
-
70
-
71
-
72
-
73
-
74
-
75
-
76
-
77
-
78
-
79
-
80
-
81
-
82
-
83
-
84
-
85
-
86
-
87
-
88
-
89
-
90
-
91
-
92
-
93
-
94
-
95
-
96
-
97
-
98
-
99
-
100
-
101
-
102
-
103
-
104
-
105
-
106
-
107
-
108
-
109
-
110
-
111
-
112
-
113
-
114
-
115
-
116
-
117
-
118
-
119
-
120
-
121
-
122
-
123
-
124
-
125
-
126
-
127
-
128
-
129
-
130
-
131
-
 132
132 -
 133
133 -
 134
134 -
 135
135 -
 136
136 -
 137
137 -
 138
138 -
 139
139 -
 140
140 -
 141
141 -
 142
142 -
143
-
144
-
145
-
146
-
147
-
148
-
149
-
150
-
151
-
152
-
153
-
154
-
155
-
156
-
157
-
158
-
159
-
160
-
161
-
162
-
163
-
164
-
165
-
166
-
167
-
168
-
169
-
170
-
171
-
172
-
173
-
174
-
175
-
176
-
177
-
178
-
179
-
180
-
181
-
182
-
183
-
184
-
185
-
186
-
187
-
188
-
189
-
190
-
191
-
192
-
193
-
194
-
195
-
196
-
197
-
198
-
199
-
200
-
201
-
202
-
203
-
204
-
205
-
206
-
207
-
208
-
209
-
210
 |
 |