Yamaha AW2400 Owner's Manual - Page 153
Compressor Control via, the Selected Channel
 |
View all Yamaha AW2400 manuals
Add to My Manuals
Save this manual to your list of manuals |
Page 153 highlights
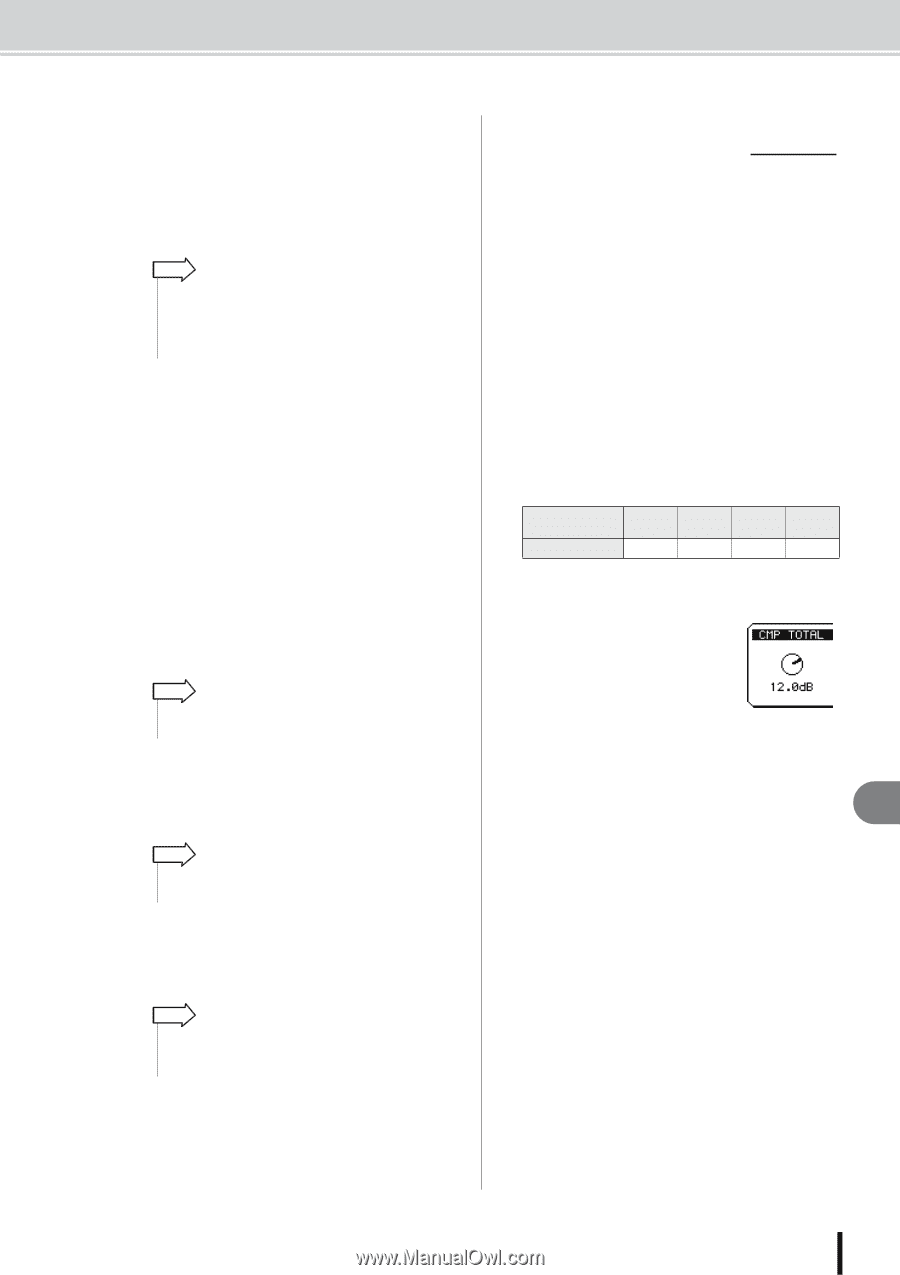
Dynamics Processing E TYPE Indicates the currently selected compressor type. The displayed indication has the following meaning. • COMP Compressor • EXPAND Expander • COMP.(H Compander (hard) • COMP.(S Compander (soft) HINT • You cannot change the compressor type via this page. If you want to use a different type, you must recall a library setting that uses the desired type. For details on recalling library compression settings, refer to "EQ/Dynamics Processor Library Operation" on page 154. F GR (Gain Reduction) Indicates the amount of gain reduction produced by the compressor, in a range of -18 dB to 0 dB. G Output meter Indicates the level of the signal after it has passed through the compressor. H PARAMETER Here you can edit the parameters of the compressor. The type of parameters and their ranges will differ depending on the compressor type. For details on the types of parameter and their function, refer to the appendix. 4 Move the cursor to the COMP ON/OFF button and press the [ENTER] key to turn the compressor on. HINT • Pressing the [F1] key while holding the Display section [SHIFT] key has the same effect as the ON/OFF button. 5 Use the STEREO LINK button to turn compressor linking for paired channels on or off, and the POSITION field to select the compressor insert point as required. HINT • Pressing the [F2] key while holding the Display section [SHIFT] key has the same effect as the STEREO LINK button. 6 Move the cursor to the parameter you want to edit and use either the [DATA/JOG] dial or [INC]/[DEC] keys to set the parameter as required. HINT • You can save your current compressor settings in the library as described in "EQ/Dynamics Processor Library Operation" on page 154. ■ Compressor Control via the Selected Channel section Applying and controlling compression by using knobs 1- 4 in the Selected Channel section. 1 Use the Layer section, [INPUT SEL], [SEL], and [STEREO SEL] keys to select the channel to which compression is to be applied. 2 Press the Selected Channel section [DYN] key so that it's indicator lights. With the default settings the DYNAMICS screen will appear automatically. The display will not change if the UTILITY screen Preference page AUTO DISPLAY button is set to OFF. 3 Rotate Selected Channel knobs 1-4. The parameters for the channels selected in step 1 will change accordingly. The knobs control the following parameters. Selected Channel knobs 1-4 Parameters 1 2 TOTAL* Threshold 3 Ratio 4 Gain * TOTAL: Multiple parameters are changed simultaneously to vary the compression effect. If the UTILITY screen Preference page AUTO DISPLAY button is set to OFF, a popup window showing the current compression settings will appear while Selected Channel knobs 1-4 are being operated. 16 Pan, EQ, and Dynamics Processing AW2400 Owner's Manual 153
-
 1
1 -
2
-
3
-
4
-
5
-
6
-
7
-
8
-
9
-
10
-
11
-
12
-
13
-
14
-
15
-
16
-
17
-
18
-
19
-
20
-
21
-
22
-
23
-
24
-
25
-
26
-
27
-
28
-
29
-
30
-
31
-
32
-
33
-
34
-
35
-
36
-
37
-
38
-
39
-
40
-
41
-
42
-
43
-
44
-
45
-
46
-
47
-
48
-
49
-
50
-
51
-
52
-
53
-
54
-
55
-
56
-
57
-
58
-
59
-
60
-
61
-
62
-
63
-
64
-
65
-
66
-
67
-
68
-
69
-
70
-
71
-
72
-
73
-
74
-
75
-
76
-
77
-
78
-
79
-
80
-
81
-
82
-
83
-
84
-
85
-
86
-
87
-
88
-
89
-
90
-
91
-
92
-
93
-
94
-
95
-
96
-
97
-
98
-
99
-
100
-
101
-
102
-
103
-
104
-
105
-
106
-
107
-
108
-
109
-
110
-
111
-
112
-
113
-
114
-
115
-
116
-
117
-
118
-
119
-
120
-
121
-
122
-
123
-
124
-
125
-
126
-
127
-
128
-
129
-
130
-
131
-
132
-
133
-
134
-
135
-
136
-
137
-
138
-
139
-
140
-
141
-
142
-
143
-
144
-
145
-
146
-
147
-
 148
148 -
 149
149 -
 150
150 -
 151
151 -
 152
152 -
 153
153 -
 154
154 -
 155
155 -
 156
156 -
 157
157 -
 158
158 -
159
-
160
-
161
-
162
-
163
-
164
-
165
-
166
-
167
-
168
-
169
-
170
-
171
-
172
-
173
-
174
-
175
-
176
-
177
-
178
-
179
-
180
-
181
-
182
-
183
-
184
-
185
-
186
-
187
-
188
-
189
-
190
-
191
-
192
-
193
-
194
-
195
-
196
-
197
-
198
-
199
-
200
-
201
-
202
-
203
-
204
-
205
-
206
-
207
-
208
-
209
-
210
-
211
-
212
-
213
-
214
-
215
-
216
-
217
-
218
-
219
-
220
-
221
-
222
-
223
-
224
-
225
-
226
-
227
-
228
-
229
-
230
-
231
-
232
-
233
-
234
-
235
-
236
-
237
-
238
-
239
-
240
-
241
-
242
-
243
-
244
-
245
-
246
-
247
-
248
-
249
-
250
-
251
-
252
-
253
-
254
-
255
-
256
-
257
-
258
-
259
-
260
-
261
-
262
-
263
-
264
-
265
-
266
-
267
-
268
-
269
-
270
-
271
-
272
-
273
-
274
-
275
-
276
-
277
-
278
-
279
-
280
-
281
-
282
-
283
-
284
-
285
-
286
-
287
-
288
 |
 |