Ricoh Aficio SP 3400SF User Guide - Page 157
Specifying the Scan Settings, When a scan destination is specified
 |
View all Ricoh Aficio SP 3400SF manuals
Add to My Manuals
Save this manual to your list of manuals |
Page 157 highlights
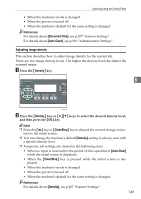
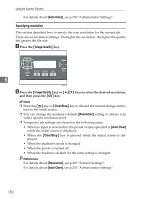
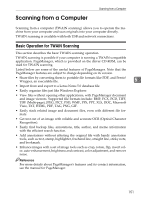
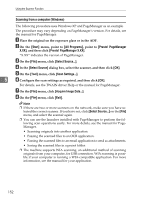
Scanning Using the Control Panel Note ❒ To cancel scanning, press the {Scanner} key, and then press the {Clear/Stop} key. The scan files are discarded. ❒ You can configure the machine to scan documents in black and white, color, or grayscale by changing the [Color Mode] setting under scanner settings. ❒ If the [Limitless Scan] setting under scanner settings is enabled, you can place originals on the exposure glass repeatedly in a single scan procedure. ❒ If the [Multi Page in A Document] setting under scanner settings is enabled, you can scan multiple pages to create a single PDF or TIFF file containing all pages. However, if the file format is JPEG, a single-page file will be created for every page scanned. ❒ If paper is jammed in the ADF, the scan file is discarded. In this case, scan the entire originals again. To remove paper jams in the ADF, see p.283 "Removing Scanning Jams". Reference 5 To place the original, see p.84 "Placing Originals". To configure advanced scan settings, see p.147 "Specifying the Scan Settings". For details about [Color Mode] settings, see p.208 "Scanner Setting Parameters". For details about [Multi Page in A Document] or [Limitless Scan], see p.207 "Scanner Settings". For details about how to remove the paper jammed in the ADF, see p.283 "Removing Scanning Jams". Specifying the Scan Settings This section describes how to specify the scanning size, image density, and resolution for the current job. ❖ When a scan destination is specified When you specify a scan destination, the machine's scan settings change automatically according to the information registered for that destination in the Address Book. This allows you to send scanned files without having to reconfigure the scan settings according to each destination. If necessary, you can change the scan settings using the control panel. Note ❒ The machine maintains the preset scan settings for the current destination un- til the machine returns to standby mode. ❒ Changing the preset scan settings for the current destination does not change the information registered in the Address Book. 147
-
 1
1 -
2
-
3
-
4
-
5
-
6
-
7
-
8
-
9
-
10
-
11
-
12
-
13
-
14
-
15
-
16
-
17
-
18
-
19
-
20
-
21
-
22
-
23
-
24
-
25
-
26
-
27
-
28
-
29
-
30
-
31
-
32
-
33
-
34
-
35
-
36
-
37
-
38
-
39
-
40
-
41
-
42
-
43
-
44
-
45
-
46
-
47
-
48
-
49
-
50
-
51
-
52
-
53
-
54
-
55
-
56
-
57
-
58
-
59
-
60
-
61
-
62
-
63
-
64
-
65
-
66
-
67
-
68
-
69
-
70
-
71
-
72
-
73
-
74
-
75
-
76
-
77
-
78
-
79
-
80
-
81
-
82
-
83
-
84
-
85
-
86
-
87
-
88
-
89
-
90
-
91
-
92
-
93
-
94
-
95
-
96
-
97
-
98
-
99
-
100
-
101
-
102
-
103
-
104
-
105
-
106
-
107
-
108
-
109
-
110
-
111
-
112
-
113
-
114
-
115
-
116
-
117
-
118
-
119
-
120
-
121
-
122
-
123
-
124
-
125
-
126
-
127
-
128
-
129
-
130
-
131
-
132
-
133
-
134
-
135
-
136
-
137
-
138
-
139
-
140
-
141
-
142
-
143
-
144
-
145
-
146
-
147
-
148
-
149
-
150
-
151
-
 152
152 -
 153
153 -
 154
154 -
 155
155 -
 156
156 -
 157
157 -
 158
158 -
 159
159 -
 160
160 -
 161
161 -
 162
162 -
163
-
164
-
165
-
166
-
167
-
168
-
169
-
170
-
171
-
172
-
173
-
174
-
175
-
176
-
177
-
178
-
179
-
180
-
181
-
182
-
183
-
184
-
185
-
186
-
187
-
188
-
189
-
190
-
191
-
192
-
193
-
194
-
195
-
196
-
197
-
198
-
199
-
200
-
201
-
202
-
203
-
204
-
205
-
206
-
207
-
208
-
209
-
210
-
211
-
212
-
213
-
214
-
215
-
216
-
217
-
218
-
219
-
220
-
221
-
222
-
223
-
224
-
225
-
226
-
227
-
228
-
229
-
230
-
231
-
232
-
233
-
234
-
235
-
236
-
237
-
238
-
239
-
240
-
241
-
242
-
243
-
244
-
245
-
246
-
247
-
248
-
249
-
250
-
251
-
252
-
253
-
254
-
255
-
256
-
257
-
258
-
259
-
260
-
261
-
262
-
263
-
264
-
265
-
266
-
267
-
268
-
269
-
270
-
271
-
272
-
273
-
274
-
275
-
276
-
277
-
278
-
279
-
280
-
281
-
282
-
283
-
284
-
285
-
286
-
287
-
288
-
289
-
290
-
291
-
292
-
293
-
294
-
295
-
296
-
297
-
298
-
299
-
300
-
301
-
302
-
303
-
304
-
305
-
306
-
307
-
308
-
309
-
310
-
311
-
312
-
313
-
314
-
315
-
316
-
317
-
318
-
319
-
320
-
321
-
322
-
323
-
324
-
325
-
326
-
327
-
328
-
329
-
330
-
331
-
332
-
333
-
334
-
335
-
336
-
337
-
338
-
339
-
340
-
341
-
342
-
343
-
344
-
345
-
346
-
347
-
348
-
349
-
350
-
351
-
352
-
353
-
354
-
355
-
356
-
357
-
358
-
359
-
360
-
361
-
362
 |
 |
