Samsung SGH-T959V User Manual (user Manual) (ver.f4) (English) - Page 105
Account Settings, Default account
 |
View all Samsung SGH-T959V manuals
Add to My Manuals
Save this manual to your list of manuals |
Page 105 highlights
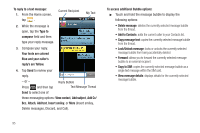
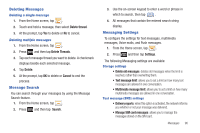
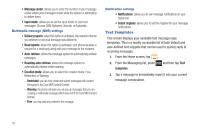
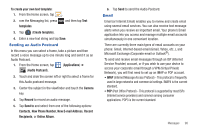
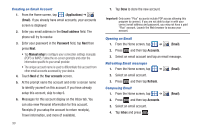
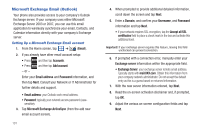
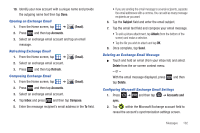
5. Tap Compose. 6. Enter the message recipient's email address in the To field. • If you are sending the email message to several recipients, separate the email addresses with a comma. You can add as many message recipients as you want. 7. Tap the Subject field and enter the email subject. 8. Tap the email text field and compose your email message. • To add a picture attachment, tap Attach (from the bottom of the screen) and make a selection. 9. Once complete, tap Send. Configuring Email Settings 1. From the Home screen, tap ➔ (Email). 2. Press and then tap Accounts. 3. Select an account. 4. From the email list screen, press ➔ Account Settings. and then tap More 5. Alter any of the following settings: • Account name: displays your uniquely created account display name. • Your name: displays the name used in the From field of your outgoing email messages. • Email check frequency: Tap to adjust the time interval used by your device to check your email account for new email messages. • Default account: Assign this account as the default email account used for outgoing messages. • Email notifications: Activates the email notification icon to appear within the Notifications area of the status bar when a new Internet mail (Gmail, etc..) is received. • Select ringtone: Plays a selected ringtone when a new email message is received. • Vibrate: Activates a vibration when a new email message is received. • Incoming settings: Lets you specify incoming email settings, such as username, password, and IMAP server. • Outgoing settings: Lets you specify outgoing settings, such as username, password, and SMTP server. • Recent messages: Lets you assign the number of recent messages that are displayed on-screen. Choose from: 25 - Total. • Forward with files: Lets you include attachments when forwarding an email. • Add signature: Lets you attach a customized signature to the bottom of all outgoing emails. • Signature: Lets you create an email signature for your outgoing Gmail email messages. Messages 100
-
 1
1 -
2
-
3
-
4
-
5
-
6
-
7
-
8
-
9
-
10
-
11
-
12
-
13
-
14
-
15
-
16
-
17
-
18
-
19
-
20
-
21
-
22
-
23
-
24
-
25
-
26
-
27
-
28
-
29
-
30
-
31
-
32
-
33
-
34
-
35
-
36
-
37
-
38
-
39
-
40
-
41
-
42
-
43
-
44
-
45
-
46
-
47
-
48
-
49
-
50
-
51
-
52
-
53
-
54
-
55
-
56
-
57
-
58
-
59
-
60
-
61
-
62
-
63
-
64
-
65
-
66
-
67
-
68
-
69
-
70
-
71
-
72
-
73
-
74
-
75
-
76
-
77
-
78
-
79
-
80
-
81
-
82
-
83
-
84
-
85
-
86
-
87
-
88
-
89
-
90
-
91
-
92
-
93
-
94
-
95
-
96
-
97
-
98
-
99
-
 100
100 -
 101
101 -
 102
102 -
 103
103 -
 104
104 -
 105
105 -
 106
106 -
 107
107 -
 108
108 -
 109
109 -
 110
110 -
111
-
112
-
113
-
114
-
115
-
116
-
117
-
118
-
119
-
120
-
121
-
122
-
123
-
124
-
125
-
126
-
127
-
128
-
129
-
130
-
131
-
132
-
133
-
134
-
135
-
136
-
137
-
138
-
139
-
140
-
141
-
142
-
143
-
144
-
145
-
146
-
147
-
148
-
149
-
150
-
151
-
152
-
153
-
154
-
155
-
156
-
157
-
158
-
159
-
160
-
161
-
162
-
163
-
164
-
165
-
166
-
167
-
168
-
169
-
170
-
171
-
172
-
173
-
174
-
175
-
176
-
177
-
178
-
179
-
180
-
181
-
182
-
183
-
184
-
185
-
186
-
187
-
188
-
189
-
190
-
191
-
192
-
193
-
194
-
195
-
196
-
197
-
198
-
199
-
200
-
201
-
202
-
203
-
204
-
205
-
206
-
207
-
208
-
209
-
210
-
211
-
212
-
213
-
214
-
215
-
216
-
217
-
218
-
219
-
220
-
221
-
222
-
223
-
224
-
225
-
226
-
227
-
228
-
229
-
230
-
231
-
232
-
233
-
234
-
235
-
236
-
237
-
238
-
239
-
240
-
241
-
242
-
243
-
244
-
245
-
246
 |
 |
