Samsung SGH-T959V User Manual (user Manual) (ver.f4) (English) - Page 167
Settings, Applications, USB settings, Media player, Windows Media Player, Mass storage - kies
 |
View all Samsung SGH-T959V manuals
Add to My Manuals
Save this manual to your list of manuals |
Page 167 highlights
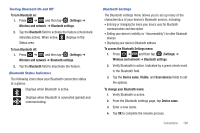
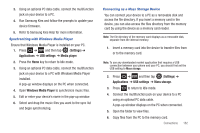
3. Using an optional PC data cable, connect the multifunction jack on your device to a PC. 4. Run Samsung Kies and follow the prompts to update your device firmware. 5. Refer to Samsung Kies Help for more information. Synchronizing with Windows Media Player Ensure that Windows Media Player is installed on your PC. 1. Press ➔ and then tap (Settings) ➔ Applications ➔ USB settings ➔ Media player. 2. Press the Home key to return to Idle mode. 3. Using an optional PC data cable, connect the multifunction jack on your device to a PC with Windows Media Player installed. A pop-up window displays on the PC when connected. 4. Open Windows Media Player to synchronize music files. 5. Edit or enter your device's name in the pop-up window. 6. Select and drag the music files you want to the sync list and begin synchronizing. Connecting as a Mass Storage Device You can connect your device to a PC as a removable disk and access the file directory. If you insert a memory card in the device, you can also access the files directory from the memory card by using the device as a memory card reader. Note: The file directory of the memory card displays as a removable disk, separate from the internal memory. 1. Insert a memory card into the device to transfer files from or to the memory card. Note: To use any downloaded market application that requires a USB connection between your phone and your PC, you should first set the USB setting to Mass storage. 2. Press ➔ and then tap (Settings) ➔ Applications ➔ USB settings ➔ Mass storage. 3. Press to return to Idle mode. 4. Connect the multifunction jack on your device to a PC using an optional PC data cable. A pop-up window displays on the PC when connected. 5. Open the folder to view files. 6. Copy files from the PC to the memory card. Connections 162
-
 1
1 -
2
-
3
-
4
-
5
-
6
-
7
-
8
-
9
-
10
-
11
-
12
-
13
-
14
-
15
-
16
-
17
-
18
-
19
-
20
-
21
-
22
-
23
-
24
-
25
-
26
-
27
-
28
-
29
-
30
-
31
-
32
-
33
-
34
-
35
-
36
-
37
-
38
-
39
-
40
-
41
-
42
-
43
-
44
-
45
-
46
-
47
-
48
-
49
-
50
-
51
-
52
-
53
-
54
-
55
-
56
-
57
-
58
-
59
-
60
-
61
-
62
-
63
-
64
-
65
-
66
-
67
-
68
-
69
-
70
-
71
-
72
-
73
-
74
-
75
-
76
-
77
-
78
-
79
-
80
-
81
-
82
-
83
-
84
-
85
-
86
-
87
-
88
-
89
-
90
-
91
-
92
-
93
-
94
-
95
-
96
-
97
-
98
-
99
-
100
-
101
-
102
-
103
-
104
-
105
-
106
-
107
-
108
-
109
-
110
-
111
-
112
-
113
-
114
-
115
-
116
-
117
-
118
-
119
-
120
-
121
-
122
-
123
-
124
-
125
-
126
-
127
-
128
-
129
-
130
-
131
-
132
-
133
-
134
-
135
-
136
-
137
-
138
-
139
-
140
-
141
-
142
-
143
-
144
-
145
-
146
-
147
-
148
-
149
-
150
-
151
-
152
-
153
-
154
-
155
-
156
-
157
-
158
-
159
-
160
-
161
-
 162
162 -
 163
163 -
 164
164 -
 165
165 -
 166
166 -
 167
167 -
 168
168 -
 169
169 -
 170
170 -
 171
171 -
 172
172 -
173
-
174
-
175
-
176
-
177
-
178
-
179
-
180
-
181
-
182
-
183
-
184
-
185
-
186
-
187
-
188
-
189
-
190
-
191
-
192
-
193
-
194
-
195
-
196
-
197
-
198
-
199
-
200
-
201
-
202
-
203
-
204
-
205
-
206
-
207
-
208
-
209
-
210
-
211
-
212
-
213
-
214
-
215
-
216
-
217
-
218
-
219
-
220
-
221
-
222
-
223
-
224
-
225
-
226
-
227
-
228
-
229
-
230
-
231
-
232
-
233
-
234
-
235
-
236
-
237
-
238
-
239
-
240
-
241
-
242
-
243
-
244
-
245
-
246
 |
 |