Samsung SGH-T959V User Manual (user Manual) (ver.f4) (English) - Page 133
Calendar, Synchronizing Contacts
 |
View all Samsung SGH-T959V manuals
Add to My Manuals
Save this manual to your list of manuals |
Page 133 highlights
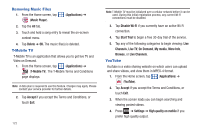
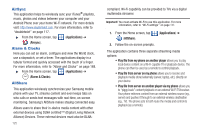
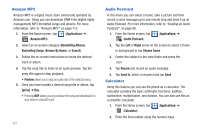
3. Enter the operation for your calculation by touching the Plus, Minus, Multiplication, or Division key. 4. Enter the next number. 5. To view the result, tap the = (equals) key. 6. Repeat steps 1 to 4 as many times as required. Note: Place the screen in Landscape mode (sliding screen open) to reveal additional scientific functions. Calendar With the Calendar feature, you can consult the calendar by day, week, or month, create events, and set an alarm to act as a reminder. Google Calendar is built into the phone and synchronizes both new and existing entries between your phone and your online Google account. Important!: You must have previously added an account (Facebook, Microsoft Exchange ActiveSync, or Google) prior to using the Calendar. 1. From the Home screen, tap (Applications) ➔ (Calendar). The Calendar displays four tabs: • Month: displays the Month view. • Week: displays the Week view. • Day: displays the Day view. • List: allows you to search for events for the selected Month, Week, or Day. Or you can look for events for a future date. 2. Press and select one of the following options: • Search: allows you to search within current events. • Create: creates a new Event. • Go to: displays a specific date. • Today: displays the date highlighted with a Blue box highlighting the date. • Delete: allows you to delete All events, All events before today, or an individual event. • Settings: displays a list of configurable settings. For more information, refer to "Synchronizing Contacts" on page 86. To manually sync calendar events: 1. Press ➔ and then tap sync. ➔ Accounts and 2. Locate the email account containing the events you wish to synchronize. 3. Tap within the adjacent account field to reveal the account's synchronization settings screen. Applications and Development 128
-
 1
1 -
2
-
3
-
4
-
5
-
6
-
7
-
8
-
9
-
10
-
11
-
12
-
13
-
14
-
15
-
16
-
17
-
18
-
19
-
20
-
21
-
22
-
23
-
24
-
25
-
26
-
27
-
28
-
29
-
30
-
31
-
32
-
33
-
34
-
35
-
36
-
37
-
38
-
39
-
40
-
41
-
42
-
43
-
44
-
45
-
46
-
47
-
48
-
49
-
50
-
51
-
52
-
53
-
54
-
55
-
56
-
57
-
58
-
59
-
60
-
61
-
62
-
63
-
64
-
65
-
66
-
67
-
68
-
69
-
70
-
71
-
72
-
73
-
74
-
75
-
76
-
77
-
78
-
79
-
80
-
81
-
82
-
83
-
84
-
85
-
86
-
87
-
88
-
89
-
90
-
91
-
92
-
93
-
94
-
95
-
96
-
97
-
98
-
99
-
100
-
101
-
102
-
103
-
104
-
105
-
106
-
107
-
108
-
109
-
110
-
111
-
112
-
113
-
114
-
115
-
116
-
117
-
118
-
119
-
120
-
121
-
122
-
123
-
124
-
125
-
126
-
127
-
 128
128 -
 129
129 -
 130
130 -
 131
131 -
 132
132 -
 133
133 -
 134
134 -
 135
135 -
 136
136 -
 137
137 -
 138
138 -
139
-
140
-
141
-
142
-
143
-
144
-
145
-
146
-
147
-
148
-
149
-
150
-
151
-
152
-
153
-
154
-
155
-
156
-
157
-
158
-
159
-
160
-
161
-
162
-
163
-
164
-
165
-
166
-
167
-
168
-
169
-
170
-
171
-
172
-
173
-
174
-
175
-
176
-
177
-
178
-
179
-
180
-
181
-
182
-
183
-
184
-
185
-
186
-
187
-
188
-
189
-
190
-
191
-
192
-
193
-
194
-
195
-
196
-
197
-
198
-
199
-
200
-
201
-
202
-
203
-
204
-
205
-
206
-
207
-
208
-
209
-
210
-
211
-
212
-
213
-
214
-
215
-
216
-
217
-
218
-
219
-
220
-
221
-
222
-
223
-
224
-
225
-
226
-
227
-
228
-
229
-
230
-
231
-
232
-
233
-
234
-
235
-
236
-
237
-
238
-
239
-
240
-
241
-
242
-
243
-
244
-
245
-
246
 |
 |
