Samsung SGH-T959V User Manual (user Manual) (ver.f4) (English) - Page 197
USB Settings, Accounts and Synchronization - firmware update
 |
View all Samsung SGH-T959V manuals
Add to My Manuals
Save this manual to your list of manuals |
Page 197 highlights
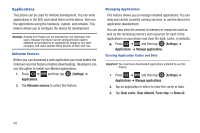
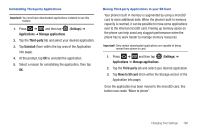
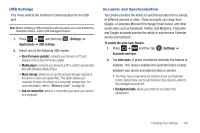
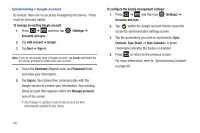
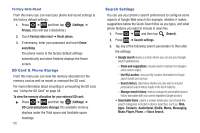
USB Settings This menu selects the method of communication for the USB port. Note: Before initiating a USB connection with the phone you must disable the Bluetooth feature, and/or USB debugging feature. 1. Press ➔ and then tap Applications ➔ USB settings. (Settings) ➔ 2. Select one of the following USB modes: • Kies (Firmware update): connects your phone to a PC and prepares it for a direct firmware update. • Media player: connects your phone to a PC in order to synchronize files with Windows Media Player. • Mass storage: allows you to use the onboard storage capacity of the phone to store and upload files. This option allows your computer to detect the phone as a removable storage drive. For more information, refer to "Memory Card" on page 48. • Ask on connection: asks for a connection type when you connect to a computer. Accounts and Synchronization Your phone provides the ability to synchronize data from a variety of different sources or sites. These accounts can range from Google, a Corporate Microsoft Exchange Email Server, and other social sites such as Facebook, Twitter, and MySpace. Corporate and Google accounts provide the ability to synchronize Calendar events and Contacts. To enable the auto-sync feature: 1. Press ➔ and then tap Accounts and sync. (Settings) ➔ 2. Tap Auto-sync. A green checkmark indicates the feature is enabled. This feature enables the synchronization of data between your phone and external sites or servers. • The three main components are Contacts Email, and Calendar Events. Before these can be synchronized, they must be added to the managed accounts list. • Background data: allows your phone to use data in the background. Changing Your Settings 192
-
 1
1 -
2
-
3
-
4
-
5
-
6
-
7
-
8
-
9
-
10
-
11
-
12
-
13
-
14
-
15
-
16
-
17
-
18
-
19
-
20
-
21
-
22
-
23
-
24
-
25
-
26
-
27
-
28
-
29
-
30
-
31
-
32
-
33
-
34
-
35
-
36
-
37
-
38
-
39
-
40
-
41
-
42
-
43
-
44
-
45
-
46
-
47
-
48
-
49
-
50
-
51
-
52
-
53
-
54
-
55
-
56
-
57
-
58
-
59
-
60
-
61
-
62
-
63
-
64
-
65
-
66
-
67
-
68
-
69
-
70
-
71
-
72
-
73
-
74
-
75
-
76
-
77
-
78
-
79
-
80
-
81
-
82
-
83
-
84
-
85
-
86
-
87
-
88
-
89
-
90
-
91
-
92
-
93
-
94
-
95
-
96
-
97
-
98
-
99
-
100
-
101
-
102
-
103
-
104
-
105
-
106
-
107
-
108
-
109
-
110
-
111
-
112
-
113
-
114
-
115
-
116
-
117
-
118
-
119
-
120
-
121
-
122
-
123
-
124
-
125
-
126
-
127
-
128
-
129
-
130
-
131
-
132
-
133
-
134
-
135
-
136
-
137
-
138
-
139
-
140
-
141
-
142
-
143
-
144
-
145
-
146
-
147
-
148
-
149
-
150
-
151
-
152
-
153
-
154
-
155
-
156
-
157
-
158
-
159
-
160
-
161
-
162
-
163
-
164
-
165
-
166
-
167
-
168
-
169
-
170
-
171
-
172
-
173
-
174
-
175
-
176
-
177
-
178
-
179
-
180
-
181
-
182
-
183
-
184
-
185
-
186
-
187
-
188
-
189
-
190
-
191
-
 192
192 -
 193
193 -
 194
194 -
 195
195 -
 196
196 -
 197
197 -
 198
198 -
 199
199 -
 200
200 -
 201
201 -
 202
202 -
203
-
204
-
205
-
206
-
207
-
208
-
209
-
210
-
211
-
212
-
213
-
214
-
215
-
216
-
217
-
218
-
219
-
220
-
221
-
222
-
223
-
224
-
225
-
226
-
227
-
228
-
229
-
230
-
231
-
232
-
233
-
234
-
235
-
236
-
237
-
238
-
239
-
240
-
241
-
242
-
243
-
244
-
245
-
246
 |
 |