Samsung SGH-T959V User Manual (user Manual) (ver.f4) (English) - Page 106
Microsoft Exchange Email (Outlook), Accept all SSL
 |
View all Samsung SGH-T959V manuals
Add to My Manuals
Save this manual to your list of manuals |
Page 106 highlights
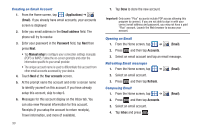
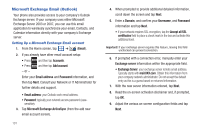
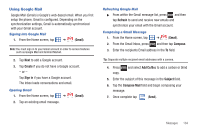
Microsoft Exchange Email (Outlook) Your phone also provides access to your company's Outlook Exchange server. If your company uses either Microsoft Exchange Server 2003 or 2007, you can use this email application to wirelessly synchronize your email, Contacts, and Calendar information directly with your company's Exchange server. Setting Up a Microsoft Exchange Email account 1. From the Home screen, tap ➔ (Email). 2. If you already have other email account setup: • Press • Press - or - and then tap Accounts. and then tap Add account. Enter your Email address and Password information, and then tap Next. Consult your Network or IT Administrator for further details and support. • Email address: your Outlook work email address. • Password: typically your network access password (case- sensitive). 3. Tap Microsoft Exchange ActiveSync (from the add new email account screen). 101 4. When prompted to provide additional detailed information, scroll down the screen and tap Next. 5. Enter a Domain, and confirm your Username, and Password information and tap Next. • If your network requires SSL encryption, tap the Accept all SSL certificates field to place a check mark in the box and activate this additional level. Important!: If your exchange server requires this feature, leaving this field unchecked can prevent connection. 6. If prompted with a connection error, manually enter your Exchange server information within the appropriate field. • Exchange Server: your exchange server remote email address. Typically starts with mail.XXX.com. Obtain this information from your company network administrator. Do not accept the default entry as this is a guess based on returned information. 7. With the new server information entered, tap Next. 8. Read the on-screen activation disclaimer and, if prompted, tap OK. 9. Adjust the various on-screen configuration fields and tap Next.
-
 1
1 -
2
-
3
-
4
-
5
-
6
-
7
-
8
-
9
-
10
-
11
-
12
-
13
-
14
-
15
-
16
-
17
-
18
-
19
-
20
-
21
-
22
-
23
-
24
-
25
-
26
-
27
-
28
-
29
-
30
-
31
-
32
-
33
-
34
-
35
-
36
-
37
-
38
-
39
-
40
-
41
-
42
-
43
-
44
-
45
-
46
-
47
-
48
-
49
-
50
-
51
-
52
-
53
-
54
-
55
-
56
-
57
-
58
-
59
-
60
-
61
-
62
-
63
-
64
-
65
-
66
-
67
-
68
-
69
-
70
-
71
-
72
-
73
-
74
-
75
-
76
-
77
-
78
-
79
-
80
-
81
-
82
-
83
-
84
-
85
-
86
-
87
-
88
-
89
-
90
-
91
-
92
-
93
-
94
-
95
-
96
-
97
-
98
-
99
-
100
-
 101
101 -
 102
102 -
 103
103 -
 104
104 -
 105
105 -
 106
106 -
 107
107 -
 108
108 -
 109
109 -
 110
110 -
 111
111 -
112
-
113
-
114
-
115
-
116
-
117
-
118
-
119
-
120
-
121
-
122
-
123
-
124
-
125
-
126
-
127
-
128
-
129
-
130
-
131
-
132
-
133
-
134
-
135
-
136
-
137
-
138
-
139
-
140
-
141
-
142
-
143
-
144
-
145
-
146
-
147
-
148
-
149
-
150
-
151
-
152
-
153
-
154
-
155
-
156
-
157
-
158
-
159
-
160
-
161
-
162
-
163
-
164
-
165
-
166
-
167
-
168
-
169
-
170
-
171
-
172
-
173
-
174
-
175
-
176
-
177
-
178
-
179
-
180
-
181
-
182
-
183
-
184
-
185
-
186
-
187
-
188
-
189
-
190
-
191
-
192
-
193
-
194
-
195
-
196
-
197
-
198
-
199
-
200
-
201
-
202
-
203
-
204
-
205
-
206
-
207
-
208
-
209
-
210
-
211
-
212
-
213
-
214
-
215
-
216
-
217
-
218
-
219
-
220
-
221
-
222
-
223
-
224
-
225
-
226
-
227
-
228
-
229
-
230
-
231
-
232
-
233
-
234
-
235
-
236
-
237
-
238
-
239
-
240
-
241
-
242
-
243
-
244
-
245
-
246
 |
 |