HP 9500hdn HP Color LaserJet 9500n/9500hdn - User Reference Guide - Page 325
Diagnostics menu, B Control panel menus, You can use this submenu to isolate parts
 |
UPC - 808736429689
View all HP 9500hdn manuals
Add to My Manuals
Save this manual to your list of manuals |
Page 325 highlights
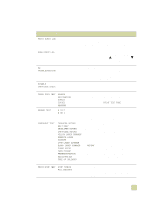
Diagnostics menu You can use this submenu to isolate parts, and to troubleshoot jam and print-quality issues. Item Values Explanation PRINT EVENT LOG Use this item to generate a localized LIFO (last in, first out) list of the 50 most recent entries in the error log. The printed event log shows error number, page count, error code, and description or personality. SHOW EVENT LOG Use this item to scroll through the contents of the event log at the control panel, and to show the 50 most recent events. Use (UP button) and (DOWN button) to scroll through the event-log contents. PQ TROUBLESHOOTING Use this item to print eight pages to help you identify print-quality problems. The eight pages consist of two pages of instructions, one page for each color (cyan, magenta, yellow, and black), one demo page, and one configuration page. DISABLE CARTRIDGE CHECK Use this item to isolate defective cartridges by removing specific cartridges, then printing internal pages or a print job using the remaining cartridges PAPER PATH TEST SOURCE DESTINATION DUPLEX COPIES SENSORS Use this item to generate a test page that is useful for troubleshooting the printer's paper-handling features. Define the test by selecting one of the options, then select PRINT TEST PAGE to perform the test. SENSOR TEST A TO P 0 OR 1 Use this item to manually test paper-path sensors and switches for correct operation. The sensor test covers five areas: paper path, trays, doors, environment, and toner density. COMPONENT TEST TRANSFER MOTORS BELT ONLY DEVELOPER MOTORS CARTRIDGE MOTORS YELLOW LASER SCANNER MAGENTA LASER SCANNER CYAN LASER SCANNER BLACK LASER SCANNER FUSER MOTOR TRAY PICKUP PREREGISTRATION REGISTRATION FACE UP SOLENOID Component tests exercise individual parts independently to help you isolate noise, leaks, or other issues. The results of the test depend on your observation of the printer during the test to determine the source of the problem. When you select one of the components for testing, the printer goes offline and runs the test based on the REPEAT value. Depending on the component that you select, you might be prompted to remove parts from the printer. If you do not remove the correct parts or if you press the CANCEL JOB button, the display returns to the Diagnostics menu. When the test is complete, the control panel also returns to the Diagnostics menu. PRINT/STOP TEST STOP TIME=0 MILLISECONDS Use this item to isolate faults by stopping the printer in the middle of a print cycle to observe at what point in the process the image degrades. The range is 0 to 60,000 milliseconds, in increments of 10. B Control panel menus 323
-
 1
1 -
2
-
3
-
4
-
5
-
6
-
7
-
8
-
9
-
10
-
11
-
12
-
13
-
14
-
15
-
16
-
17
-
18
-
19
-
20
-
21
-
22
-
23
-
24
-
25
-
26
-
27
-
28
-
29
-
30
-
31
-
32
-
33
-
34
-
35
-
36
-
37
-
38
-
39
-
40
-
41
-
42
-
43
-
44
-
45
-
46
-
47
-
48
-
49
-
50
-
51
-
52
-
53
-
54
-
55
-
56
-
57
-
58
-
59
-
60
-
61
-
62
-
63
-
64
-
65
-
66
-
67
-
68
-
69
-
70
-
71
-
72
-
73
-
74
-
75
-
76
-
77
-
78
-
79
-
80
-
81
-
82
-
83
-
84
-
85
-
86
-
87
-
88
-
89
-
90
-
91
-
92
-
93
-
94
-
95
-
96
-
97
-
98
-
99
-
100
-
101
-
102
-
103
-
104
-
105
-
106
-
107
-
108
-
109
-
110
-
111
-
112
-
113
-
114
-
115
-
116
-
117
-
118
-
119
-
120
-
121
-
122
-
123
-
124
-
125
-
126
-
127
-
128
-
129
-
130
-
131
-
132
-
133
-
134
-
135
-
136
-
137
-
138
-
139
-
140
-
141
-
142
-
143
-
144
-
145
-
146
-
147
-
148
-
149
-
150
-
151
-
152
-
153
-
154
-
155
-
156
-
157
-
158
-
159
-
160
-
161
-
162
-
163
-
164
-
165
-
166
-
167
-
168
-
169
-
170
-
171
-
172
-
173
-
174
-
175
-
176
-
177
-
178
-
179
-
180
-
181
-
182
-
183
-
184
-
185
-
186
-
187
-
188
-
189
-
190
-
191
-
192
-
193
-
194
-
195
-
196
-
197
-
198
-
199
-
200
-
201
-
202
-
203
-
204
-
205
-
206
-
207
-
208
-
209
-
210
-
211
-
212
-
213
-
214
-
215
-
216
-
217
-
218
-
219
-
220
-
221
-
222
-
223
-
224
-
225
-
226
-
227
-
228
-
229
-
230
-
231
-
232
-
233
-
234
-
235
-
236
-
237
-
238
-
239
-
240
-
241
-
242
-
243
-
244
-
245
-
246
-
247
-
248
-
249
-
250
-
251
-
252
-
253
-
254
-
255
-
256
-
257
-
258
-
259
-
260
-
261
-
262
-
263
-
264
-
265
-
266
-
267
-
268
-
269
-
270
-
271
-
272
-
273
-
274
-
275
-
276
-
277
-
278
-
279
-
280
-
281
-
282
-
283
-
284
-
285
-
286
-
287
-
288
-
289
-
290
-
291
-
292
-
293
-
294
-
295
-
296
-
297
-
298
-
299
-
300
-
301
-
302
-
303
-
304
-
305
-
306
-
307
-
308
-
309
-
310
-
311
-
312
-
313
-
314
-
315
-
316
-
317
-
318
-
319
-
 320
320 -
 321
321 -
 322
322 -
 323
323 -
 324
324 -
 325
325 -
 326
326 -
 327
327 -
 328
328 -
 329
329 -
 330
330 -
331
-
332
-
333
-
334
-
335
-
336
-
337
-
338
-
339
-
340
-
341
-
342
-
343
-
344
-
345
-
346
-
347
-
348
-
349
-
350
 |
 |
