Ricoh 3035 General Settings Guide - Page 110
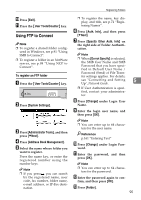
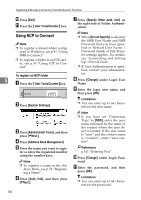
Using NCP to Connect
 |
View all Ricoh 3035 manuals
Add to My Manuals
Save this manual to your list of manuals |
Page 110 highlights
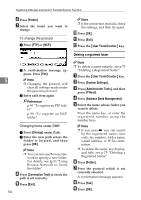
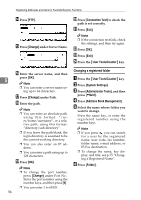
Registering Addresses and Users for Facsimile/Scanner Functions J Press [Exit]. K Press the {User Tools/Counter} key. Using NCP to Connect Note ❒ To register a shared folder configured in Windows, see p.91 "Using SMB to Connect" ❒ To register a folder in an FTP server, see p.95 "Using FTP to Connect" To register an NCP folder 5 A Press the {User Tools/Counter}key. B Press [System Settings]. C Press [Administrator Tools], and then press [TNext.]. D Press [Address Book Management]. E Press the name you want to regis- ter or enter the registered number using the number keys. Note ❒ To register a name in the Ad- dress Book, see p.74 "Registering a Name". F Press [Auth. Info], and then press [TNext.]. 98 G Press [Specify Other Auth. Info] on the right side of Folder Authentication. Note ❒ When [Do not Specify] is selected, the SMB User Name and SMB Password that you have specified in Default User Name / Password (Send) of File Transfer settings applies. For details, see "Connecting and Setting Up", Network Guide. ❒ If User Authentication is specified, contact your administrator. H Press [Change] under Login User Name. I Enter the login user name, and then press [OK]. Limitation ❒ You can enter up to 64 charac- ters for the user name. Note ❒ If you have set "Connection Type" to [NDS], enter the user name followed by the name of the context where the user object is located. If the user name is "user" and the context name is "context", enter "user.context" Reference p.161 "Entering Text" J Press [Change] under Login Pass- word. K Enter the password, and then press [OK]. Limitation ❒ You can enter up to 64 charac- ters for the password.
-
 1
1 -
2
-
3
-
4
-
5
-
6
-
7
-
8
-
9
-
10
-
11
-
12
-
13
-
14
-
15
-
16
-
17
-
18
-
19
-
20
-
21
-
22
-
23
-
24
-
25
-
26
-
27
-
28
-
29
-
30
-
31
-
32
-
33
-
34
-
35
-
36
-
37
-
38
-
39
-
40
-
41
-
42
-
43
-
44
-
45
-
46
-
47
-
48
-
49
-
50
-
51
-
52
-
53
-
54
-
55
-
56
-
57
-
58
-
59
-
60
-
61
-
62
-
63
-
64
-
65
-
66
-
67
-
68
-
69
-
70
-
71
-
72
-
73
-
74
-
75
-
76
-
77
-
78
-
79
-
80
-
81
-
82
-
83
-
84
-
85
-
86
-
87
-
88
-
89
-
90
-
91
-
92
-
93
-
94
-
95
-
96
-
97
-
98
-
99
-
100
-
101
-
102
-
103
-
104
-
 105
105 -
 106
106 -
 107
107 -
 108
108 -
 109
109 -
 110
110 -
 111
111 -
 112
112 -
 113
113 -
 114
114 -
 115
115 -
116
-
117
-
118
-
119
-
120
-
121
-
122
-
123
-
124
-
125
-
126
-
127
-
128
-
129
-
130
-
131
-
132
-
133
-
134
-
135
-
136
-
137
-
138
-
139
-
140
-
141
-
142
-
143
-
144
-
145
-
146
-
147
-
148
-
149
-
150
-
151
-
152
-
153
-
154
-
155
-
156
-
157
-
158
-
159
-
160
-
161
-
162
-
163
-
164
-
165
-
166
-
167
-
168
-
169
-
170
-
171
-
172
-
173
-
174
-
175
-
176
-
177
-
178
-
179
-
180
-
181
-
182
-
183
-
184
-
185
-
186
-
187
-
188
-
189
-
190
-
191
-
192
-
193
-
194
-
195
-
196
 |
 |