Ricoh 3035 General Settings Guide - Page 159
Staple unit for saddle stitch function
 |
View all Ricoh 3035 manuals
Add to My Manuals
Save this manual to your list of manuals |
Page 159 highlights
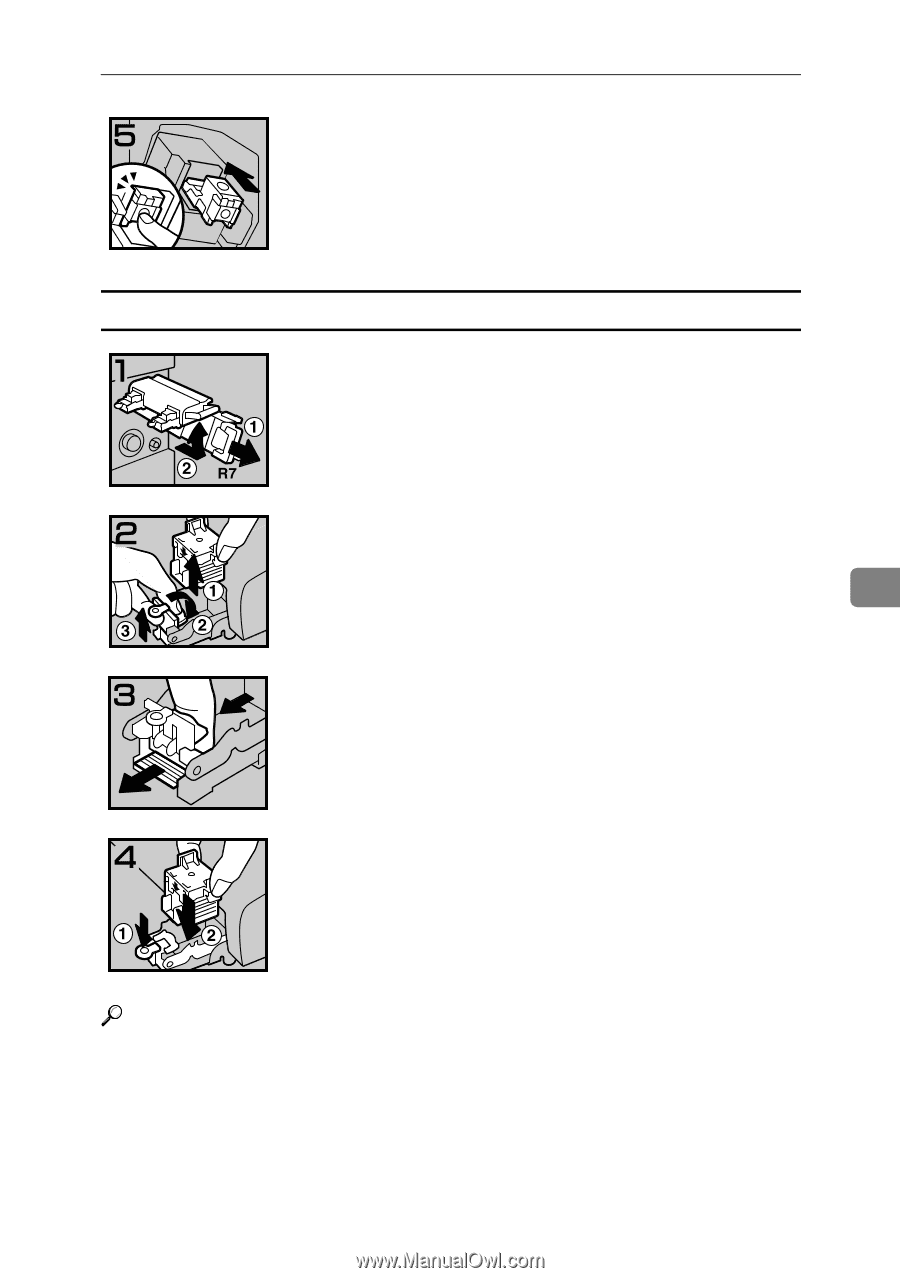
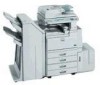
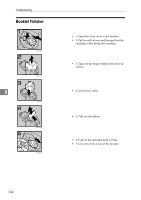
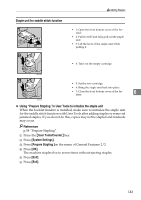
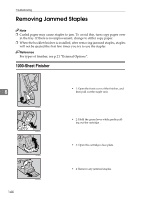
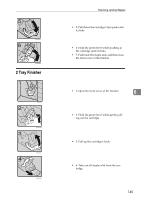
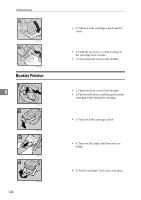
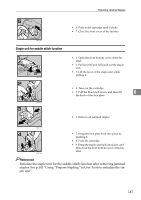
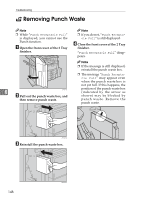
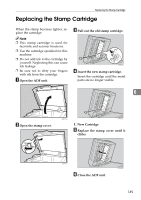
Removing Jammed Staples ZBQP140E Staple unit for saddle stitch function ZBQP150E • 6: Push in the cartridge until it clicks. • 7: Close the front cover of the finisher. • 1: Open the front bottom cover of the finisher. • 2: Pull lever R7 and fully pull out the staple unit. • 3: Lift the lever of the staple unit while pulling it. ZBQP160E • 4: Take out the cartridge. • 5: Pull the blue knob down, and then lift 6 the knob of the face plate. • 6: Remove all jammed staples. ZBQP170E ZBQP180E • 7: Bring the face plate back into place by pushing it. • 8: Push the cartridge. • 9: Bring the staple unit back into place, and then close the front bottom cover of the finisher. Reference Initialize the staple unit for the saddle stitch function after removing jammed staples. See p.143 "Using "Prepare Stapling "in User Tools to initialize the staple unit". 147
-
 1
1 -
2
-
3
-
4
-
5
-
6
-
7
-
8
-
9
-
10
-
11
-
12
-
13
-
14
-
15
-
16
-
17
-
18
-
19
-
20
-
21
-
22
-
23
-
24
-
25
-
26
-
27
-
28
-
29
-
30
-
31
-
32
-
33
-
34
-
35
-
36
-
37
-
38
-
39
-
40
-
41
-
42
-
43
-
44
-
45
-
46
-
47
-
48
-
49
-
50
-
51
-
52
-
53
-
54
-
55
-
56
-
57
-
58
-
59
-
60
-
61
-
62
-
63
-
64
-
65
-
66
-
67
-
68
-
69
-
70
-
71
-
72
-
73
-
74
-
75
-
76
-
77
-
78
-
79
-
80
-
81
-
82
-
83
-
84
-
85
-
86
-
87
-
88
-
89
-
90
-
91
-
92
-
93
-
94
-
95
-
96
-
97
-
98
-
99
-
100
-
101
-
102
-
103
-
104
-
105
-
106
-
107
-
108
-
109
-
110
-
111
-
112
-
113
-
114
-
115
-
116
-
117
-
118
-
119
-
120
-
121
-
122
-
123
-
124
-
125
-
126
-
127
-
128
-
129
-
130
-
131
-
132
-
133
-
134
-
135
-
136
-
137
-
138
-
139
-
140
-
141
-
142
-
143
-
144
-
145
-
146
-
147
-
148
-
149
-
150
-
151
-
152
-
153
-
 154
154 -
 155
155 -
 156
156 -
 157
157 -
 158
158 -
 159
159 -
 160
160 -
 161
161 -
 162
162 -
 163
163 -
 164
164 -
165
-
166
-
167
-
168
-
169
-
170
-
171
-
172
-
173
-
174
-
175
-
176
-
177
-
178
-
179
-
180
-
181
-
182
-
183
-
184
-
185
-
186
-
187
-
188
-
189
-
190
-
191
-
192
-
193
-
194
-
195
-
196
 |
 |