Ricoh 3035 General Settings Guide - Page 122
Freq., Fax Dest., E-mail, IP-Fax, Receiving Statn., Quick Dial, Speed Dial, Group Dial
 |
View all Ricoh 3035 manuals
Add to My Manuals
Save this manual to your list of manuals |
Page 122 highlights
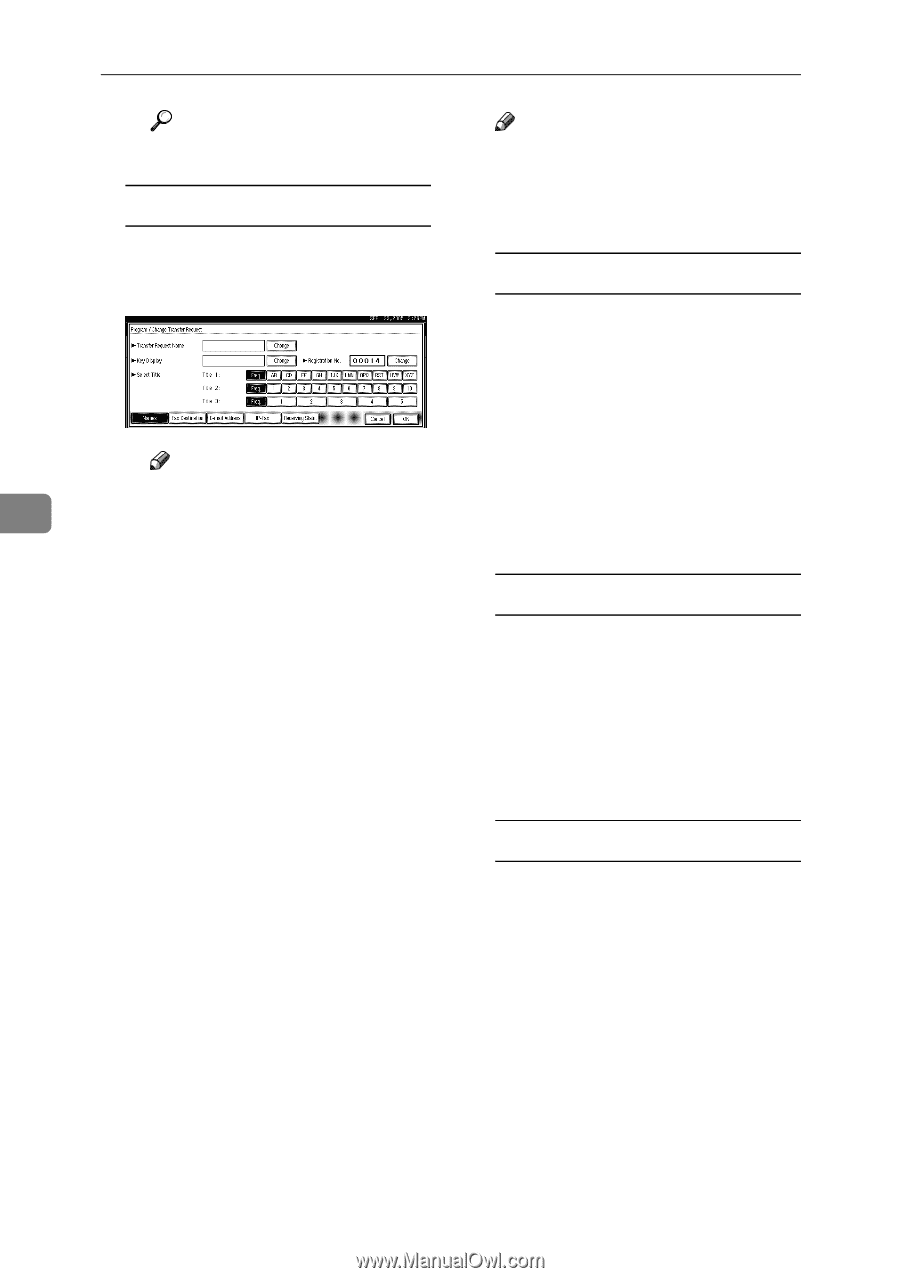
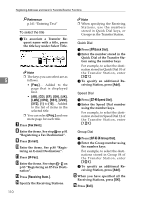
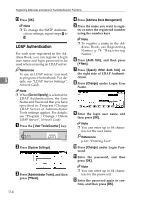
Registering Addresses and Users for Facsimile/Scanner Functions Reference p.161 "Entering Text" To select the title A To associate a Transfer Request name with a title, press the title key under Select Title. Note ❒ The keys you can select are as 5 follows: • [Freq.]... Added to the page that is displayed first. • [AB], [CD], [EF], [GH], [IJK], [LMN], [OPQ], [RST], [UVW], [XYZ], [1] to [10]... Added to the list of items in the selected title. ❒ You can select [Freq.] and one more page for each title. G Press [Fax Dest.]. H Enter the items. See step G on p.81 "Registering a Fax Destination". I Press [E-mail]. J Enter the items. See p.88 "Regis- tering an E-mail Destination". K Press [IP-Fax]. L Enter the items. See steps H - J on p.85 "Registering an IP-Fax Destination". M Press [Receiving Statn.]. N Specify the Receiving Stations. 110 Note ❒ When specifying the Receiving Stations, use the numbers stored in Quick Dial keys, or Groups in the Transfer Station. Quick Dial A Press [qQuick Dial]. B Enter the number stored in the Quick Dial of the Transfer Station using the number keys For example, to select the destination stored in Quick Dial 01 of the Transfer Station, enter {0}{1}. C To specify an additional Receiving Station, press [Add]. Speed Dial A Press [qpSpeed Dial]. B Enter the Speed Dial number using the number keys. For example, to select the destination stored in Speed Dial 12 of the Transfer Station, enter {1}{2}. Group Dial A Press [qppGroup Dial]. B Enter the Group number using the number keys. For example, to select the destinations stored in Group 04 of the Transfer Station, enter {0}{4}. C To specify an additional Receiving Station, press [Add]. O When you have specified all the Receiving Stations, press [OK]. P Press [Exit].
-
 1
1 -
2
-
3
-
4
-
5
-
6
-
7
-
8
-
9
-
10
-
11
-
12
-
13
-
14
-
15
-
16
-
17
-
18
-
19
-
20
-
21
-
22
-
23
-
24
-
25
-
26
-
27
-
28
-
29
-
30
-
31
-
32
-
33
-
34
-
35
-
36
-
37
-
38
-
39
-
40
-
41
-
42
-
43
-
44
-
45
-
46
-
47
-
48
-
49
-
50
-
51
-
52
-
53
-
54
-
55
-
56
-
57
-
58
-
59
-
60
-
61
-
62
-
63
-
64
-
65
-
66
-
67
-
68
-
69
-
70
-
71
-
72
-
73
-
74
-
75
-
76
-
77
-
78
-
79
-
80
-
81
-
82
-
83
-
84
-
85
-
86
-
87
-
88
-
89
-
90
-
91
-
92
-
93
-
94
-
95
-
96
-
97
-
98
-
99
-
100
-
101
-
102
-
103
-
104
-
105
-
106
-
107
-
108
-
109
-
110
-
111
-
112
-
113
-
114
-
115
-
116
-
 117
117 -
 118
118 -
 119
119 -
 120
120 -
 121
121 -
 122
122 -
 123
123 -
 124
124 -
 125
125 -
 126
126 -
 127
127 -
128
-
129
-
130
-
131
-
132
-
133
-
134
-
135
-
136
-
137
-
138
-
139
-
140
-
141
-
142
-
143
-
144
-
145
-
146
-
147
-
148
-
149
-
150
-
151
-
152
-
153
-
154
-
155
-
156
-
157
-
158
-
159
-
160
-
161
-
162
-
163
-
164
-
165
-
166
-
167
-
168
-
169
-
170
-
171
-
172
-
173
-
174
-
175
-
176
-
177
-
178
-
179
-
180
-
181
-
182
-
183
-
184
-
185
-
186
-
187
-
188
-
189
-
190
-
191
-
192
-
193
-
194
-
195
-
196
 |
 |