Ricoh Aficio SP 5200S Fax Guide - Page 325
Copying the machine's Address Book to a computer, For details
 |
View all Ricoh Aficio SP 5200S manuals
Add to My Manuals
Save this manual to your list of manuals |
Page 325 highlights
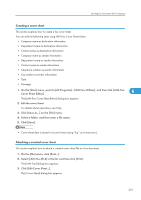
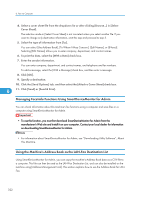
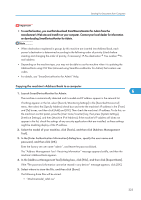
Sending Fax Documents from Computers • To use this function, you must first download SmartDeviceMonitor for Admin from the manufacturer's Web site and install it on your computer. Contact your local dealer for information on downloading SmartDeviceMonitor for Admin. • When destinations registered in groups by this machine are inserted into Address Book, each person's destination is determined according to the following order of priority (check before inserting and changing the order of priority, if necessary): IP-Fax destination Fax number Email address • Depending on the machine type, you may not be able to use the machine when it is updating the Address Book using CSV files (retrieved using SmartDeviceMonitor for Admin) that contain user codes. • For details, see "SmartDeviceMonitor for Admin" Help. Copying the machine's Address Book to a computer 1. Launch SmartDeviceMonitor for Admin. 6 The machine is automatically detected and its model and IP address appear in the network list. If nothing appears in the list, select [Search/Monitoring Settings] in the [Searched Device List] menu, then select the [Specify Address] check box and enter the machine's IP address in the [From] and [To] boxes, and then click [Add] and [OK]. Then check the machine's IP address. To do this, on the machine's control panel, press the [User Tools/Counter] key, then press [System Settings], [Interface Settings], and then [Machine IPv4 Address]. If the machine's IP address still does not appear in the list, check the settings of any security applications that are installed, as these settings might be disabling display of the IP address. 2. Select the model of your machine, click [Tools], and then click [Address Management Tool]. 3. In the [Enter Authentication Information] dialog box, specify the user name and password, and then click [OK]. Enter the factory-set user name "admin", and leave the password blank. The "Address Management Tool - Receiving Information" message appears briefly, and then the machine's Address Book appears. 4. In the [Address Management Tool] dialog box, click [File], and then click [Export Data]. If the "The password information cannot be reused in any device." message appears, click [OK]. 5. Select where to store the file, and then click [Save]. The following three files will be stored: • "Machinemodel_addr.csv" 323
-
 1
1 -
2
-
3
-
4
-
5
-
6
-
7
-
8
-
9
-
10
-
11
-
12
-
13
-
14
-
15
-
16
-
17
-
18
-
19
-
20
-
21
-
22
-
23
-
24
-
25
-
26
-
27
-
28
-
29
-
30
-
31
-
32
-
33
-
34
-
35
-
36
-
37
-
38
-
39
-
40
-
41
-
42
-
43
-
44
-
45
-
46
-
47
-
48
-
49
-
50
-
51
-
52
-
53
-
54
-
55
-
56
-
57
-
58
-
59
-
60
-
61
-
62
-
63
-
64
-
65
-
66
-
67
-
68
-
69
-
70
-
71
-
72
-
73
-
74
-
75
-
76
-
77
-
78
-
79
-
80
-
81
-
82
-
83
-
84
-
85
-
86
-
87
-
88
-
89
-
90
-
91
-
92
-
93
-
94
-
95
-
96
-
97
-
98
-
99
-
100
-
101
-
102
-
103
-
104
-
105
-
106
-
107
-
108
-
109
-
110
-
111
-
112
-
113
-
114
-
115
-
116
-
117
-
118
-
119
-
120
-
121
-
122
-
123
-
124
-
125
-
126
-
127
-
128
-
129
-
130
-
131
-
132
-
133
-
134
-
135
-
136
-
137
-
138
-
139
-
140
-
141
-
142
-
143
-
144
-
145
-
146
-
147
-
148
-
149
-
150
-
151
-
152
-
153
-
154
-
155
-
156
-
157
-
158
-
159
-
160
-
161
-
162
-
163
-
164
-
165
-
166
-
167
-
168
-
169
-
170
-
171
-
172
-
173
-
174
-
175
-
176
-
177
-
178
-
179
-
180
-
181
-
182
-
183
-
184
-
185
-
186
-
187
-
188
-
189
-
190
-
191
-
192
-
193
-
194
-
195
-
196
-
197
-
198
-
199
-
200
-
201
-
202
-
203
-
204
-
205
-
206
-
207
-
208
-
209
-
210
-
211
-
212
-
213
-
214
-
215
-
216
-
217
-
218
-
219
-
220
-
221
-
222
-
223
-
224
-
225
-
226
-
227
-
228
-
229
-
230
-
231
-
232
-
233
-
234
-
235
-
236
-
237
-
238
-
239
-
240
-
241
-
242
-
243
-
244
-
245
-
246
-
247
-
248
-
249
-
250
-
251
-
252
-
253
-
254
-
255
-
256
-
257
-
258
-
259
-
260
-
261
-
262
-
263
-
264
-
265
-
266
-
267
-
268
-
269
-
270
-
271
-
272
-
273
-
274
-
275
-
276
-
277
-
278
-
279
-
280
-
281
-
282
-
283
-
284
-
285
-
286
-
287
-
288
-
289
-
290
-
291
-
292
-
293
-
294
-
295
-
296
-
297
-
298
-
299
-
300
-
301
-
302
-
303
-
304
-
305
-
306
-
307
-
308
-
309
-
310
-
311
-
312
-
313
-
314
-
315
-
316
-
317
-
318
-
319
-
 320
320 -
 321
321 -
 322
322 -
 323
323 -
 324
324 -
 325
325 -
 326
326 -
 327
327 -
 328
328 -
 329
329 -
 330
330 -
331
-
332
-
333
-
334
-
335
-
336
-
337
-
338
-
339
-
340
-
341
-
342
-
343
-
344
-
345
-
346
-
347
-
348
-
349
-
350
-
351
-
352
-
353
-
354
-
355
-
356
-
357
-
358
-
359
-
360
-
361
-
362
-
363
-
364
-
365
-
366
-
367
-
368
-
369
-
370
-
371
-
372
-
373
-
374
-
375
-
376
-
377
-
378
-
379
-
380
-
381
-
382
-
383
-
384
-
385
-
386
-
387
-
388
-
389
-
390
-
391
-
392
-
393
-
394
-
395
-
396
-
397
-
398
-
399
-
400
-
401
-
402
-
403
-
404
-
405
-
406
-
407
-
408
-
409
-
410
-
411
-
412
-
413
-
414
-
415
-
416
-
417
-
418
-
419
-
420
-
421
-
422
-
423
-
424
-
425
-
426
-
427
-
428
-
429
-
430
-
431
-
432
-
433
-
434
-
435
-
436
-
437
-
438
-
439
-
440
-
441
-
442
-
443
-
444
 |
 |