Ricoh Aficio SP 5200S Fax Guide - Page 347
To send the Folder Transfer Result Report, press [E-mail]., E-mail Destination
 |
View all Ricoh Aficio SP 5200S manuals
Add to My Manuals
Save this manual to your list of manuals |
Page 347 highlights
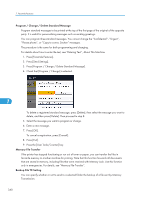
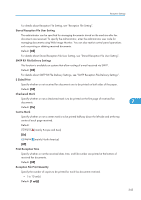
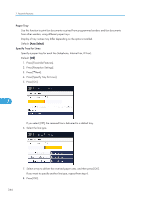
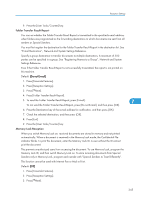
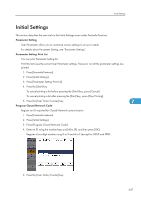
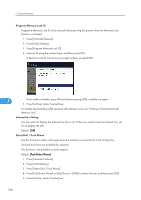
Reception Settings 9. Press the [User Tools/Counter] key. Folder Transfer Result Report You can set whether the Folder Transfer Result Report is transmitted to the specified e-mail address, when folders are programmed as the forwarding destinations to which documents are sent from all senders or Special Senders. You must first register the destination for the Folder Transfer Result Report in the destination list. See "E-mail Destination", Network and System Settings Reference. Specify a group destination to transfer documents to multiple destinations. A maximum of 500 parties can be specified in a group. See "Registering Names to a Group", Network and System Settings Reference. Even if the Folder Transfer Result Report is not successfully transmitted, the report is not printed on this machine. Default: [Do not E-mail] 1. Press [Facsimile Features]. 2. Press [Reception Settings]. 3. Press [ Next]. 4. Press [Folder Transfer Result Report]. 5. To send the Folder Transfer Result Report, press [E-mail]. 7 To not send the Folder Transfer Result Report, press [Do not E-mail], and then press [OK]. 6. Press the Destination key of the e-mail address for notification, and then press [OK]. 7. Check the selected destination, and then press [OK]. 8. Press [Exit]. 9. Press the [User Tools/Counter] key. Memory Lock Reception When you switch Memory Lock on, received documents are stored in memory and not printed automatically. When a document is received in the Memory Lock mode, the Confidential File indicator blinks. To print this document, enter the Memory Lock ID. A user without the ID cannot print the document. This prevents unauthorized users from accessing the document. To use Memory Lock, program the Memory Lock ID, and then switch Memory Lock on. To store incoming documents from Special Senders only in Memory Lock, program each sender with "Special Senders to Treat Differently". This function cannot be used with Internet Fax or Mail to Print. Default: [Off] 1. Press [Facsimile Features]. 2. Press [Reception Settings]. 3. Press [ Next]. 345
-
 1
1 -
2
-
3
-
4
-
5
-
6
-
7
-
8
-
9
-
10
-
11
-
12
-
13
-
14
-
15
-
16
-
17
-
18
-
19
-
20
-
21
-
22
-
23
-
24
-
25
-
26
-
27
-
28
-
29
-
30
-
31
-
32
-
33
-
34
-
35
-
36
-
37
-
38
-
39
-
40
-
41
-
42
-
43
-
44
-
45
-
46
-
47
-
48
-
49
-
50
-
51
-
52
-
53
-
54
-
55
-
56
-
57
-
58
-
59
-
60
-
61
-
62
-
63
-
64
-
65
-
66
-
67
-
68
-
69
-
70
-
71
-
72
-
73
-
74
-
75
-
76
-
77
-
78
-
79
-
80
-
81
-
82
-
83
-
84
-
85
-
86
-
87
-
88
-
89
-
90
-
91
-
92
-
93
-
94
-
95
-
96
-
97
-
98
-
99
-
100
-
101
-
102
-
103
-
104
-
105
-
106
-
107
-
108
-
109
-
110
-
111
-
112
-
113
-
114
-
115
-
116
-
117
-
118
-
119
-
120
-
121
-
122
-
123
-
124
-
125
-
126
-
127
-
128
-
129
-
130
-
131
-
132
-
133
-
134
-
135
-
136
-
137
-
138
-
139
-
140
-
141
-
142
-
143
-
144
-
145
-
146
-
147
-
148
-
149
-
150
-
151
-
152
-
153
-
154
-
155
-
156
-
157
-
158
-
159
-
160
-
161
-
162
-
163
-
164
-
165
-
166
-
167
-
168
-
169
-
170
-
171
-
172
-
173
-
174
-
175
-
176
-
177
-
178
-
179
-
180
-
181
-
182
-
183
-
184
-
185
-
186
-
187
-
188
-
189
-
190
-
191
-
192
-
193
-
194
-
195
-
196
-
197
-
198
-
199
-
200
-
201
-
202
-
203
-
204
-
205
-
206
-
207
-
208
-
209
-
210
-
211
-
212
-
213
-
214
-
215
-
216
-
217
-
218
-
219
-
220
-
221
-
222
-
223
-
224
-
225
-
226
-
227
-
228
-
229
-
230
-
231
-
232
-
233
-
234
-
235
-
236
-
237
-
238
-
239
-
240
-
241
-
242
-
243
-
244
-
245
-
246
-
247
-
248
-
249
-
250
-
251
-
252
-
253
-
254
-
255
-
256
-
257
-
258
-
259
-
260
-
261
-
262
-
263
-
264
-
265
-
266
-
267
-
268
-
269
-
270
-
271
-
272
-
273
-
274
-
275
-
276
-
277
-
278
-
279
-
280
-
281
-
282
-
283
-
284
-
285
-
286
-
287
-
288
-
289
-
290
-
291
-
292
-
293
-
294
-
295
-
296
-
297
-
298
-
299
-
300
-
301
-
302
-
303
-
304
-
305
-
306
-
307
-
308
-
309
-
310
-
311
-
312
-
313
-
314
-
315
-
316
-
317
-
318
-
319
-
320
-
321
-
322
-
323
-
324
-
325
-
326
-
327
-
328
-
329
-
330
-
331
-
332
-
333
-
334
-
335
-
336
-
337
-
338
-
339
-
340
-
341
-
 342
342 -
 343
343 -
 344
344 -
 345
345 -
 346
346 -
 347
347 -
 348
348 -
 349
349 -
 350
350 -
 351
351 -
 352
352 -
353
-
354
-
355
-
356
-
357
-
358
-
359
-
360
-
361
-
362
-
363
-
364
-
365
-
366
-
367
-
368
-
369
-
370
-
371
-
372
-
373
-
374
-
375
-
376
-
377
-
378
-
379
-
380
-
381
-
382
-
383
-
384
-
385
-
386
-
387
-
388
-
389
-
390
-
391
-
392
-
393
-
394
-
395
-
396
-
397
-
398
-
399
-
400
-
401
-
402
-
403
-
404
-
405
-
406
-
407
-
408
-
409
-
410
-
411
-
412
-
413
-
414
-
415
-
416
-
417
-
418
-
419
-
420
-
421
-
422
-
423
-
424
-
425
-
426
-
427
-
428
-
429
-
430
-
431
-
432
-
433
-
434
-
435
-
436
-
437
-
438
-
439
-
440
-
441
-
442
-
443
-
444
 |
 |