Samsung SPH-P500 User Manual Ver.li6_f7 (English(north America)) - Page 78
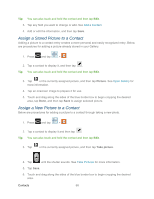
Assign a Stored Picture to a Contact, Picture, Take picture
 |
View all Samsung SPH-P500 manuals
Add to My Manuals
Save this manual to your list of manuals |
Page 78 highlights
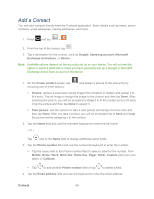
Tip: You can also touch and hold the contact and then tap Edit. 3. Tap any field you want to change or add. See Add a Contact. 4. Add or edit the information, and then tap Save. Assign a Stored Picture to a Contact Adding a picture to a contact entry creates a more personal and easily recognized entry. Below are procedures for adding a picture already stored in your Gallery. 1. Press and tap > . 2. Tap a contact to display it, and then tap . Tip: You can also touch and hold the contact and then tap Edit. 3. Tap or the currently assigned picture, and then tap Picture. See Open Gallery for more information. 4. Tap an onscreen image to prepare it for use. 5. Touch and drag along the sides of the blue border box to begin cropping the desired area, tap Done, and then tap Save to assign selected picture. Assign a New Picture to a Contact Below are procedures for adding a picture to a contact through taking a new photo. 1. Press and tap > . 2. Tap a contact to display it and then tap . Tip: You can also touch and hold the contact and then tap Edit. 3. Tap or the currently assigned picture, and then tap Take picture. 4. Tap until the shutter sounds. See Take Pictures for more information. 5. Tap Save. 6. Touch and drag along the sides of the blue border box to begin cropping the desired area. Contacts 68
-
 1
1 -
2
-
3
-
4
-
5
-
6
-
7
-
8
-
9
-
10
-
11
-
12
-
13
-
14
-
15
-
16
-
17
-
18
-
19
-
20
-
21
-
22
-
23
-
24
-
25
-
26
-
27
-
28
-
29
-
30
-
31
-
32
-
33
-
34
-
35
-
36
-
37
-
38
-
39
-
40
-
41
-
42
-
43
-
44
-
45
-
46
-
47
-
48
-
49
-
50
-
51
-
52
-
53
-
54
-
55
-
56
-
57
-
58
-
59
-
60
-
61
-
62
-
63
-
64
-
65
-
66
-
67
-
68
-
69
-
70
-
71
-
72
-
 73
73 -
 74
74 -
 75
75 -
 76
76 -
 77
77 -
 78
78 -
 79
79 -
 80
80 -
 81
81 -
 82
82 -
 83
83 -
84
-
85
-
86
-
87
-
88
-
89
-
90
-
91
-
92
-
93
-
94
-
95
-
96
-
97
-
98
-
99
-
100
-
101
-
102
-
103
-
104
-
105
-
106
-
107
-
108
-
109
-
110
-
111
-
112
-
113
-
114
-
115
-
116
-
117
-
118
-
119
-
120
-
121
-
122
-
123
-
124
-
125
-
126
-
127
-
128
-
129
-
130
-
131
-
132
-
133
-
134
-
135
-
136
-
137
-
138
-
139
-
140
-
141
-
142
-
143
-
144
-
145
-
146
-
147
-
148
-
149
-
150
-
151
-
152
-
153
-
154
-
155
-
156
-
157
-
158
-
159
-
160
-
161
-
162
-
163
-
164
-
165
-
166
-
167
 |
 |