Gateway MX6452 8511385 - User Guide Gateway Notebook - Page 189
Defragmenting the hard drive, Check Now, Start
 |
View all Gateway MX6452 manuals
Add to My Manuals
Save this manual to your list of manuals |
Page 189 highlights
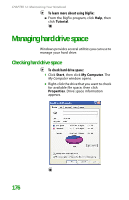
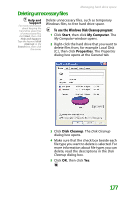
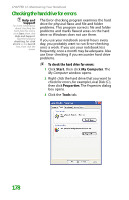
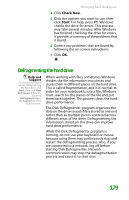
Managing hard drive space 4 Click Check Now. 5 Click the options you want to use, then click Start. For help, press F1. Windows checks the drive for errors. This process may take several minutes. After Windows has finished checking the drive for errors, it provides a summary of the problems that it found. 6 Correct any problems that are found by following the on-screen instructions. 7 Click OK. Defragmenting the hard drive Help and Support For more information about defragmenting the hard drive, click Start, then click Help and Support. Type the keyword defragmenting in the Search box, then click the arrow. When working with files, sometimes Windows divides the file information into pieces and stores them in different places on the hard drive. This is called fragmentation, and it is normal. In order for your notebook to use a file, Windows must search for the pieces of the file and put them back together. This process slows the hard drive performance. The Disk Defragmenter program organizes the data on the drive so each file is stored as one unit rather than as multiple pieces scattered across different areas of the drive. Defragmenting the information stored on the drive can improve hard drive performance. While the Disk Defragmenter program is running, do not use your keyboard or mouse because using them may continuously stop and restart the defragmenting process. Also, if you are connected to a network, log off before starting Disk Defragmenter. Network communication may stop the defragmentation process and cause it to start over. 179
-
 1
1 -
2
-
3
-
4
-
5
-
6
-
7
-
8
-
9
-
10
-
11
-
12
-
13
-
14
-
15
-
16
-
17
-
18
-
19
-
20
-
21
-
22
-
23
-
24
-
25
-
26
-
27
-
28
-
29
-
30
-
31
-
32
-
33
-
34
-
35
-
36
-
37
-
38
-
39
-
40
-
41
-
42
-
43
-
44
-
45
-
46
-
47
-
48
-
49
-
50
-
51
-
52
-
53
-
54
-
55
-
56
-
57
-
58
-
59
-
60
-
61
-
62
-
63
-
64
-
65
-
66
-
67
-
68
-
69
-
70
-
71
-
72
-
73
-
74
-
75
-
76
-
77
-
78
-
79
-
80
-
81
-
82
-
83
-
84
-
85
-
86
-
87
-
88
-
89
-
90
-
91
-
92
-
93
-
94
-
95
-
96
-
97
-
98
-
99
-
100
-
101
-
102
-
103
-
104
-
105
-
106
-
107
-
108
-
109
-
110
-
111
-
112
-
113
-
114
-
115
-
116
-
117
-
118
-
119
-
120
-
121
-
122
-
123
-
124
-
125
-
126
-
127
-
128
-
129
-
130
-
131
-
132
-
133
-
134
-
135
-
136
-
137
-
138
-
139
-
140
-
141
-
142
-
143
-
144
-
145
-
146
-
147
-
148
-
149
-
150
-
151
-
152
-
153
-
154
-
155
-
156
-
157
-
158
-
159
-
160
-
161
-
162
-
163
-
164
-
165
-
166
-
167
-
168
-
169
-
170
-
171
-
172
-
173
-
174
-
175
-
176
-
177
-
178
-
179
-
180
-
181
-
182
-
183
-
 184
184 -
 185
185 -
 186
186 -
 187
187 -
 188
188 -
 189
189 -
 190
190 -
 191
191 -
 192
192 -
 193
193 -
 194
194 -
195
-
196
-
197
-
198
-
199
-
200
-
201
-
202
-
203
-
204
-
205
-
206
-
207
-
208
-
209
-
210
-
211
-
212
-
213
-
214
-
215
-
216
-
217
-
218
-
219
-
220
-
221
-
222
-
223
-
224
-
225
-
226
-
227
-
228
-
229
-
230
-
231
-
232
-
233
-
234
-
235
-
236
-
237
-
238
-
239
-
240
-
241
-
242
-
243
-
244
-
245
-
246
-
247
-
248
-
249
-
250
-
251
-
252
-
253
-
254
-
255
-
256
-
257
-
258
-
259
-
260
-
261
-
262
 |
 |
