HP 5500dn HP Designjet 5500 series printers - Quick Reference Pocket Guide - Page 14
menu print
 |
View all HP 5500dn manuals
Add to My Manuals
Save this manual to your list of manuals |
Page 14 highlights
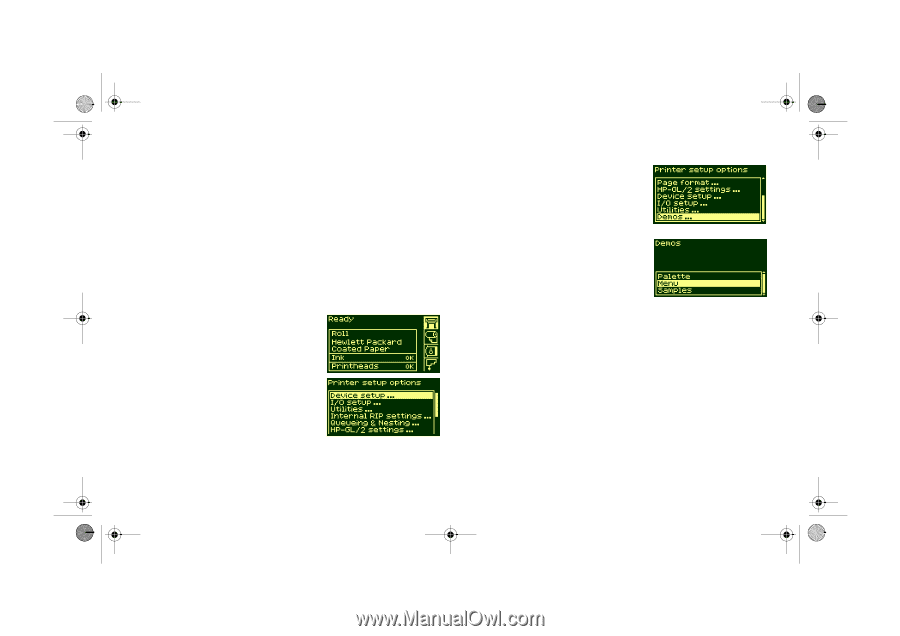
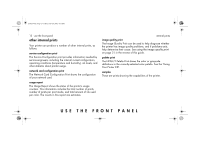
pocket.book Page 12 Friday, June 28, 2002 4:31 PM 12 - use the front panel menu print You can see the complete menu structure available on the printer by printing the Menu print. Alternatively, see front-panel menus on page 14. Use it to help you to navigate the menus. NOTE: The Menu print is printed in the size specified in the Page Format → Size settings in the front panel. However, if a sheet is loaded, it will automatically shrink to fit. Make sure this setting specifies the size you want before printing. 1. Make sure that printing material is loaded. 2. Make sure the front panel displays the printer setup menu icon. If it does, press the Top key to select it. Press the Enter key. 3. The front panel will now display the printer setup options: 4. Press ↓ key until "Demos" is selected. Press the Enter key. 5. Press ↓ or ↑ key until "Menu" is displayed. Press the Enter key. 6. The front panel will now display the message "Receiving" while the file is being processed, and then the printer starts printing the Menu print. internal prints
-
 1
1 -
2
-
3
-
4
-
5
-
6
-
7
-
8
-
 9
9 -
 10
10 -
 11
11 -
 12
12 -
 13
13 -
 14
14 -
 15
15 -
 16
16 -
 17
17 -
 18
18 -
 19
19 -
20
-
21
-
22
-
23
-
24
-
25
-
26
-
27
-
28
-
29
-
30
-
31
-
32
-
33
-
34
-
35
-
36
-
37
-
38
-
39
-
40
-
41
-
42
-
43
-
44
-
45
-
46
-
47
-
48
-
49
-
50
-
51
-
52
-
53
-
54
-
55
-
56
-
57
-
58
-
59
-
60
-
61
-
62
-
63
-
64
-
65
-
66
-
67
-
68
-
69
-
70
-
71
-
72
-
73
-
74
-
75
-
76
-
77
-
78
-
79
-
80
-
81
-
82
-
83
-
84
-
85
-
86
-
87
-
88
-
89
-
90
-
91
-
92
-
93
-
94
-
95
-
96
-
97
-
98
-
99
-
100
-
101
-
102
-
103
-
104
-
105
-
106
-
107
-
108
-
109
-
110
-
111
-
112
-
113
-
114
-
115
-
116
-
117
-
118
-
119
-
120
-
121
-
122
-
123
-
124
-
125
-
126
-
127
-
128
-
129
-
130
-
131
-
132
-
133
-
134
-
135
-
136
-
137
-
138
-
139
-
140
-
141
-
142
-
143
-
144
-
145
-
146
-
147
-
148
-
149
-
150
-
151
-
152
-
153
-
154
-
155
-
156
-
157
-
158
-
159
-
160
-
161
-
162
-
163
-
164
-
165
-
166
-
167
-
168
-
169
-
170
-
171
-
172
-
173
-
174
-
175
-
176
-
177
-
178
-
179
-
180
-
181
-
182
-
183
-
184
-
185
-
186
-
187
-
188
-
189
-
190
-
191
-
192
-
193
-
194
-
195
-
196
-
197
-
198
-
199
-
200
-
201
-
202
-
203
-
204
-
205
-
206
-
207
-
208
-
209
-
210
 |
 |