Kyocera KM-3035 Kyocera Extended Driver 3.x User Guide Rev-1.4 - Page 120
Creating Virtual Mailboxes, Start, Printers and Faxes, Printer and, Properties, Device Settings
 |
View all Kyocera KM-3035 manuals
Add to My Manuals
Save this manual to your list of manuals |
Page 120 highlights
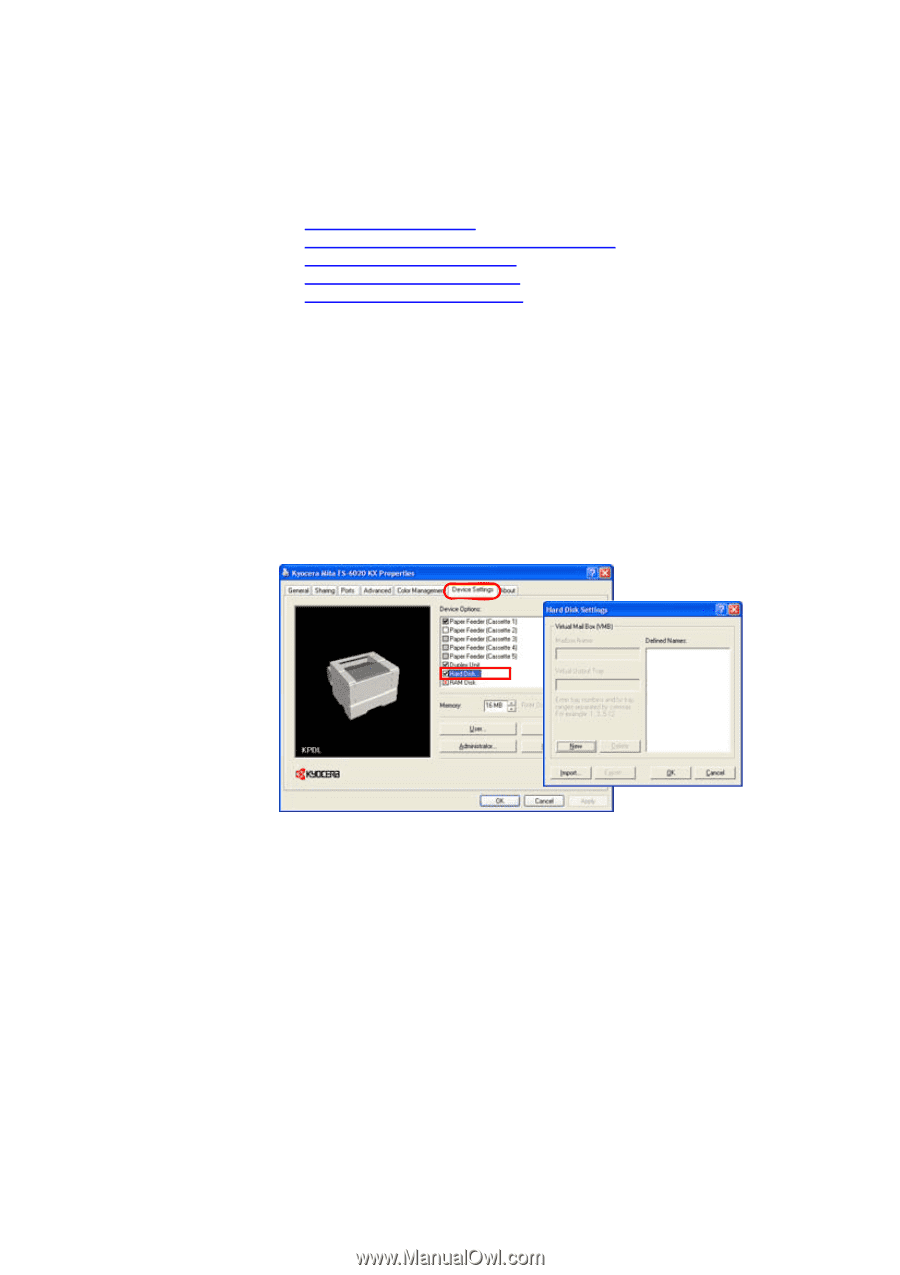
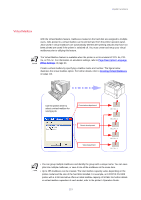
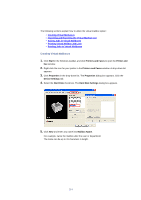
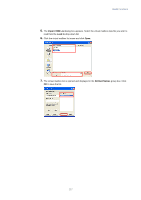
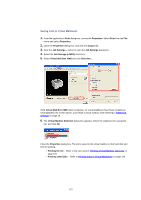
The following sections explain how to utilize the virtual mailbox option: • Creating Virtual Mailboxes • Importing and Exporting the Virtual Mailbox List • Saving Jobs in Virtual Mailboxes • Printing Virtual Mailbox Job Lists • Printing Jobs in Virtual Mailboxes Creating Virtual Mailboxes 1. Click Start in the Windows taskbar, and click Printers and Faxes to open the Printer and Fax window. 2. Right-click the icon for your printer in the Printers and Faxes window. A drop-down list appears. 3. Click Properties in the drop-down list. The Properties dialog box appears. Click the Device Settings tab. 4. Select the Hard Disk check box. The Hard Disk Settings dialog box appears. 5. Click New and enter any name into Mailbox Name. For example, name the mailbox after the user or department. The name can be up to 31 characters in length. 114
-
 1
1 -
2
-
3
-
4
-
5
-
6
-
7
-
8
-
9
-
10
-
11
-
12
-
13
-
14
-
15
-
16
-
17
-
18
-
19
-
20
-
21
-
22
-
23
-
24
-
25
-
26
-
27
-
28
-
29
-
30
-
31
-
32
-
33
-
34
-
35
-
36
-
37
-
38
-
39
-
40
-
41
-
42
-
43
-
44
-
45
-
46
-
47
-
48
-
49
-
50
-
51
-
52
-
53
-
54
-
55
-
56
-
57
-
58
-
59
-
60
-
61
-
62
-
63
-
64
-
65
-
66
-
67
-
68
-
69
-
70
-
71
-
72
-
73
-
74
-
75
-
76
-
77
-
78
-
79
-
80
-
81
-
82
-
83
-
84
-
85
-
86
-
87
-
88
-
89
-
90
-
91
-
92
-
93
-
94
-
95
-
96
-
97
-
98
-
99
-
100
-
101
-
102
-
103
-
104
-
105
-
106
-
107
-
108
-
109
-
110
-
111
-
112
-
113
-
114
-
 115
115 -
 116
116 -
 117
117 -
 118
118 -
 119
119 -
 120
120 -
 121
121 -
 122
122 -
 123
123 -
 124
124 -
 125
125 -
126
-
127
-
128
-
129
-
130
-
131
-
132
-
133
-
134
-
135
-
136
-
137
-
138
-
139
-
140
-
141
-
142
-
143
-
144
-
145
-
146
-
147
-
148
-
149
 |
 |