Kyocera KM-3035 Kyocera Extended Driver 3.x User Guide Rev-1.4 - Page 77
Half Tone Screen Settings, Use Printer's Default Screens
 |
View all Kyocera KM-3035 manuals
Add to My Manuals
Save this manual to your list of manuals |
Page 77 highlights
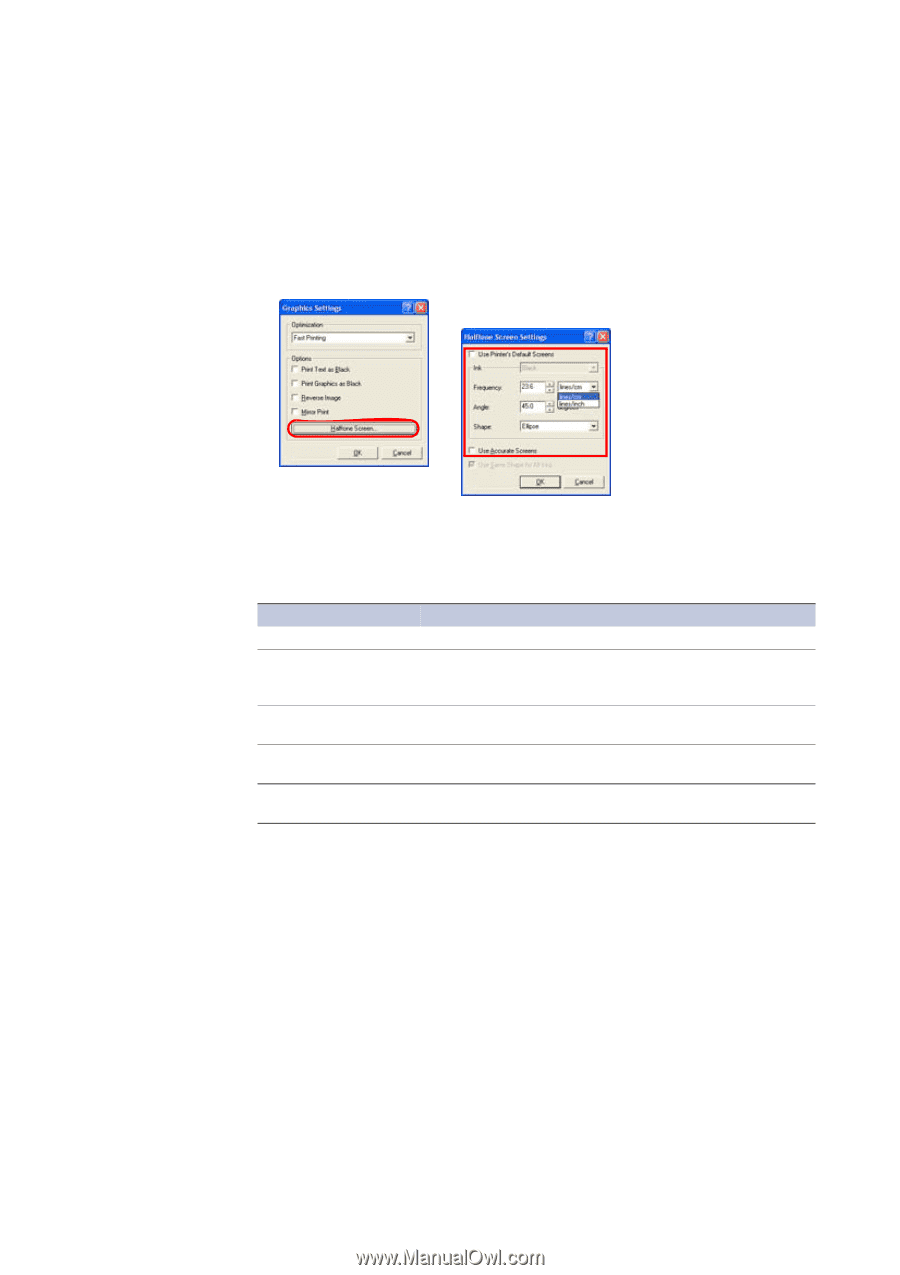
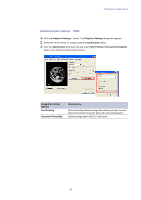
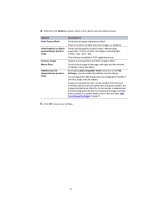
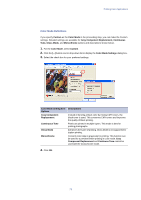
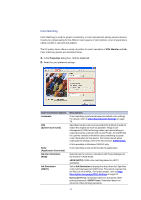
Printing from Applications Half Tone Screen Settings 1. Click Halftone Screen... on the Graphics Settings dialog box. The Halftone Screen Settings dialog box appears. 2. Clear the Use Printer's Default Screens check box. 3. Select from the drop-down list for each item, or enter values into the boxes to make settings. Refer to the options and descriptions listed below. Options Ink Frequency Angle Shape Use Accurate Screens Descriptions Determines the color used for the printed output. Set the number of lines and units for halftone dots. The units are lines/cm or lines/inch. Enter a value in the Frequency box, and select the units from the drop-down list to the right. Determines the halftone dot angle. The setting can range from 0.0 to 180.0 degrees. Set the dot shape for halftones. Choose from: Ellipse, Round, and Line. Fine adjusts the set values to ensure an accurate number of lines and halftone angle. 4. Click OK to save the settings. 71
-
 1
1 -
2
-
3
-
4
-
5
-
6
-
7
-
8
-
9
-
10
-
11
-
12
-
13
-
14
-
15
-
16
-
17
-
18
-
19
-
20
-
21
-
22
-
23
-
24
-
25
-
26
-
27
-
28
-
29
-
30
-
31
-
32
-
33
-
34
-
35
-
36
-
37
-
38
-
39
-
40
-
41
-
42
-
43
-
44
-
45
-
46
-
47
-
48
-
49
-
50
-
51
-
52
-
53
-
54
-
55
-
56
-
57
-
58
-
59
-
60
-
61
-
62
-
63
-
64
-
65
-
66
-
67
-
68
-
69
-
70
-
71
-
 72
72 -
 73
73 -
 74
74 -
 75
75 -
 76
76 -
 77
77 -
 78
78 -
 79
79 -
 80
80 -
 81
81 -
 82
82 -
83
-
84
-
85
-
86
-
87
-
88
-
89
-
90
-
91
-
92
-
93
-
94
-
95
-
96
-
97
-
98
-
99
-
100
-
101
-
102
-
103
-
104
-
105
-
106
-
107
-
108
-
109
-
110
-
111
-
112
-
113
-
114
-
115
-
116
-
117
-
118
-
119
-
120
-
121
-
122
-
123
-
124
-
125
-
126
-
127
-
128
-
129
-
130
-
131
-
132
-
133
-
134
-
135
-
136
-
137
-
138
-
139
-
140
-
141
-
142
-
143
-
144
-
145
-
146
-
147
-
148
-
149
 |
 |