Samsung SGH-I957 User Manual (user Manual) (ver.f5) (English) - Page 80
Camera, Camcorder, Record, Flash, Self recording, White balance, Timer, Exposure value, Settings
 |
View all Samsung SGH-I957 manuals
Add to My Manuals
Save this manual to your list of manuals |
Page 80 highlights
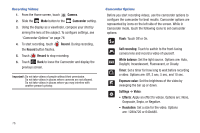
Recording Videos 1. From the Home screen, touch Camera. 2. Slide the Mode button to the Camcorder setting. 3. Using the display as a viewfinder, compose your shot by aiming the lens at the subject. To configure settings, see "Camcorder Options" on page 76 4. To start recording, touch Record. During recording, the Record button flashes. 5. Touch Record to stop recording. 6. Touch Back to leave the Camcorder and display the previous screen. Important!: Do not take videos of people without their permission. Do not take videos in places where cameras are not allowed. Do not take videos in places where you may interfere with another person's privacy. Camcorder Options Before you start recording videos, use the camcorder options to configure the camcorder for best results. Camcorder options are represented by icons on the left side of the screen. While in Camcorder mode, touch the following icons to set camcorder options: Flash: Touch Off or On. Self recording: Touch to switch to the front-facing camera lens and record a video of yourself. White balance: Set the light source. Options are: Auto, Daylight, Incandescent, Fluorescent, or Cloudy. Timer: Set a timer for how long to wait before recording a video. Options are: Off, 2 sec, 5 sec, and 10 sec. Exposure value: Set the brightness of the video by sweeping the bar up or down. Settings ➔ Video: • Effects: Apply an effect to videos. Options are: None, Grayscale, Sepia, or Negative. • Resolution: Set a size for the video. Options are: 1280x720 or 640x480. 76
-
 1
1 -
2
-
3
-
4
-
5
-
6
-
7
-
8
-
9
-
10
-
11
-
12
-
13
-
14
-
15
-
16
-
17
-
18
-
19
-
20
-
21
-
22
-
23
-
24
-
25
-
26
-
27
-
28
-
29
-
30
-
31
-
32
-
33
-
34
-
35
-
36
-
37
-
38
-
39
-
40
-
41
-
42
-
43
-
44
-
45
-
46
-
47
-
48
-
49
-
50
-
51
-
52
-
53
-
54
-
55
-
56
-
57
-
58
-
59
-
60
-
61
-
62
-
63
-
64
-
65
-
66
-
67
-
68
-
69
-
70
-
71
-
72
-
73
-
74
-
 75
75 -
 76
76 -
 77
77 -
 78
78 -
 79
79 -
 80
80 -
 81
81 -
 82
82 -
 83
83 -
 84
84 -
 85
85 -
86
-
87
-
88
-
89
-
90
-
91
-
92
-
93
-
94
-
95
-
96
-
97
-
98
-
99
-
100
-
101
-
102
-
103
-
104
-
105
-
106
-
107
-
108
-
109
-
110
-
111
-
112
-
113
-
114
-
115
-
116
-
117
-
118
-
119
-
120
-
121
-
122
-
123
-
124
-
125
-
126
-
127
-
128
-
129
-
130
-
131
-
132
-
133
-
134
-
135
-
136
-
137
-
138
-
139
-
140
-
141
-
142
-
143
-
144
-
145
-
146
-
147
-
148
-
149
-
150
-
151
-
152
-
153
-
154
-
155
-
156
-
157
-
158
-
159
-
160
-
161
-
162
-
163
-
164
-
165
-
166
-
167
-
168
-
169
-
170
-
171
-
172
-
173
-
174
-
175
-
176
 |
 |
