Oki MB471 Users Manual Advanced - Page 162
Using IPv6, Enabling IPv6, Checking IPv6 Address, Using IEEE802.1X
 |
View all Oki MB471 manuals
Add to My Manuals
Save this manual to your list of manuals |
Page 162 highlights
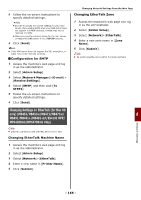
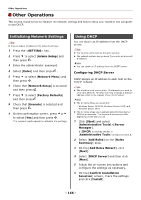
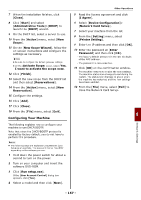
Changing Network Settings From the Web Page Using IPv6 Your machine supports IPv6. The machine obtains the IPv6 address automatically. You cannot set the IPv6 address manually. The machine supports the following protocols: For Printing: - LPR - IPP - RAW (Port9100) - FTP For Configuration: - HTTP - SNMPv1/v3 - Telnet Operation is confirmed under specific conditions for the following applications. Protocol OS Application Condi tion LPD Port9100 FTP HTTP Telnet Windows 7 LPR (Command Windows Vista Prompt) Windows XP *1, 2, 3 Windows 7 LPRng Windows Vista *1, 2, 3 Windows 7 FTP (Command Windows Vista Prompt) Windows XP *1, 2, 3 Mac OS X FTP (Terminal) *1, 2, 3 Windows XP Internet Explorer *1, 2, 3 6.0 Mac OS X Safari (2.0v412.2) *1, 2, 3, 4 Windows 7 Telnet (Command *1, 2, 3 Windows Vista Prompt) Windows XP Mac OS X Telnet (Terminal) *1, 2, 3 *1) To specify a host name, edit the host's file or access via the DNS server. *2) On Telnet, when only IPv6 is enabled you cannot specify a host name by the DNS server. *3) You cannot specify a host name when you use a link local address to access. *4) Enter an IPv6 address enclosed with square brackets. Note To use IPv6 on Windows XP, install IPv6. Enabling IPv6 1 Access the machine's web page and log in as the administrator. 2 Select [Admin Setup]. 3 Select [Network]>[TCP/IP]. 4 Select [Enable] for [IPv6]. 5 Click [Submit]. The network card reboots to enable the new settings. Checking IPv6 Address The OPv6 address is automatically assigned. 1 Select [View Info]. 2 Select [Network]>[TCP/IP]. Memo When the global address is displayed only as zeros, it may be an error due to the router being used. Reference You can also check the IPv6 address in the network report from the machine by pressing the key and then selecting [Report Print] > [View Info] > [Network Information]. For details on the report and how to print it, refer to "Printing Reports" P. 73. Using IEEE802.1X Your machine supports the IEEE802.1X authentication. Be sure to configure your machine and your computer in advance before performing the following steps. Reference For details on the initial setup and the IP address, refer to the User's Manual Basic. Configuring Your Machine for IEEE802.1X Using PEAP 1 Access the machine's web page and log in as the administrator. 2 Select [Admin Setup]. 3 Select [Network Manager]> [IEEE802.1X]. 4 Select [Enable] for [IEEE802.1X]. 5 Select [PEAP] for [EAP Type]. 6 Enter a user name in [EAP User]. 7 Enter a password in [EAP Password]. - 162 -
-
 1
1 -
2
-
3
-
4
-
5
-
6
-
7
-
8
-
9
-
10
-
11
-
12
-
13
-
14
-
15
-
16
-
17
-
18
-
19
-
20
-
21
-
22
-
23
-
24
-
25
-
26
-
27
-
28
-
29
-
30
-
31
-
32
-
33
-
34
-
35
-
36
-
37
-
38
-
39
-
40
-
41
-
42
-
43
-
44
-
45
-
46
-
47
-
48
-
49
-
50
-
51
-
52
-
53
-
54
-
55
-
56
-
57
-
58
-
59
-
60
-
61
-
62
-
63
-
64
-
65
-
66
-
67
-
68
-
69
-
70
-
71
-
72
-
73
-
74
-
75
-
76
-
77
-
78
-
79
-
80
-
81
-
82
-
83
-
84
-
85
-
86
-
87
-
88
-
89
-
90
-
91
-
92
-
93
-
94
-
95
-
96
-
97
-
98
-
99
-
100
-
101
-
102
-
103
-
104
-
105
-
106
-
107
-
108
-
109
-
110
-
111
-
112
-
113
-
114
-
115
-
116
-
117
-
118
-
119
-
120
-
121
-
122
-
123
-
124
-
125
-
126
-
127
-
128
-
129
-
130
-
131
-
132
-
133
-
134
-
135
-
136
-
137
-
138
-
139
-
140
-
141
-
142
-
143
-
144
-
145
-
146
-
147
-
148
-
149
-
150
-
151
-
152
-
153
-
154
-
155
-
156
-
 157
157 -
 158
158 -
 159
159 -
 160
160 -
 161
161 -
 162
162 -
 163
163 -
 164
164 -
 165
165 -
 166
166 -
 167
167 -
168
-
169
-
170
-
171
-
172
-
173
-
174
-
175
-
176
-
177
-
178
-
179
-
180
-
181
-
182
 |
 |
