Oki MB471 Users Manual Advanced - Page 65
For Windows PS Printer Driver
 |
View all Oki MB471 manuals
Add to My Manuals
Save this manual to your list of manuals |
Page 65 highlights
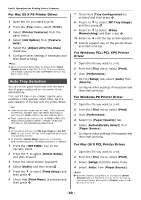
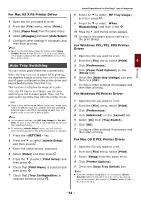
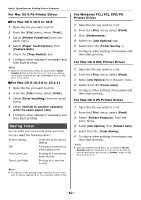
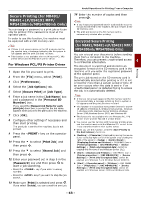
Printing 6 Click [Overlay]. 7 Select the [Print Using Active Overlays] check box. 8 Click [Define Overlays]. 9 Enter a name for the overlay in the [Overlay Name] box. 10 Enter the ID of the form you registered in the Configuration Tool in the [ID Value(s)]. 11 Select the pages of the document on which to print the overlay from the [Print on Pages] drop-down list. 12 Click [Add]. 13 Click [Close]. 14 Select the overlay to use from the [Defined Overlays] and click [Add]. 15 Click [OK]. 16 Configure other settings if necessary and then start printing. For Windows PS Printer Driver Memo An overlay is a form group. You can register three forms with one overlay. 1 Click [Start] and select [Devices and Printers]. 2 Right-click the OKI MB491 icon and select [Printing preferences]>[OKI MB491(PS)]. 3 Select the [Job Options] tab. 4 Click [Overlays]. 5 Select [Use Overlay] from the dropdown list and click [New]. 6 Enter the exact name of the overlay you registered in the Configuration Tool in the [Form Name] box and click [Add]. 7 Enter a name for the overlay in the [Overlay Name] box 8 Select the page of the document on which to print the overlay from the [Print on Pages] drop-down list. 9 Click [OK]. Useful Operations for Printing From a Computer 10 Select the overlay to use from the [Defined Overlay] list and then click [Add]. 11 Click [OK]. 12 Click [OK] to close the print setup dialog box. 13 Open the file you want to print. 14 Start printing on the print dialog. Storing Print Data (for MB491/ MB491+LP/ES4191 MFP/ MPS4200mb/MPS4700mb Only) 4 You can store print data on the SD memory card installed on the machine and print it as needed from the operator panel by entering a password. Note If there is not enough space on the SD memory card for the spooled data, a message indicating the file system is full appears and the print job does not start. This function is not available with the Windows PCL XPS printer driver and the Mac OS X printer driver For Windows PCL/PS Printer Driver 1 Open the file you want to print. 2 From the [File] menu, select [Print]. 3 Click [Preferences]. 4 Select the [Job Options] tab. 5 Check [Store to SD]. 6 Enter a job name in the [Job Name] box and a password in the [Personal ID Number] box. If you check the [Request Job Name for each print job] box, a prompt for the job name appears when you send the job to the machine. 7 Click [OK]. 8 Configure other settings if necessary and then start printing. The print job is sent to the machine, but is not printed. 9 Press the key on the operator panel. 10 Press the to select [Print Job] and then press . OK - 65 -
-
 1
1 -
2
-
3
-
4
-
5
-
6
-
7
-
8
-
9
-
10
-
11
-
12
-
13
-
14
-
15
-
16
-
17
-
18
-
19
-
20
-
21
-
22
-
23
-
24
-
25
-
26
-
27
-
28
-
29
-
30
-
31
-
32
-
33
-
34
-
35
-
36
-
37
-
38
-
39
-
40
-
41
-
42
-
43
-
44
-
45
-
46
-
47
-
48
-
49
-
50
-
51
-
52
-
53
-
54
-
55
-
56
-
57
-
58
-
59
-
 60
60 -
 61
61 -
 62
62 -
 63
63 -
 64
64 -
 65
65 -
 66
66 -
 67
67 -
 68
68 -
 69
69 -
 70
70 -
71
-
72
-
73
-
74
-
75
-
76
-
77
-
78
-
79
-
80
-
81
-
82
-
83
-
84
-
85
-
86
-
87
-
88
-
89
-
90
-
91
-
92
-
93
-
94
-
95
-
96
-
97
-
98
-
99
-
100
-
101
-
102
-
103
-
104
-
105
-
106
-
107
-
108
-
109
-
110
-
111
-
112
-
113
-
114
-
115
-
116
-
117
-
118
-
119
-
120
-
121
-
122
-
123
-
124
-
125
-
126
-
127
-
128
-
129
-
130
-
131
-
132
-
133
-
134
-
135
-
136
-
137
-
138
-
139
-
140
-
141
-
142
-
143
-
144
-
145
-
146
-
147
-
148
-
149
-
150
-
151
-
152
-
153
-
154
-
155
-
156
-
157
-
158
-
159
-
160
-
161
-
162
-
163
-
164
-
165
-
166
-
167
-
168
-
169
-
170
-
171
-
172
-
173
-
174
-
175
-
176
-
177
-
178
-
179
-
180
-
181
-
182
 |
 |
