Oki MB471 Users Manual Advanced - Page 163
Connecting Your Machine to Authentication Switch, Configuring LDAP Server, Using EAP-TLS
 |
View all Oki MB471 manuals
Add to My Manuals
Save this manual to your list of manuals |
Page 163 highlights
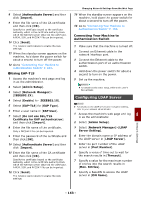
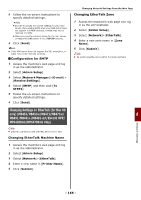
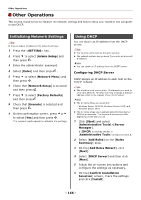
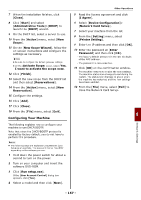
8 Select [Authenticate Server] and then click [Import]. 9 Enter the file name of the CA certificate and then click [OK]. Specify the certificate issued by the certificate authority, which is the certificate authority from which the RADIUS server obtained the certificate. A PEM, DER, and PKCS#7 file can be imported. 10 Click [Send]. The network card reboots to enable the new settings. 11 When the standby screen appears on the machine, hold down the power switch for about a second to turn off the power. 12 Go to "Connecting Your Machine to Authentication Switch" P. 163. Using EAP-TLS 1 Access the machine's web page and log in as the administrator. 2 Select [Admin Setup]. 3 Select [Network Manager]> [IEEE802.1X]. 4 Select [Enable] for [IEEE802.1X]. 5 Select [EAP-TLS] for [EAP Type]. 6 Enter a user name in [EAP User]. 7 Select [Do not use SSL/TLS Certificate for EAP authentication] and then click [Import]. 8 Enter the file name of the certificate. Only a PKCS#12 file can be imported. 9 Enter the password of the certificate and then click [OK]. 10 Select [Authenticate Server] and then click [Import]. 11 Enter the file name of the CA certificate and then click [OK]. Specify the certificate issued by the certificate authority, which is the certificate authority from which the RADIUS server obtained the certificate. A PEM, DER, and PKCS#7 file can be imported. 12 Click [Send]. The network card reboots to enable the new settings. Changing Network Settings From the Web Page 13 When the standby screen appears on the machine, hold down the power switch for about a second to turn off the power. 14 Go to "Connecting Your Machine to Authentication Switch" P. 163. Connecting Your Machine to Authentication Switch 1 Make sure that the machine is turned off. 2 Connect an Ethernet cable to the network interface port. 3 Connect the Ethernet cable to the authentication port of an authentication switch. 4 Hold down the power switch for about a second to turn on the power. 5 Set up the machine. Reference For details on the initial setup, refer to the User's Manual Basic. Configuring LDAP Server Reference For details on the LDAP server and encryption setting, refer to your network administrator. 8 1 Access the machine's web page and log in as the administrator. 2 Select [Admin Setup]. 3 Select [Network Manager]>[LDAP Server Setting]. 4 Enter the domain name or IP address of the LDAP server in [LDAP Server]. 5 Enter the port number of the LDAP server in [Port Number]. 6 Specify a value of time-out to wait for the search results in [Timeout]. 7 Specify a value for the maximum number of entries into the search results in [Max. Entries]. 8 Specify a BaseDN to access the LDAP server in [DN Name]. Network Settings - 163 -
-
 1
1 -
2
-
3
-
4
-
5
-
6
-
7
-
8
-
9
-
10
-
11
-
12
-
13
-
14
-
15
-
16
-
17
-
18
-
19
-
20
-
21
-
22
-
23
-
24
-
25
-
26
-
27
-
28
-
29
-
30
-
31
-
32
-
33
-
34
-
35
-
36
-
37
-
38
-
39
-
40
-
41
-
42
-
43
-
44
-
45
-
46
-
47
-
48
-
49
-
50
-
51
-
52
-
53
-
54
-
55
-
56
-
57
-
58
-
59
-
60
-
61
-
62
-
63
-
64
-
65
-
66
-
67
-
68
-
69
-
70
-
71
-
72
-
73
-
74
-
75
-
76
-
77
-
78
-
79
-
80
-
81
-
82
-
83
-
84
-
85
-
86
-
87
-
88
-
89
-
90
-
91
-
92
-
93
-
94
-
95
-
96
-
97
-
98
-
99
-
100
-
101
-
102
-
103
-
104
-
105
-
106
-
107
-
108
-
109
-
110
-
111
-
112
-
113
-
114
-
115
-
116
-
117
-
118
-
119
-
120
-
121
-
122
-
123
-
124
-
125
-
126
-
127
-
128
-
129
-
130
-
131
-
132
-
133
-
134
-
135
-
136
-
137
-
138
-
139
-
140
-
141
-
142
-
143
-
144
-
145
-
146
-
147
-
148
-
149
-
150
-
151
-
152
-
153
-
154
-
155
-
156
-
157
-
 158
158 -
 159
159 -
 160
160 -
 161
161 -
 162
162 -
 163
163 -
 164
164 -
 165
165 -
 166
166 -
 167
167 -
 168
168 -
169
-
170
-
171
-
172
-
173
-
174
-
175
-
176
-
177
-
178
-
179
-
180
-
181
-
182
 |
 |
