Oki MB471 Users Manual Advanced - Page 61
For Mac OS X PS Printer Driver, Auto Tray Switching, For Windows PCL/PCL XPS Printer Driver,
 |
View all Oki MB471 manuals
Add to My Manuals
Save this manual to your list of manuals |
Page 61 highlights
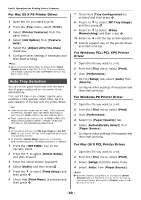
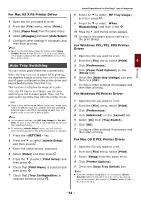
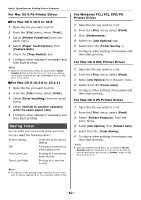
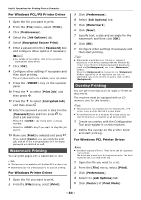
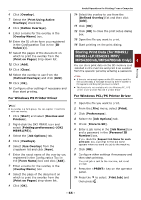
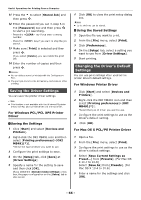
Printing For Mac OS X PS Printer Driver 1 Open the file you want to print. 2 From the [File] menu, select [Print]. 3 Select [Paper Feed] from the panel menu. 4 Select [All pages] and select [Auto Select]. 5 Configure other settings if necessary and then start printing. Memo Open the Detailed Setup Menu by pressing the [Show Details] button in Max OS X 10.7 to 10.8 or by clicking the triangle symbol at the side of [Printer] menu in Max OS X 10.5 to 10.6. Auto Tray Switching You can switch paper feed trays automatically. When the tray runs out of paper while printing, the machine locates another tray with the same size of paper configured on the printer driver and begins feeding paper from that tray. This function is effective for large print jobs. First, set MP tray to be a target tray for auto switching on the operator panel. Then, set the auto switching of the tray with the printer driver. Note Make sure to set the same values (paper size, media type, media weight) for each tray used for auto tray switching. Available paper size differs depending on each tray. For details, refer to the User's Manual Basic. Memo In the default settings, the [MP tray Usage] is [Do Not Use]. In such a case, MP tray is not supported by the auto tray switching function. To enter the [Admin Setup] menu, you will need an administrator password. The default password is "aaaaaa". 1 Press the key. 2 Press the to select [Admin Setup] and then press . OK 3 Enter the administrator password. 4 Select [Enter] and then press . OK 5 Press the to select [Print Setup] and then press . OK 6 Check that [Print Menu] is selected and then press . OK 7 Check that [Tray Configuration] is selected and then press . OK Useful Operations for Printing From a Computer 8 Press the to select [MP Tray Usage] and then press . OK 9 Press the to select [When Mismatching] and then press . OK 10 Press the until the top screen appears. 11 Configure the paper source setting on the print dialog. For Windows PCL/PCL XPS Printer Driver 1 Open the file you want to print. 2 From the [File] menu, select [Print]. 4 3 Click [Preferences]. 4 Click [Paper Feed Options] on the [Setup] tab. 5 Check the [Auto tray change] box and then click [OK]. 6 Configure other settings if necessary and then start printing. For Windows PS Printer Driver 1 Open the file you want to print. 2 From the [File] menu, select [Print]. 3 Click [Preferences]. 4 Click [Advanced] on the [Layout] tab. 5 Select [On] from [Tray Switch]. 6 Click [OK]. 7 Configure other settings if necessary and then start printing. For Mac OS X PCL Printer Driver 1 Open the file you want to print. 2 From the [File] menu, select [Print]. 3 Select [Setup] from the panel menu. 4 Click [Printer Options]. 5 Check the [Auto Tray Switch] box. Memo Open the Detailed Setup Menu by pressing the [Show Details] button in Max OS X 10.7 to 10.8 or by clicking the triangle symbol at the side of [Printer] menu in Max OS X 10.5 to 10.6. - 61 -
-
 1
1 -
2
-
3
-
4
-
5
-
6
-
7
-
8
-
9
-
10
-
11
-
12
-
13
-
14
-
15
-
16
-
17
-
18
-
19
-
20
-
21
-
22
-
23
-
24
-
25
-
26
-
27
-
28
-
29
-
30
-
31
-
32
-
33
-
34
-
35
-
36
-
37
-
38
-
39
-
40
-
41
-
42
-
43
-
44
-
45
-
46
-
47
-
48
-
49
-
50
-
51
-
52
-
53
-
54
-
55
-
 56
56 -
 57
57 -
 58
58 -
 59
59 -
 60
60 -
 61
61 -
 62
62 -
 63
63 -
 64
64 -
 65
65 -
 66
66 -
67
-
68
-
69
-
70
-
71
-
72
-
73
-
74
-
75
-
76
-
77
-
78
-
79
-
80
-
81
-
82
-
83
-
84
-
85
-
86
-
87
-
88
-
89
-
90
-
91
-
92
-
93
-
94
-
95
-
96
-
97
-
98
-
99
-
100
-
101
-
102
-
103
-
104
-
105
-
106
-
107
-
108
-
109
-
110
-
111
-
112
-
113
-
114
-
115
-
116
-
117
-
118
-
119
-
120
-
121
-
122
-
123
-
124
-
125
-
126
-
127
-
128
-
129
-
130
-
131
-
132
-
133
-
134
-
135
-
136
-
137
-
138
-
139
-
140
-
141
-
142
-
143
-
144
-
145
-
146
-
147
-
148
-
149
-
150
-
151
-
152
-
153
-
154
-
155
-
156
-
157
-
158
-
159
-
160
-
161
-
162
-
163
-
164
-
165
-
166
-
167
-
168
-
169
-
170
-
171
-
172
-
173
-
174
-
175
-
176
-
177
-
178
-
179
-
180
-
181
-
182
 |
 |