Samsung Galaxy S4 Mini User Manual - Page 43
Updating Contacts from Recent Calls, Add another field, Cancel, Email, Address, Website
 |
View all Samsung Galaxy S4 Mini manuals
Add to My Manuals
Save this manual to your list of manuals |
Page 43 highlights
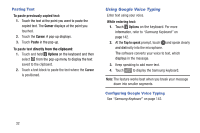
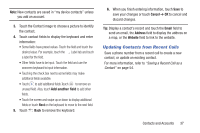
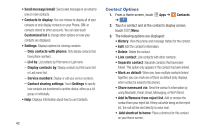
Note: New contacts are saved in "my device contacts" unless you add an account. 3. Touch the Contact image to choose a picture to identify the contact. 4. Touch contact fields to display the keyboard and enter information: • Some fields have preset values. Touch the field and touch the desired value. For example, touch the Label tab and touch a label for the field. • Other fields have to be input. Touch the field and use the onscreen keyboard to input information. • Touching the check box next to some fields may make additional fields available. • Touch to add additional fields.Touch to remove an unused field. Also, touch Add another field to add other fields. • Touch the screen and swipe up or down to display additional fields or touch Next on the keyboard to move to the next field. 5. Touch Back to remove the keyboard. 6. When you finish entering information, touch Save to save your changes or touch Cancel ➔ OK to cancel and discard changes. Tip: Display a contact's record and touch the Email field to send an email, the Address field to display the address on a map, or the Website field to link to the website. Updating Contacts from Recent Calls Save a phone number from a recent call to create a new contact, or update an existing contact. For more information, refer to "Saving a Recent Call as a Contact" on page 54. Contacts and Accounts 37
-
 1
1 -
2
-
3
-
4
-
5
-
6
-
7
-
8
-
9
-
10
-
11
-
12
-
13
-
14
-
15
-
16
-
17
-
18
-
19
-
20
-
21
-
22
-
23
-
24
-
25
-
26
-
27
-
28
-
29
-
30
-
31
-
32
-
33
-
34
-
35
-
36
-
37
-
 38
38 -
 39
39 -
 40
40 -
 41
41 -
 42
42 -
 43
43 -
 44
44 -
 45
45 -
 46
46 -
 47
47 -
 48
48 -
49
-
50
-
51
-
52
-
53
-
54
-
55
-
56
-
57
-
58
-
59
-
60
-
61
-
62
-
63
-
64
-
65
-
66
-
67
-
68
-
69
-
70
-
71
-
72
-
73
-
74
-
75
-
76
-
77
-
78
-
79
-
80
-
81
-
82
-
83
-
84
-
85
-
86
-
87
-
88
-
89
-
90
-
91
-
92
-
93
-
94
-
95
-
96
-
97
-
98
-
99
-
100
-
101
-
102
-
103
-
104
-
105
-
106
-
107
-
108
-
109
-
110
-
111
-
112
-
113
-
114
-
115
-
116
-
117
-
118
-
119
-
120
-
121
-
122
-
123
-
124
-
125
-
126
-
127
-
128
-
129
-
130
-
131
-
132
-
133
-
134
-
135
-
136
-
137
-
138
-
139
-
140
-
141
-
142
-
143
-
144
-
145
-
146
-
147
-
148
-
149
-
150
-
151
-
152
-
153
-
154
-
155
-
156
-
157
-
158
-
159
-
160
-
161
-
162
-
163
-
164
-
165
-
166
-
167
-
168
-
169
-
170
 |
 |
