Xerox 4150 User Guide - Page 102
Address List, Entering an E-mail Address
 |
UPC - 095205228717
View all Xerox 4150 manuals
Add to My Manuals
Save this manual to your list of manuals |
Page 102 highlights
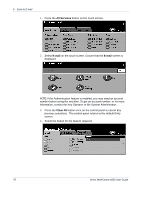
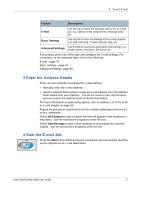
6 Scan to E-mail Remove All Use this option to delete all addresses from the Address List. NOTE: The e-mail subject and body text are not deleted. Address List Displays all the recipient addresses entered for the current scan to e-mail job. Up to 128 recipient addresses can be entered in the list. Entering an E-mail Address You can use either the keypad on the Touch Screen or the Address Book to enter an e-mail address. NOTE: When entering e-mail details you can change the keypad on the Touch Screen to show upper or lower case, accented characters or numbers by selecting the appropriate button. Use the Back button to delete the previously entered character. Manually If you already know the full SMTP e-mail address of your recipient, or if you know that the recipient is not in any of the configured address books, you can use the keypad on the touch screen to enter an e-mail address in the To..., Cc... or Bcc... fields. To delete a character, press the Backspace button. Address Book Address books contain a list of e-mail addresses and details that are relevant to your company and/or you. If configured, your machine is able to support two types of e-mail address books - Public and Internal. When an entry is made in To..., Cc... or Bcc... the Address Book displays search results for one or both configured address books. Use the keypad on the touch screen to enter the e-mail recipient's name. As with most search facilities, you do not need to enter the full name and can search the address book on the first few letters. When you have entered the e-mail search criteria, select the Enter button. If there are no matching entries, select the Change Address Book button to search the other address book. If one or more matches are found based on the search criteria, the matches display on the touch screen. Use the up/down scroll buttons to locate the recipient. Highlight the recipient in the list and select the Add button. Continue this process until you have added all the required recipients. On completion select the Done button. The entered e-mail addresses will be shown in the Address List. 80 Xerox WorkCentre 4150 User Guide
-
 1
1 -
2
-
3
-
4
-
5
-
6
-
7
-
8
-
9
-
10
-
11
-
12
-
13
-
14
-
15
-
16
-
17
-
18
-
19
-
20
-
21
-
22
-
23
-
24
-
25
-
26
-
27
-
28
-
29
-
30
-
31
-
32
-
33
-
34
-
35
-
36
-
37
-
38
-
39
-
40
-
41
-
42
-
43
-
44
-
45
-
46
-
47
-
48
-
49
-
50
-
51
-
52
-
53
-
54
-
55
-
56
-
57
-
58
-
59
-
60
-
61
-
62
-
63
-
64
-
65
-
66
-
67
-
68
-
69
-
70
-
71
-
72
-
73
-
74
-
75
-
76
-
77
-
78
-
79
-
80
-
81
-
82
-
83
-
84
-
85
-
86
-
87
-
88
-
89
-
90
-
91
-
92
-
93
-
94
-
95
-
96
-
 97
97 -
 98
98 -
 99
99 -
 100
100 -
 101
101 -
 102
102 -
 103
103 -
 104
104 -
 105
105 -
 106
106 -
 107
107 -
108
-
109
-
110
-
111
-
112
-
113
-
114
-
115
-
116
-
117
-
118
-
119
-
120
-
121
-
122
-
123
-
124
-
125
-
126
-
127
-
128
-
129
-
130
-
131
-
132
-
133
-
134
-
135
-
136
-
137
-
138
-
139
-
140
-
141
-
142
-
143
-
144
-
145
-
146
-
147
-
148
-
149
-
150
-
151
-
152
-
153
-
154
-
155
-
156
-
157
-
158
-
159
-
160
-
161
-
162
-
163
-
164
-
165
-
166
-
167
-
168
-
169
-
170
-
171
-
172
-
173
-
174
-
175
-
176
-
177
-
178
-
179
-
180
-
181
-
182
-
183
-
184
-
185
-
186
-
187
-
188
-
189
-
190
-
191
-
192
-
193
-
194
-
195
-
196
-
197
-
198
-
199
-
200
-
201
 |
 |
