Xerox 4150 User Guide - Page 149
Change Default Settings, Set (Power Save) Duration Times, Entry Screen Default, Job Status Default
 |
UPC - 095205228717
View all Xerox 4150 manuals
Add to My Manuals
Save this manual to your list of manuals |
Page 149 highlights
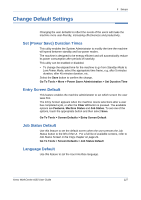
Change Default Settings 9 Setups Changing the user defaults to reflect the needs of the users will make the machine more user-friendly, increasing effectiveness and productivity. Set (Power Save) Duration Times This utility enables the System Administrator to modify the time the machine will spend between standby and low power modes. The machine is designed to be energy efficient and will automatically reduce its power consumption after periods of inactivity. This utility can be enabled or disabled. • To change the elapsed time for the machine to go from Standby Mode to Low Power Mode, select the appropriate time frame, e.g. after 5 minutes duration, after 45 minutes duration, etc. Select the Save button to confirm the change. Go To Tools > More > Power Saver Administration > Set Duration Time Entry Screen Default This feature enables the machine administrator to set which screen the user sees first. The Entry Screen appears when the machine resets selections after a user has completed a job, or after the Clear All button is pressed. The available options are Features, Machine Status and Job Status. To set one of the options, touch the appropriate button and then select Save. Go To Tools > Screen Defaults > Entry Screen Default Job Status Default Use this feature to set the default screen when the user presses the Job Status button to the left of the UI. For a full list of available screens, refer to Job Status Screen in the Copy chapter on page 21. Go To Tools > Screen Defaults > Job Status Default Language Default Use this feature to set the User Interface language. Xerox WorkCentre 4150 User Guide 127
-
 1
1 -
2
-
3
-
4
-
5
-
6
-
7
-
8
-
9
-
10
-
11
-
12
-
13
-
14
-
15
-
16
-
17
-
18
-
19
-
20
-
21
-
22
-
23
-
24
-
25
-
26
-
27
-
28
-
29
-
30
-
31
-
32
-
33
-
34
-
35
-
36
-
37
-
38
-
39
-
40
-
41
-
42
-
43
-
44
-
45
-
46
-
47
-
48
-
49
-
50
-
51
-
52
-
53
-
54
-
55
-
56
-
57
-
58
-
59
-
60
-
61
-
62
-
63
-
64
-
65
-
66
-
67
-
68
-
69
-
70
-
71
-
72
-
73
-
74
-
75
-
76
-
77
-
78
-
79
-
80
-
81
-
82
-
83
-
84
-
85
-
86
-
87
-
88
-
89
-
90
-
91
-
92
-
93
-
94
-
95
-
96
-
97
-
98
-
99
-
100
-
101
-
102
-
103
-
104
-
105
-
106
-
107
-
108
-
109
-
110
-
111
-
112
-
113
-
114
-
115
-
116
-
117
-
118
-
119
-
120
-
121
-
122
-
123
-
124
-
125
-
126
-
127
-
128
-
129
-
130
-
131
-
132
-
133
-
134
-
135
-
136
-
137
-
138
-
139
-
140
-
141
-
142
-
143
-
 144
144 -
 145
145 -
 146
146 -
 147
147 -
 148
148 -
 149
149 -
 150
150 -
 151
151 -
 152
152 -
 153
153 -
 154
154 -
155
-
156
-
157
-
158
-
159
-
160
-
161
-
162
-
163
-
164
-
165
-
166
-
167
-
168
-
169
-
170
-
171
-
172
-
173
-
174
-
175
-
176
-
177
-
178
-
179
-
180
-
181
-
182
-
183
-
184
-
185
-
186
-
187
-
188
-
189
-
190
-
191
-
192
-
193
-
194
-
195
-
196
-
197
-
198
-
199
-
200
-
201
 |
 |
