Xerox 4150 User Guide - Page 141
Forward All Faxes, Forward to E-mail
 |
UPC - 095205228717
View all Xerox 4150 manuals
Add to My Manuals
Save this manual to your list of manuals |
Page 141 highlights
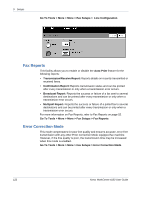
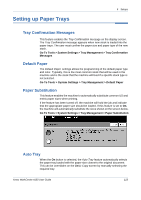
9 Setups Receive Header Select Enable to have a time stamp, page number and number of the sending fax machine printed at the top of all received fax jobs. Fax Receive Tray Select from either Tray 1, Tray 2 or the Bypass Tray to use for incoming fax transmissions. Default Output Options Depending on the output device fitted, you will be able to staple or duplex your incoming faxes. This utility is used to enable the output options you require for all your incoming faxes. To select the output you require, select the Stapled button or the Duplex button, then select the On button. Both options can be on if required. The Stapling option will put a single staple in the top left corner of faxes. If the fax job has 1 sheet or more than 50 sheets, the fax job will not staple. The Duplex option will assume Head-to-Head orientation (like a book). E-mail / Fax This feature allows incoming or outgoing faxes to be automatically forwarded forward to another recipient, either fax or e-mail. Forward to E-mail Select either Forward All Faxes, Forward Transmitted Faxes or Forward Received Faxes. Select either Output Format pdf or Output Format TIFF. Enter forwarding E-mail address and Save settings. Forward to Fax Select either Forward All Faxes, Forward Transmitted Faxes or Forward Received Faxes. Enter forwarding fax number and Save settings. Secure Receive For added security, this feature enables the machine administrator to control when and how your incoming faxes are printed. To print a fax on receipt, the Secure Receive feature must be Off. Select the On button to hold the incoming fax until a passcode is used. Print on Passcode settings can be changed using the number keypad. Touch Save to confirm changes. When a fax is received, the screen will prompt you to insert a four digit passcode number (the default setting is 1111). This number will then be used by the user to release incoming faxes from the print queue. Junk Fax This tool enables the machine administrator to prevent the receipt of unwanted Prevention (junk) faxes. This is done by only allowing the receipt of faxes from numbers held in the dial directory. Xerox WorkCentre 4150 User Guide 119
-
 1
1 -
2
-
3
-
4
-
5
-
6
-
7
-
8
-
9
-
10
-
11
-
12
-
13
-
14
-
15
-
16
-
17
-
18
-
19
-
20
-
21
-
22
-
23
-
24
-
25
-
26
-
27
-
28
-
29
-
30
-
31
-
32
-
33
-
34
-
35
-
36
-
37
-
38
-
39
-
40
-
41
-
42
-
43
-
44
-
45
-
46
-
47
-
48
-
49
-
50
-
51
-
52
-
53
-
54
-
55
-
56
-
57
-
58
-
59
-
60
-
61
-
62
-
63
-
64
-
65
-
66
-
67
-
68
-
69
-
70
-
71
-
72
-
73
-
74
-
75
-
76
-
77
-
78
-
79
-
80
-
81
-
82
-
83
-
84
-
85
-
86
-
87
-
88
-
89
-
90
-
91
-
92
-
93
-
94
-
95
-
96
-
97
-
98
-
99
-
100
-
101
-
102
-
103
-
104
-
105
-
106
-
107
-
108
-
109
-
110
-
111
-
112
-
113
-
114
-
115
-
116
-
117
-
118
-
119
-
120
-
121
-
122
-
123
-
124
-
125
-
126
-
127
-
128
-
129
-
130
-
131
-
132
-
133
-
134
-
135
-
 136
136 -
 137
137 -
 138
138 -
 139
139 -
 140
140 -
 141
141 -
 142
142 -
 143
143 -
 144
144 -
 145
145 -
 146
146 -
147
-
148
-
149
-
150
-
151
-
152
-
153
-
154
-
155
-
156
-
157
-
158
-
159
-
160
-
161
-
162
-
163
-
164
-
165
-
166
-
167
-
168
-
169
-
170
-
171
-
172
-
173
-
174
-
175
-
176
-
177
-
178
-
179
-
180
-
181
-
182
-
183
-
184
-
185
-
186
-
187
-
188
-
189
-
190
-
191
-
192
-
193
-
194
-
195
-
196
-
197
-
198
-
199
-
200
-
201
 |
 |