Xerox 4150 User Guide - Page 179
Replacing the SMart KitTM Drum Cartridge, Confirm - toner cartridge
 |
UPC - 095205228717
View all Xerox 4150 manuals
Add to My Manuals
Save this manual to your list of manuals |
Page 179 highlights
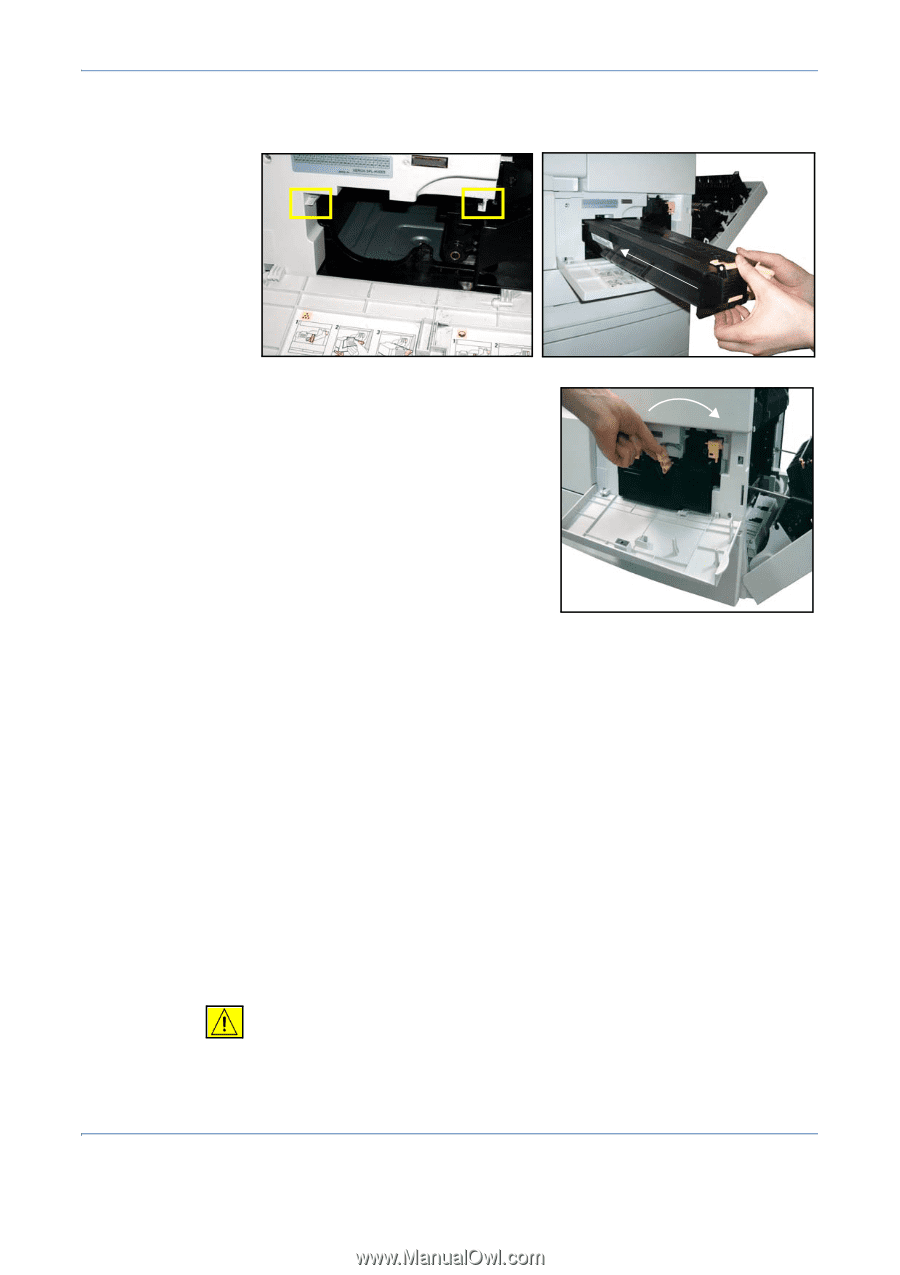
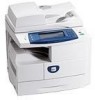
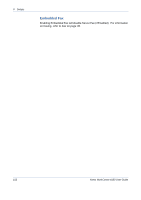
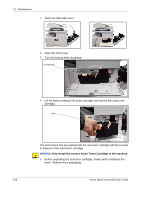
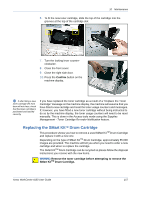
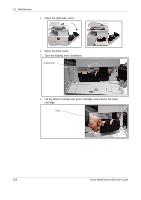
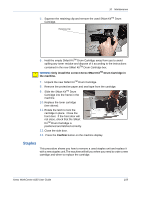
10 Maintenance 6. To fit the new toner cartridge, slide the top of the cartridge into the grooves at the top of the cartridge slot. 7. Turn the locking lever counter- clockwise. 8. Close the front cover. 9. Close the right side door. 10.Press the Confirm button on the machine display. If after fitting a new toner cartridge the front door will not close, check that the toner cartridge is positioned and latched correctly. If you have replaced the toner cartridge as a result of a "Replace the Toner Cartridge" message on the machine display, the machine will assume that you have fitted a new cartridge and reset the toner usage counters and messages. If, however, you have fitted a new toner cartridge without being instructed to do so by the machine display, the toner usage counters will need to be reset manually. This is done in the Access tools mode using the Supplies Management - Toner Cartridge Re-order Notification feature. Replacing the SMart KitTM Drum Cartridge This procedure shows you how to remove a used SMart KitTM Drum Cartridge and replace it with a new one. Depending on the type of SMart KitTM Drum Cartridge, approximately 55,000 images are provided. The machine will tell you when you need to order a new cartridge and when to replace the cartridge. The SMart KitTM Drum Cartridge can be recycled so please follow the disposal instructions you receive with the new items. WARNING: Remove the toner cartridge before attempting to remove the SMart KitTM Drum Cartridge. Xerox WorkCentre 4150 User Guide 157
-
 1
1 -
2
-
3
-
4
-
5
-
6
-
7
-
8
-
9
-
10
-
11
-
12
-
13
-
14
-
15
-
16
-
17
-
18
-
19
-
20
-
21
-
22
-
23
-
24
-
25
-
26
-
27
-
28
-
29
-
30
-
31
-
32
-
33
-
34
-
35
-
36
-
37
-
38
-
39
-
40
-
41
-
42
-
43
-
44
-
45
-
46
-
47
-
48
-
49
-
50
-
51
-
52
-
53
-
54
-
55
-
56
-
57
-
58
-
59
-
60
-
61
-
62
-
63
-
64
-
65
-
66
-
67
-
68
-
69
-
70
-
71
-
72
-
73
-
74
-
75
-
76
-
77
-
78
-
79
-
80
-
81
-
82
-
83
-
84
-
85
-
86
-
87
-
88
-
89
-
90
-
91
-
92
-
93
-
94
-
95
-
96
-
97
-
98
-
99
-
100
-
101
-
102
-
103
-
104
-
105
-
106
-
107
-
108
-
109
-
110
-
111
-
112
-
113
-
114
-
115
-
116
-
117
-
118
-
119
-
120
-
121
-
122
-
123
-
124
-
125
-
126
-
127
-
128
-
129
-
130
-
131
-
132
-
133
-
134
-
135
-
136
-
137
-
138
-
139
-
140
-
141
-
142
-
143
-
144
-
145
-
146
-
147
-
148
-
149
-
150
-
151
-
152
-
153
-
154
-
155
-
156
-
157
-
158
-
159
-
160
-
161
-
162
-
163
-
164
-
165
-
166
-
167
-
168
-
169
-
170
-
171
-
172
-
173
-
 174
174 -
 175
175 -
 176
176 -
 177
177 -
 178
178 -
 179
179 -
 180
180 -
 181
181 -
 182
182 -
 183
183 -
 184
184 -
185
-
186
-
187
-
188
-
189
-
190
-
191
-
192
-
193
-
194
-
195
-
196
-
197
-
198
-
199
-
200
-
201
 |
 |