Brother International HL 1850 Service Manual - Page 43
previously
 |
UPC - 012502603900
View all Brother International HL 1850 manuals
Add to My Manuals
Save this manual to your list of manuals |
Page 43 highlights
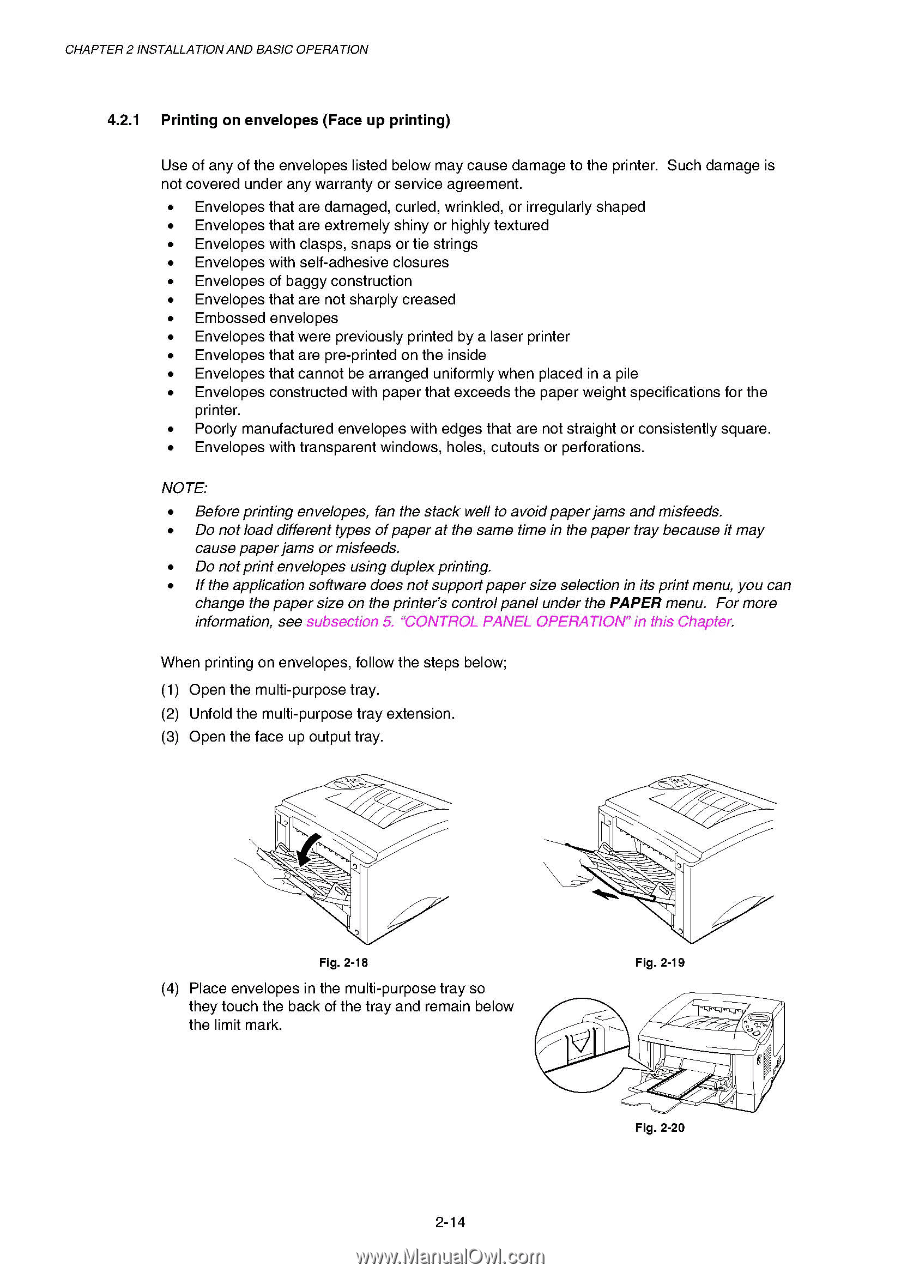
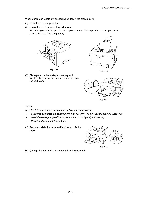
CHAPTER 2 INSTALLATIONAND BASIC OPERATION 4.2.1 Printing on envelopes (Face up printing) Use of any of the envelopes listed below may cause damage to the printer. Such damage is not covered under any warranty or service agreement. • Envelopes that are damaged, curled, wrinkled, or irregularly shaped • Envelopes that are extremely shiny or highly textured • Envelopes with clasps, snaps or tie strings • Envelopes with self-adhesive closures • Envelopes of baggy construction • Envelopes that are not sharply creased • Embossed envelopes • Envelopes that were previously printed by a laser printer • Envelopes that are pre-printed on the inside • Envelopes that cannot be arranged uniformly when placed in a pile • Envelopes constructed with paper that exceeds the paper weight specifications for the printer. • Poorly manufactured envelopes with edges that are not straight or consistently square. • Envelopes with transparent windows, holes, cutouts or perforations. NOTE: • Before printing envelopes, fan the stack well to avoid paper jams and misfeeds. • Do not load different types of paper at the same time in the paper tray because it may cause paper jams or misfeeds. • Do not print envelopes using duplex printing. • If the application software does not support paper size selection in its print menu, you can change the paper size on the printer's control panel under the PAPER menu. For more information, see subsection 5. "CONTROL PANEL OPERATION" in this Chapter. When printing on envelopes, follow the steps below; (1) Open the multi-purpose tray. (2) Unfold the multi-purpose tray extension. (3) Open the face up output tray. tz Z. )...7.7... c, .*) Fig. 2-18 (4) Place envelopes in the multi-purpose tray so they touch the back of the tray and remain below the limit mark. c, ') Fig. 2-19 c __---- r----___ , , Fig. 2-20 2-14
-
 1
1 -
2
-
3
-
4
-
5
-
6
-
7
-
8
-
9
-
10
-
11
-
12
-
13
-
14
-
15
-
16
-
17
-
18
-
19
-
20
-
21
-
22
-
23
-
24
-
25
-
26
-
27
-
28
-
29
-
30
-
31
-
32
-
33
-
34
-
35
-
36
-
37
-
 38
38 -
 39
39 -
 40
40 -
 41
41 -
 42
42 -
 43
43 -
 44
44 -
 45
45 -
 46
46 -
 47
47 -
 48
48 -
49
-
50
-
51
-
52
-
53
-
54
-
55
-
56
-
57
-
58
-
59
-
60
-
61
-
62
-
63
-
64
-
65
-
66
-
67
-
68
-
69
-
70
-
71
-
72
-
73
-
74
-
75
-
76
-
77
-
78
-
79
-
80
-
81
-
82
-
83
-
84
-
85
-
86
-
87
-
88
-
89
-
90
-
91
-
92
-
93
-
94
-
95
-
96
-
97
-
98
-
99
-
100
-
101
-
102
-
103
-
104
-
105
-
106
-
107
-
108
-
109
-
110
-
111
-
112
-
113
-
114
-
115
-
116
-
117
-
118
-
119
-
120
-
121
-
122
-
123
-
124
-
125
-
126
-
127
-
128
-
129
-
130
-
131
-
132
-
133
-
134
-
135
-
136
-
137
-
138
-
139
-
140
-
141
-
142
-
143
-
144
-
145
-
146
-
147
-
148
-
149
-
150
-
151
-
152
-
153
-
154
-
155
-
156
-
157
-
158
-
159
-
160
-
161
-
162
-
163
-
164
-
165
-
166
-
167
-
168
-
169
-
170
-
171
-
172
-
173
-
174
-
175
-
176
-
177
-
178
-
179
-
180
-
181
-
182
-
183
-
184
-
185
-
186
-
187
-
188
-
189
-
190
-
191
-
192
-
193
-
194
-
195
-
196
-
197
-
198
-
199
-
200
-
201
-
202
-
203
-
204
-
205
-
206
-
207
-
208
-
209
-
210
-
211
-
212
-
213
-
214
-
215
-
216
-
217
-
218
-
219
-
220
-
221
-
222
-
223
-
224
-
225
-
226
-
227
-
228
-
229
-
230
-
231
-
232
-
233
-
234
-
235
-
236
-
237
-
238
-
239
-
240
-
241
-
242
-
243
-
244
-
245
-
246
-
247
-
248
-
249
-
250
-
251
-
252
-
253
-
254
-
255
-
256
-
257
-
258
-
259
-
260
-
261
-
262
-
263
-
264
-
265
-
266
-
267
-
268
-
269
-
270
-
271
-
272
-
273
-
274
-
275
-
276
-
277
 |
 |