Epson PowerLite 1825 User's Guide - Page 147
Capturing the Image, over the image.
 |
View all Epson PowerLite 1825 manuals
Add to My Manuals
Save this manual to your list of manuals |
Page 147 highlights
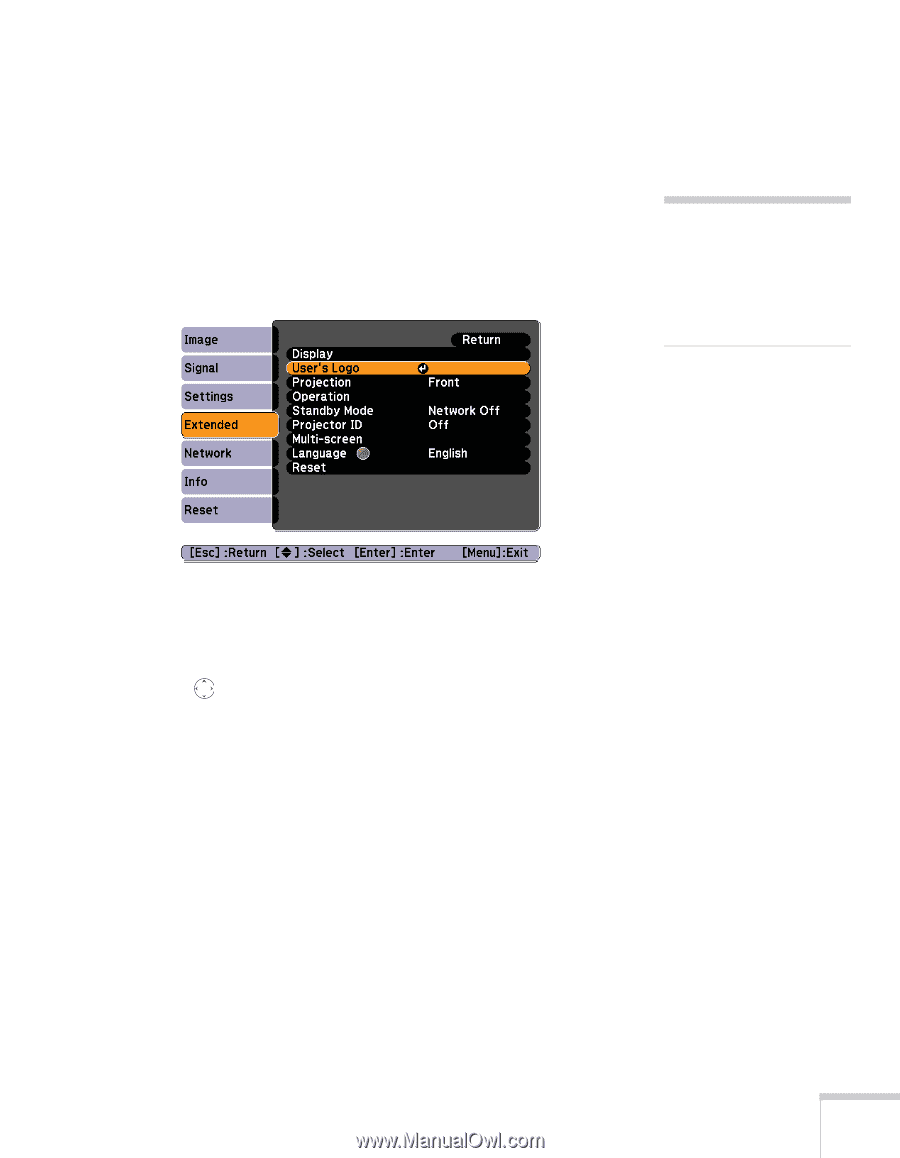
Capturing the Image Start by displaying the image you want to use from either a computer or video source, such as a DVD player or digital camera. Then follow these steps to capture the image and transfer it to the projector: 1. Press the Menu button on the remote control, highlight the Extended menu, and press Enter. 2. Highlight User's Logo and press Enter. 333 note When you choose an image for the user's logo, it erases any previously used image. You can save an image up to 300 × 400 pixels in size. 3. When you see a message asking Choose this image as the user's logo?, select Yes and press Enter. A selection box displays over the image. 4. Use the pointer button to select the area of the image you want to use. Then press Enter. 5. When you see the message Select this Image?, highlight Yes and press Enter. 6. Use the arrow buttons to select a zoom factor (display size) and press Enter. 7. When the message Save this image as the user's logo? appears, select Yes and press Enter. Saving the logo may take a few moments. Do not use your projector, remote control, or video source while the logo is being saved. 8. When you see the message Completed, press Menu to exit the menu system. Fine-Tuning the Projector 147
-
 1
1 -
2
-
3
-
4
-
5
-
6
-
7
-
8
-
9
-
10
-
11
-
12
-
13
-
14
-
15
-
16
-
17
-
18
-
19
-
20
-
21
-
22
-
23
-
24
-
25
-
26
-
27
-
28
-
29
-
30
-
31
-
32
-
33
-
34
-
35
-
36
-
37
-
38
-
39
-
40
-
41
-
42
-
43
-
44
-
45
-
46
-
47
-
48
-
49
-
50
-
51
-
52
-
53
-
54
-
55
-
56
-
57
-
58
-
59
-
60
-
61
-
62
-
63
-
64
-
65
-
66
-
67
-
68
-
69
-
70
-
71
-
72
-
73
-
74
-
75
-
76
-
77
-
78
-
79
-
80
-
81
-
82
-
83
-
84
-
85
-
86
-
87
-
88
-
89
-
90
-
91
-
92
-
93
-
94
-
95
-
96
-
97
-
98
-
99
-
100
-
101
-
102
-
103
-
104
-
105
-
106
-
107
-
108
-
109
-
110
-
111
-
112
-
113
-
114
-
115
-
116
-
117
-
118
-
119
-
120
-
121
-
122
-
123
-
124
-
125
-
126
-
127
-
128
-
129
-
130
-
131
-
132
-
133
-
134
-
135
-
136
-
137
-
138
-
139
-
140
-
141
-
 142
142 -
 143
143 -
 144
144 -
 145
145 -
 146
146 -
 147
147 -
 148
148 -
 149
149 -
 150
150 -
 151
151 -
 152
152 -
153
-
154
-
155
-
156
-
157
-
158
-
159
-
160
-
161
-
162
-
163
-
164
-
165
-
166
-
167
-
168
-
169
-
170
-
171
-
172
-
173
-
174
-
175
-
176
-
177
-
178
-
179
-
180
-
181
-
182
-
183
-
184
-
185
-
186
-
187
-
188
-
189
-
190
-
191
-
192
-
193
-
194
-
195
-
196
-
197
-
198
-
199
-
200
-
201
-
202
-
203
-
204
-
205
-
206
-
207
-
208
-
209
-
210
-
211
-
212
-
213
-
214
-
215
-
216
-
217
-
218
-
219
-
220
-
221
-
222
 |
 |