Epson PowerLite 1825 User's Guide - Page 154
Connecting to a Wired Network
 |
View all Epson PowerLite 1825 manuals
Add to My Manuals
Save this manual to your list of manuals |
Page 154 highlights
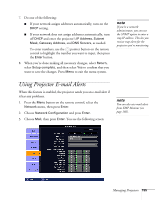
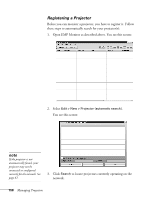
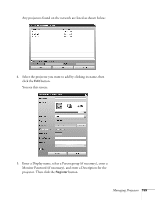
Connecting to a Wired Network Follow these steps to connect the projector to your network and configure it with an IP address: 1. Connect the projector to your network using a commercially available 100BaseTX or 10BaseT network cable. Connect the cable to the LAN port on the projector. See page 55. 2. Point the remote control at the projector and press the P Power button. 3. Press the EasyMP button on the remote control to select EasyMP as the source. 4. Press the Menu button on the remote control, select the Network menu, then press Enter. 5. Choose Network Configuration and press Enter. 6. Choose Wired LAN and press Enter. You see the following screen: 154 Managing Projectors
-
 1
1 -
2
-
3
-
4
-
5
-
6
-
7
-
8
-
9
-
10
-
11
-
12
-
13
-
14
-
15
-
16
-
17
-
18
-
19
-
20
-
21
-
22
-
23
-
24
-
25
-
26
-
27
-
28
-
29
-
30
-
31
-
32
-
33
-
34
-
35
-
36
-
37
-
38
-
39
-
40
-
41
-
42
-
43
-
44
-
45
-
46
-
47
-
48
-
49
-
50
-
51
-
52
-
53
-
54
-
55
-
56
-
57
-
58
-
59
-
60
-
61
-
62
-
63
-
64
-
65
-
66
-
67
-
68
-
69
-
70
-
71
-
72
-
73
-
74
-
75
-
76
-
77
-
78
-
79
-
80
-
81
-
82
-
83
-
84
-
85
-
86
-
87
-
88
-
89
-
90
-
91
-
92
-
93
-
94
-
95
-
96
-
97
-
98
-
99
-
100
-
101
-
102
-
103
-
104
-
105
-
106
-
107
-
108
-
109
-
110
-
111
-
112
-
113
-
114
-
115
-
116
-
117
-
118
-
119
-
120
-
121
-
122
-
123
-
124
-
125
-
126
-
127
-
128
-
129
-
130
-
131
-
132
-
133
-
134
-
135
-
136
-
137
-
138
-
139
-
140
-
141
-
142
-
143
-
144
-
145
-
146
-
147
-
148
-
 149
149 -
 150
150 -
 151
151 -
 152
152 -
 153
153 -
 154
154 -
 155
155 -
 156
156 -
 157
157 -
 158
158 -
 159
159 -
160
-
161
-
162
-
163
-
164
-
165
-
166
-
167
-
168
-
169
-
170
-
171
-
172
-
173
-
174
-
175
-
176
-
177
-
178
-
179
-
180
-
181
-
182
-
183
-
184
-
185
-
186
-
187
-
188
-
189
-
190
-
191
-
192
-
193
-
194
-
195
-
196
-
197
-
198
-
199
-
200
-
201
-
202
-
203
-
204
-
205
-
206
-
207
-
208
-
209
-
210
-
211
-
212
-
213
-
214
-
215
-
216
-
217
-
218
-
219
-
220
-
221
-
222
 |
 |

154
Managing Projectors
Connecting to a Wired Network
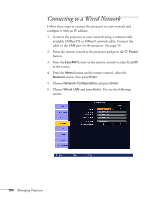
Follow these steps to connect the projector to your network and
configure it with an IP address:
1.
Connect the projector to your network using a commercially
available 100BaseTX or 10BaseT network cable. Connect the
cable to the
LAN
port on the projector. See page 55.
2.
Point the remote control at the projector and press the
P
Power
button.
3.
Press the
EasyMP
button on the remote control to select EasyMP
as the source.
4.
Press the
Menu
button on the remote control, select the
Network
menu, then press
Enter
.
5.
Choose
Network Configuration
and press
Enter
.
6.
Choose
Wired LAN
and press
Enter
. You see the following
screen: