Oki MB471 Users Manual Basic - Page 109
Scanning Methods, Scan to E-mail, Specifying a Destination, Using the Address Book or Group
 |
View all Oki MB471 manuals
Add to My Manuals
Save this manual to your list of manuals |
Page 109 highlights
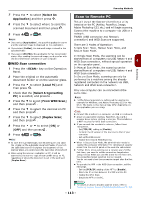
Scanning Methods Scanning Methods This section explains the basic operation of the scan function. In scan mode, you can use five scan functions, scan to e-mail, scan to USB memory, scan to network computer, scan to local computer and PC scan. You can select these functions after pressing key. Reference The scan function supports the Continuous Scan mode. For details on the [Continuous Scan] functions, refer to "Enabling Continuous Scan Mode (Continuous Scan)" P. 82. Scanning Scan to E-mail You can scan a document and attach it to an e-mail. 1 Press the key on the operator panel. 2 Place your document with text face up in the ADF or face down on the document glass. 3 Make sure [E-mail] is selected and then press . OK Specifying a Destination You can specify a destination in the following six ways: Using the address book 4 Using a group list Using the e-mail history Direct input Using LDAP search Using the one-touch key pad Perform any of the following operations at step 6 of "Scan to E-mail" stated above. Using the Address Book or Group List You can select a destination from the address book or group list. Be sure to register them in advance. Memo Here you can add addressees by using one-touch keys. You can add addresses with [To]. Thereafter, you can add multiple addresses using the one-touch keys. 4 Make sure [Add Destination] is selected and then press . OK 5 Make sure [To] is selected and then press . OK Press the to select [Cc] or [Bcc] and then press OK . 6 Specify a destination. You can specify a destination by direct input or from the address book, groups, e-mail histories, LDAP or one-touch key. 7 Press or . MONO COLOR Reference For how to register destinations in the address book or group list, refer to "Registering Address Book" P. 119. 1 Press the to select [Address book] or [Group list] and then press . OK 2 Press the to select the destination or group you want and then press . OK The check box is selected. You can select multiple entries. 3 When you have selected all the destinations, press the . 4 Check that [Complete] is selected and then press . OK 5 Press the to return to start screen. Using E-mail History You can select a destination from transmission histories. 1 Press the to select [Tx History] and then press . OK 2 Press the to select a destination and then press . OK The check box is selected. You can select multiple entries. - 109 -
-
 1
1 -
2
-
3
-
4
-
5
-
6
-
7
-
8
-
9
-
10
-
11
-
12
-
13
-
14
-
15
-
16
-
17
-
18
-
19
-
20
-
21
-
22
-
23
-
24
-
25
-
26
-
27
-
28
-
29
-
30
-
31
-
32
-
33
-
34
-
35
-
36
-
37
-
38
-
39
-
40
-
41
-
42
-
43
-
44
-
45
-
46
-
47
-
48
-
49
-
50
-
51
-
52
-
53
-
54
-
55
-
56
-
57
-
58
-
59
-
60
-
61
-
62
-
63
-
64
-
65
-
66
-
67
-
68
-
69
-
70
-
71
-
72
-
73
-
74
-
75
-
76
-
77
-
78
-
79
-
80
-
81
-
82
-
83
-
84
-
85
-
86
-
87
-
88
-
89
-
90
-
91
-
92
-
93
-
94
-
95
-
96
-
97
-
98
-
99
-
100
-
101
-
102
-
103
-
 104
104 -
 105
105 -
 106
106 -
 107
107 -
 108
108 -
 109
109 -
 110
110 -
 111
111 -
 112
112 -
 113
113 -
 114
114 -
115
-
116
-
117
-
118
-
119
-
120
-
121
-
122
-
123
-
124
-
125
-
126
-
127
-
128
-
129
-
130
-
131
-
132
-
133
-
134
-
135
-
136
-
137
-
138
-
139
-
140
-
141
-
142
-
143
-
144
-
145
-
146
-
147
-
148
-
149
-
150
-
151
-
152
-
153
-
154
-
155
-
156
-
157
-
158
-
159
-
160
-
161
-
162
-
163
-
164
-
165
-
166
-
167
-
168
-
169
-
170
-
171
-
172
-
173
-
174
-
175
-
176
-
177
-
178
-
179
-
180
-
181
-
182
-
183
-
184
-
185
-
186
-
187
-
188
-
189
-
190
-
191
-
192
-
193
-
194
-
195
-
196
-
197
-
198
-
199
-
200
-
201
-
202
-
203
 |
 |
