Oki MB471 Users Manual Basic - Page 98
Basic Procedure for Scan To Fax Server, Transmitting Data to Fax Server, Specifying the destination
 |
View all Oki MB471 manuals
Add to My Manuals
Save this manual to your list of manuals |
Page 98 highlights
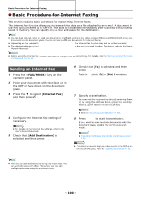
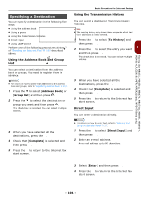
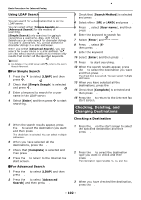
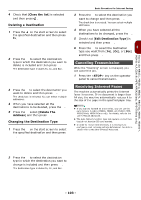
Basic Procedure for Scan To Fax Server Basic Procedure for Scan To Fax Server This section explains basic operations for data transmission to the fax server. The FaxServer function allows you to transmit fax data as a file attached to an e-mail. A document is scanned and converted to a TIFF file. The data is transmitted immediately after scanning without being saved in memory. You can specify only e-mail addresses for the destination. The Scan To Fax Server function must be enabled by Admin Setup (see the Advanced manual). Once the Scan To Fax Server function is enabled, the analog fax is disabled to send and receive messages. Memo You can load only A4, letter or legal size documents in the ADF, and only A4, letter or legal (MB491+LP/MPS4700mb only) size documents on the document glass. You cannot load mixed size documents for fax transmission. Depending on the recipient's machine, the document data sent by the FaxServer function may not be printed correctly. The detailed settings on the FaxServer function are the same as in the scan to e-mail function. For details, refer to the "User's Manual Advanced". Reference Before using the FaxServer function, you must set up the server. For the server setup, refer to "Setting Up Scan To E-mail and Internet Fax" P. 66. Transmitting Data to Fax Server 1 Press the key on the operator panel. 2 The original can be set by an automatic document feeder or the document glass. 3 Select [FAX], and then press . OK 4 Set the scan options as required. Reference "User's Manual Advanced". 5 Check that [Add Destination] is selected, and then press . OK 7 Press the Start button to start fax transmission. When you scan multiple documents on the document glass, enable the Continuous Scan mode. Reference "Enabling Continuous Scan Mode (Continuous Scan)" P. 82. Specifying the destination You can specify fax destination in any of the following four ways: • Using the Speed Dial List • Using the Group List • Using the Direct Input • Using the Tx History Use any of the following operations in the procedure of "Transmitting Data to Fax Server" P. 98. Using the Speed Dial List or Group List 6 Specify the destination fax number. You can specify the destination using either the Speed Dial List, Group List, Direct Input, or Tx History. You can quickly select fax destinations from the Speed Dial List or Group List. You need to register recipients on the Speed Dial List or Group List in advance. Reference For fax number entry on the Speed Dial List or Group List, refer to the "Phone Book" P. 95. 1 Press the to select [Speed Dial List] or [Group List], and then press . OK 2 Press the to select the destination or group, and then press . OK - 98 -
-
 1
1 -
2
-
3
-
4
-
5
-
6
-
7
-
8
-
9
-
10
-
11
-
12
-
13
-
14
-
15
-
16
-
17
-
18
-
19
-
20
-
21
-
22
-
23
-
24
-
25
-
26
-
27
-
28
-
29
-
30
-
31
-
32
-
33
-
34
-
35
-
36
-
37
-
38
-
39
-
40
-
41
-
42
-
43
-
44
-
45
-
46
-
47
-
48
-
49
-
50
-
51
-
52
-
53
-
54
-
55
-
56
-
57
-
58
-
59
-
60
-
61
-
62
-
63
-
64
-
65
-
66
-
67
-
68
-
69
-
70
-
71
-
72
-
73
-
74
-
75
-
76
-
77
-
78
-
79
-
80
-
81
-
82
-
83
-
84
-
85
-
86
-
87
-
88
-
89
-
90
-
91
-
92
-
 93
93 -
 94
94 -
 95
95 -
 96
96 -
 97
97 -
 98
98 -
 99
99 -
 100
100 -
 101
101 -
 102
102 -
 103
103 -
104
-
105
-
106
-
107
-
108
-
109
-
110
-
111
-
112
-
113
-
114
-
115
-
116
-
117
-
118
-
119
-
120
-
121
-
122
-
123
-
124
-
125
-
126
-
127
-
128
-
129
-
130
-
131
-
132
-
133
-
134
-
135
-
136
-
137
-
138
-
139
-
140
-
141
-
142
-
143
-
144
-
145
-
146
-
147
-
148
-
149
-
150
-
151
-
152
-
153
-
154
-
155
-
156
-
157
-
158
-
159
-
160
-
161
-
162
-
163
-
164
-
165
-
166
-
167
-
168
-
169
-
170
-
171
-
172
-
173
-
174
-
175
-
176
-
177
-
178
-
179
-
180
-
181
-
182
-
183
-
184
-
185
-
186
-
187
-
188
-
189
-
190
-
191
-
192
-
193
-
194
-
195
-
196
-
197
-
198
-
199
-
200
-
201
-
202
-
203
 |
 |
