Oki MB471 Users Manual Basic - Page 120
Group List, Register all E-mail addresses, Registering the Machine, Importing Addresses from a File
 |
View all Oki MB471 manuals
Add to My Manuals
Save this manual to your list of manuals |
Page 120 highlights
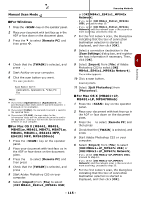
Registering Address Book Group List You can create up to 20 groups of e-mail addresses. Registering and Editing 3 Press the to select [E-mail Group] and then press . OK 4 Press the to select a group number and then press . OK Reference For details on how to enter text, refer to "Entering Text Using the Operator Panel" P. 27. 1 Press the key. 2 Press the to select [Address Book] and then press . OK 3 Press the to select [E-mail Group] and then press . OK 4 Press the to select a group number and then press . OK 5 Check that [Register] is selected and then press . OK If editing registered group numbers, select [Edit]. 6 Check that [Name] is selected and then press the . 7 Enter a name up to 16 characters. 8 Select [Enter] and then press . OK 9 Press the to select [Address Number] and then press . 10 Press the to select the desired e-mail address from the address book and then press . OK The check box is selected. You can select multiple entries. 11 When you have selected all the desired e-mail addresses, press the . 12 Check that [Complete] is selected and then press . OK 13 Press . OK Memo You can also register the e-mail group from [Group No] in [E-mail Address]. Deleting 1 Press the key. 5 Press the press . OK to select [Delete] and then 6 Press the or to select [Yes] on the confirmation screen and then press . OK Register all E-mail addresses All contents of the E-mail Address Book can be registered by using Configuration Tool. For setting up of Configuration Tool, see User's Manual (Advanced), "7. Useful Software". Registering the Machine When using the Configuration Tool or introducing a new machine, register the machine in the Configuration Tool. 1 Select [Start], [All Programs]> [Okidata]>[Configuration Tool]> [Configuration Tool]. 2 Select [Register Device] from the [Tools] menu. Search results are displayed. 3 Select the machine and click on [Register]. 4 On the confirmation screen, click on [Yes]. Importing Addresses from a File 1 Select from which device to import, from [Registered Device Table]. 2 Select the [User Setting] tab. 3 Click on [E-mail Address Manager]. 4 Enter the administrator password and click [OK]. 5 Click . 6 Select [Open] from [Select CSV File]. 7 Select the file you want to import and click on [Open]. 8 Click on [Next]. 9 Select the settings to import and click [Import]. 10 Click . 2 Press the to select [Address Book] and then press . OK Memo CSV files exported by Outlook Express (Windows email and Windows Live email) can also be restored. - 120 -
-
 1
1 -
2
-
3
-
4
-
5
-
6
-
7
-
8
-
9
-
10
-
11
-
12
-
13
-
14
-
15
-
16
-
17
-
18
-
19
-
20
-
21
-
22
-
23
-
24
-
25
-
26
-
27
-
28
-
29
-
30
-
31
-
32
-
33
-
34
-
35
-
36
-
37
-
38
-
39
-
40
-
41
-
42
-
43
-
44
-
45
-
46
-
47
-
48
-
49
-
50
-
51
-
52
-
53
-
54
-
55
-
56
-
57
-
58
-
59
-
60
-
61
-
62
-
63
-
64
-
65
-
66
-
67
-
68
-
69
-
70
-
71
-
72
-
73
-
74
-
75
-
76
-
77
-
78
-
79
-
80
-
81
-
82
-
83
-
84
-
85
-
86
-
87
-
88
-
89
-
90
-
91
-
92
-
93
-
94
-
95
-
96
-
97
-
98
-
99
-
100
-
101
-
102
-
103
-
104
-
105
-
106
-
107
-
108
-
109
-
110
-
111
-
112
-
113
-
114
-
 115
115 -
 116
116 -
 117
117 -
 118
118 -
 119
119 -
 120
120 -
 121
121 -
 122
122 -
 123
123 -
 124
124 -
 125
125 -
126
-
127
-
128
-
129
-
130
-
131
-
132
-
133
-
134
-
135
-
136
-
137
-
138
-
139
-
140
-
141
-
142
-
143
-
144
-
145
-
146
-
147
-
148
-
149
-
150
-
151
-
152
-
153
-
154
-
155
-
156
-
157
-
158
-
159
-
160
-
161
-
162
-
163
-
164
-
165
-
166
-
167
-
168
-
169
-
170
-
171
-
172
-
173
-
174
-
175
-
176
-
177
-
178
-
179
-
180
-
181
-
182
-
183
-
184
-
185
-
186
-
187
-
188
-
189
-
190
-
191
-
192
-
193
-
194
-
195
-
196
-
197
-
198
-
199
-
200
-
201
-
202
-
203
 |
 |
