Oki MB471 Users Manual Basic - Page 19
Turning On and Off Your Machine, Power Supply Conditions
 |
View all Oki MB471 manuals
Add to My Manuals
Save this manual to your list of manuals |
Page 19 highlights
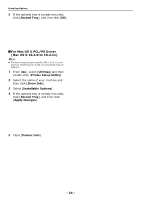
Setup 15 Reinstall the image drum in the printer:lower it into place in the printer locating the pegs (1) at each end into their slots in the sides of the printer cavity (2). 1 1 2 2 16 Turn the lever in the direction shown. The arrow on the lever should align with the arrow on the image drum. When the toner cartridge is not fully fixed , a decline in print quality may occur. 17 Close the top cover. 18 Close the scanner unit. Reference Please refer to "Loading Paper" P. 32 for information on how to load paper into the machine. Turning On and Off Your Machine Power Supply Conditions The power supply must meet the following conditions: Current: Frequency: 110 - 127VAC (Range 99 - 140 VAC) 220 - 240VAC (Range 198 - 264VAC) 50/60 Hz ± 2% Installing Your Machine Note If the power supply is unstable, use a voltage regulator. The maximum power consumption of this machine is 1 950W. Ensure that the power supply is sufficient to operate this machine. We do not guarantee the operation where an uninterruptible power system (UPS) or inverter is used. Do not use an uninterruptible power system (UPS) or inverter. There is a risk of getting WARNING an electric shock and/or causing fire. Be sure to cut off the power supply when attaching or removing the power supply plug or the earth wire. Be sure to connect an earth wire to the grounding terminal of exclusive use. Please do not connect with the ground of a water pipe, a gas pipe, and a telephone wire, or lightning rod without fail. Make sure to connect with the ground terminal before connecting the power cord to the power supply plug. Be sure to perform extraction and insertion of the power cord with a power supply plug. Insert the power supply plug into the wall socket securely. Do not touch the power cord, or machine, if your hands are wet. Install the power cord in a location where it will not be stepped on, and do not place objects on the power cord. Do not twist, bind, or knot the power cord. Please do not use a damaged power cord. Do not carry out foot wiring. Do not connect this machine and other electric products to the same wall socket. If connected simultaneously with an air-conditioner, a copy machine, shredder, etc., electric noise may interfere with operation. When the connection with the same wall socket is unavoidable, please use a commercial noise filter or a commercial noise cut transformer. Use the attached power cord and insert it directory with the ground terminal. Do not use power cords intended for other products with this machine. Do not use an extension cord. When use is unavoidable, use a cord rated higher than 15A. Use of an extended cord may cause AC voltage decrease and interfere with normal operation. During printing, do not shut off the power supply or pull out the power supply plug. When not in use for consecutive holidays or longterm travel, pull out the power cord. Do not use the attached power cord for other products. - 19 -
-
 1
1 -
2
-
3
-
4
-
5
-
6
-
7
-
8
-
9
-
10
-
11
-
12
-
13
-
 14
14 -
 15
15 -
 16
16 -
 17
17 -
 18
18 -
 19
19 -
 20
20 -
 21
21 -
 22
22 -
 23
23 -
 24
24 -
25
-
26
-
27
-
28
-
29
-
30
-
31
-
32
-
33
-
34
-
35
-
36
-
37
-
38
-
39
-
40
-
41
-
42
-
43
-
44
-
45
-
46
-
47
-
48
-
49
-
50
-
51
-
52
-
53
-
54
-
55
-
56
-
57
-
58
-
59
-
60
-
61
-
62
-
63
-
64
-
65
-
66
-
67
-
68
-
69
-
70
-
71
-
72
-
73
-
74
-
75
-
76
-
77
-
78
-
79
-
80
-
81
-
82
-
83
-
84
-
85
-
86
-
87
-
88
-
89
-
90
-
91
-
92
-
93
-
94
-
95
-
96
-
97
-
98
-
99
-
100
-
101
-
102
-
103
-
104
-
105
-
106
-
107
-
108
-
109
-
110
-
111
-
112
-
113
-
114
-
115
-
116
-
117
-
118
-
119
-
120
-
121
-
122
-
123
-
124
-
125
-
126
-
127
-
128
-
129
-
130
-
131
-
132
-
133
-
134
-
135
-
136
-
137
-
138
-
139
-
140
-
141
-
142
-
143
-
144
-
145
-
146
-
147
-
148
-
149
-
150
-
151
-
152
-
153
-
154
-
155
-
156
-
157
-
158
-
159
-
160
-
161
-
162
-
163
-
164
-
165
-
166
-
167
-
168
-
169
-
170
-
171
-
172
-
173
-
174
-
175
-
176
-
177
-
178
-
179
-
180
-
181
-
182
-
183
-
184
-
185
-
186
-
187
-
188
-
189
-
190
-
191
-
192
-
193
-
194
-
195
-
196
-
197
-
198
-
199
-
200
-
201
-
202
-
203
 |
 |
