Oki MB471 Users Manual Basic - Page 112
Scan to Local PC, Connecting via USB, Connecting via Network
 |
View all Oki MB471 manuals
Add to My Manuals
Save this manual to your list of manuals |
Page 112 highlights
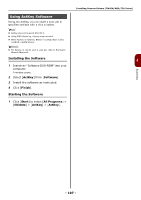
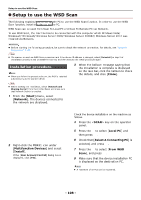
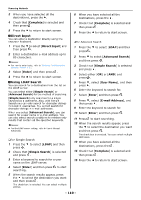
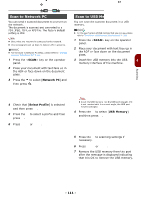
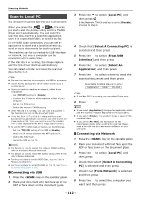
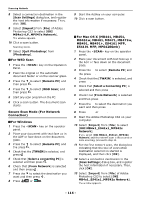
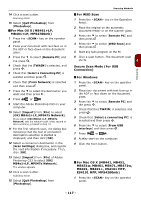
Scanning Methods Scan to Local PC You can save the scanned data into your local computer. When you press the or , the scan job starts and the ActMOKNOey utility andCOLORthe TWAIN driver start automatically. You can send the scanned document to a specified application, save it in a specified folder, or send it by fax. In the WSD Scan connection, you can set an application to start and a location where you send or store documents for each recipient. The machine can be connected to USB interface or network, but only a computer can be connected at the same time. If the Mac OS X is running, the image capture and the ICA driver start up automatically. You can select a folder and save the scanned documents in it. Note Connect the machine to a computer via USB or a network. Install ActKey and scanner driver before scanning to a local computer. If you connect the machine to network, follow these instructions. - Set [TCP/IP] setting to [Enable]. - Conform the IP version of the machine to that of your computer. - Set up the DNS server. - Enable the network TWAIN setting. If the Mac OS X is running, you can scan a document in the fixed A4 size only on the document glass. If the Mac OS X 10.7 to 10.8 is running and if you scan documents through network connection, you need to start the image capture first. Then, you need to select the machine from the list displayed at the left of image capture screen. To use the MFP in WSD Scan connection, set the followings. - Set the [TCP/IP] setting of the MFP to [Enable]. - Match the IP version between the MFP and the PC. - Enable the WSD Scan. - Install the MFP on the PC. Reference For details on how to enable the network TWAIN setting, refer to the User's Manual Advanced. For details on how to install the ActKey utility, refer to the User's Manual Advanced. For the procedure to enable WSD Scan, see the "User's Manual, Applications." For the procedure to install the MFP on the PC, see "Setup to use the WSD Scan" P. 108. Connecting via USB 1 Press the key on the operator panel. 2 Place your document with text face up in the ADF or face down on the document glass. 3 Press the to select [Local PC] and then press . OK If the Network TWAIN setting is set to [Disable], proceed to step 6. 4 Check that [Select A Connecting PC] is selected and then press . OK 5 Press the to select [From USB Interface] and then press . OK 6 Press the to select [Select An Application] and then press . OK 7 Press the to select where to send the scanned document and then press . OK Selectable location Values to send: Application Folder PC-FAX Note If the Mac OS X is running, you can select Folder only. 8 Press or . MONO COLOR Memo If you select [Application], the specified application starts and the scanned image is displayed on the application. If you select [Folder], the scanned image is saved in the specified folder. If you select [PC-FAX], the application for fax transmission starts. After sending the scanned image, send a fax with the fax transmission software on your computer. Connecting via Network 1 Press the key on the operator panel. 2 Place your document with text face up in the ADF or face down on the document glass. 3 Press the to select [Local PC] and then press . OK 4 Check that select [Select A Connecting PC] is selected and then press . OK 5 Check that [From Network] is selected and then press . OK 6 Press the to select the computer you want and then press . OK - 112 -
-
 1
1 -
2
-
3
-
4
-
5
-
6
-
7
-
8
-
9
-
10
-
11
-
12
-
13
-
14
-
15
-
16
-
17
-
18
-
19
-
20
-
21
-
22
-
23
-
24
-
25
-
26
-
27
-
28
-
29
-
30
-
31
-
32
-
33
-
34
-
35
-
36
-
37
-
38
-
39
-
40
-
41
-
42
-
43
-
44
-
45
-
46
-
47
-
48
-
49
-
50
-
51
-
52
-
53
-
54
-
55
-
56
-
57
-
58
-
59
-
60
-
61
-
62
-
63
-
64
-
65
-
66
-
67
-
68
-
69
-
70
-
71
-
72
-
73
-
74
-
75
-
76
-
77
-
78
-
79
-
80
-
81
-
82
-
83
-
84
-
85
-
86
-
87
-
88
-
89
-
90
-
91
-
92
-
93
-
94
-
95
-
96
-
97
-
98
-
99
-
100
-
101
-
102
-
103
-
104
-
105
-
106
-
 107
107 -
 108
108 -
 109
109 -
 110
110 -
 111
111 -
 112
112 -
 113
113 -
 114
114 -
 115
115 -
 116
116 -
 117
117 -
118
-
119
-
120
-
121
-
122
-
123
-
124
-
125
-
126
-
127
-
128
-
129
-
130
-
131
-
132
-
133
-
134
-
135
-
136
-
137
-
138
-
139
-
140
-
141
-
142
-
143
-
144
-
145
-
146
-
147
-
148
-
149
-
150
-
151
-
152
-
153
-
154
-
155
-
156
-
157
-
158
-
159
-
160
-
161
-
162
-
163
-
164
-
165
-
166
-
167
-
168
-
169
-
170
-
171
-
172
-
173
-
174
-
175
-
176
-
177
-
178
-
179
-
180
-
181
-
182
-
183
-
184
-
185
-
186
-
187
-
188
-
189
-
190
-
191
-
192
-
193
-
194
-
195
-
196
-
197
-
198
-
199
-
200
-
201
-
202
-
203
 |
 |
