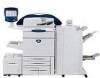
Xerox DC240 DocuColor 240/250 Training and Information Guide in PDF format.
Xerox DC240 - DocuColor 240 Color Laser Manual
 |
View all Xerox DC240 manuals
Add to My Manuals
Save this manual to your list of manuals |
Xerox DC240 manual content summary:
- Xerox DC240 | DocuColor 240/250 Training and Information Guide in PDF format. - Page 1
® DocuColor 240/250 Training and Information Guide - Xerox DC240 | DocuColor 240/250 Training and Information Guide in PDF format. - Page 2
9 Hole Punch Option Kit 10 Auxiliary Interface Device 10 Consumables 10 Drum Cartridges 10 Toner Cartridges 10 Fuser ...10 Charge Corotron 10 Control Panel 10 Power On 11 Power Off 17 3. Select the template 17 4. Select the features 17 DocuColor 240/250 Training and Information Guide 2 - Xerox DC240 | DocuColor 240/250 Training and Information Guide in PDF format. - Page 3
Professional Finisher (with Booklet Maker 24 Electrical Specifications 24 North America 24 Europe ...24 Legal and Safety 25 Safety Notes 25 Ozone Safety 27 Safety Standards 28 Illegal Copying 29 Laser Safety 31 ENERGY STAR 32 How To...33 DocuColor 240/250 Training and Information Guide 3 - Xerox DC240 | DocuColor 240/250 Training and Information Guide in PDF format. - Page 4
...40 Copy...40 Simple Copying 40 Loading Documents 42 Using the Document Handler 42 Loading Mixed Size Originals 42 Using the Document Glass 43 Scanning Bound Originals 44 2 Sided Outside/Delete Inside 74 Scan Options 76 Book Copying 76 DocuColor 240/250 Training and Information Guide 4 - Xerox DC240 | DocuColor 240/250 Training and Information Guide in PDF format. - Page 5
and Media 110 Auditron...112 Overview 112 Auditron Setup 113 Account Management 114 Create Accounts 115 Delete and Reset Data 117 Enable Auditron Mode 118 User Details Setup 119 DocuColor 240/250 Training and Information Guide 5 - Xerox DC240 | DocuColor 240/250 Training and Information Guide in PDF format. - Page 6
130 Print Report / List 131 Overwrite Hard Disk 132 Faults ...133 Consumables 134 Using Color 135 Output Color 135 Color Shift 137 Color Balance Replacing the Drum Cartridges 150 Replacing the Toner Cartridges 152 Replacing the Fuser 153 DocuColor 240/250 Training and Information Guide 6 - Xerox DC240 | DocuColor 240/250 Training and Information Guide in PDF format. - Page 7
DocuColor 240/250 Replacing the Charge Corotron 154 Replacing the Waste Toner Container 155 Further Assistance 156 Troubleshooting 157 Problem Solving 157 Fault Codes 158 Jam Clearance 171 Paper Jams 171 Bottom Left Cover Paper Jams 171 Tray 6 Paper Jams 171 Tray 5 Paper Jams 172 Transfer - Xerox DC240 | DocuColor 240/250 Training and Information Guide in PDF format. - Page 8
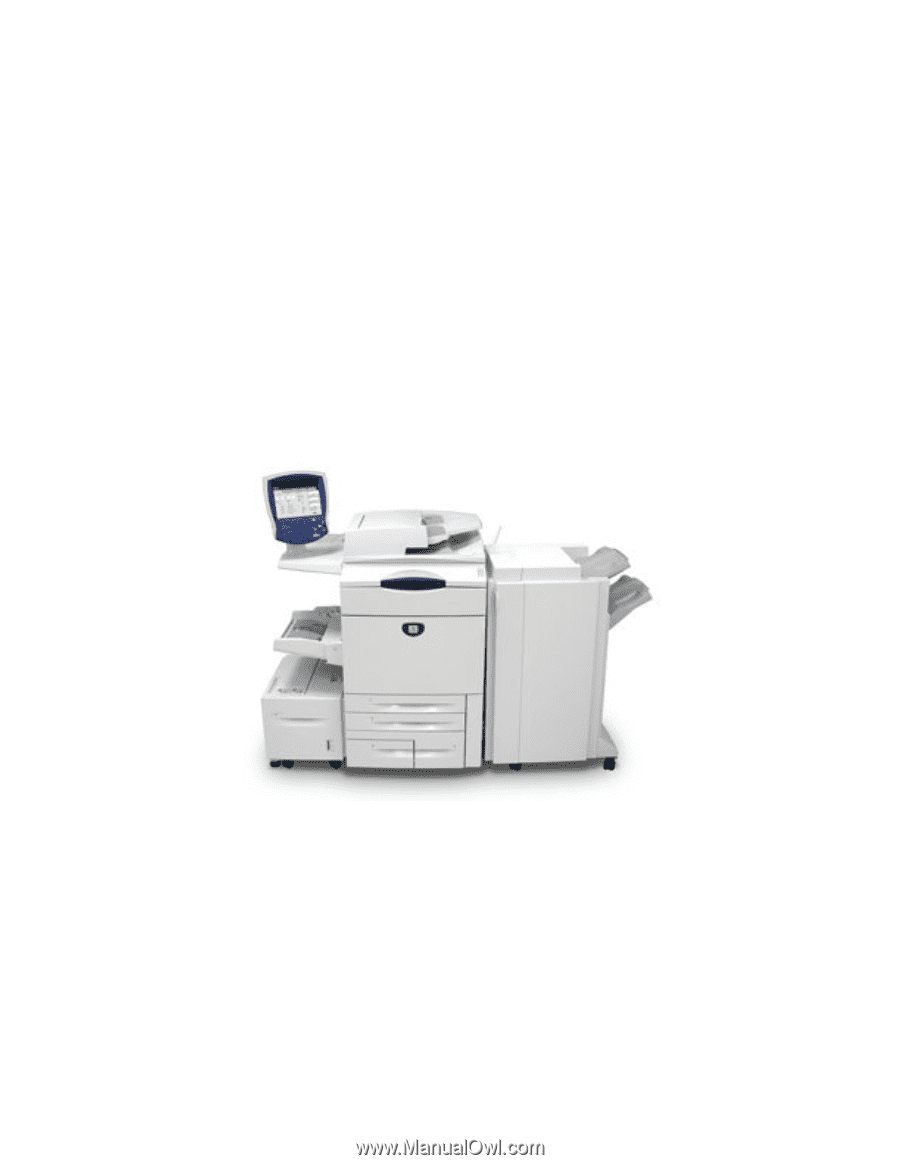
DocuColor 240/250 Getting Started Quick Tour These modules will help you to get to know your new machine. They will introduce you to the parts copier. It is a digital device capable of being used The trays accommodate paper weights from 17lb to 110lb DocuColor 240/250 Training and Information Guide 8 - Xerox DC240 | DocuColor 240/250 Training and Information Guide in PDF format. - Page 9
DocuColor 240/250 Bypass Tray The Bypass Tray is a paper tray on the left hand side of your machine and can be folded away when not in use. It accommodates all types of stock in a range of sizes between 4.0"x6.0" and 13"x19" and has a capacity of approximately 250 sheets of 20lb paper or a maximum - Xerox DC240 | DocuColor 240/250 Training and Information Guide in PDF format. - Page 10
a service call. Toner Cartridges The toner cartridges will provide approximately 15,000 prints at 6% area coverage. Supplied with the toner cartridge is the waste toner container. Fuser The fuser will , no matter what pathway has been selected. DocuColor 240/250 Training and Information Guide 10 - Xerox DC240 | DocuColor 240/250 Training and Information Guide in PDF format. - Page 11
Fuser is lowered to save power. The touch screen goes out, and the Power Saver button on the control panel lights. To use the machine, press the Power Saver button. The Power Saver button goes out to indicate that the Power Saver feature is canceled. DocuColor 240/250 Training and Information Guide - Xerox DC240 | DocuColor 240/250 Training and Information Guide in PDF format. - Page 12
DocuColor 240/250 Sleep Mode In this mode, the power is lowered more than in the Low Power mode. The touch screen goes out, and the Power Saver button on the control panel lights. To use the Off feature is NOT available for networked machines. DocuColor 240/250 Training and Information Guide 12 - Xerox DC240 | DocuColor 240/250 Training and Information Guide in PDF format. - Page 13
Services allows access to the All Services screen, where different features (copy, scan, etc.) can be selected. Review provides access to the Review number. Clear deletes numeric values or the last digit entered. The actual touch screen will vary DocuColor 240/250 Training and Information Guide 13 - Xerox DC240 | DocuColor 240/250 Training and Information Guide in PDF format. - Page 14
DocuColor 240/250 Power On and Off Ensure that your machine is connected to a suitable power source and that the power cord is fully . NOTE: To re-activate the machine when in this mode, touch a button on the touch screen or the Power Save button. DocuColor 240/250 Training and Information Guide 14 - Xerox DC240 | DocuColor 240/250 Training and Information Guide in PDF format. - Page 15
DocuColor 240/250 Loading Paper Specific instructions for loading paper can be found in the How To Load Paper and Media section of this document. Hints and Tips • There are 4 standard paper trays and 2 optional paper trays, designed to use window, DocuColor 240/250 Training and Information Guide 15 - Xerox DC240 | DocuColor 240/250 Training and Information Guide in PDF format. - Page 16
Copying tab. 3. Select the Features The features available on the Basic Copying tab are the ones used most often. They allow you to program the standard features for a copy job. On touching the the queue your job may have already been processed. DocuColor 240/250 Training and Information Guide 16 - Xerox DC240 | DocuColor 240/250 Training and Information Guide in PDF format. - Page 17
DocuColor 240/250 Simple Network Scanning In this section, you will learn the 7 simple steps to follow when Network Scanning: 1. Load your document. 2. Press the Network Scanning button. You may have to select the All Services of the imaged file, use the appropriate software to open the file. Press - Xerox DC240 | DocuColor 240/250 Training and Information Guide in PDF format. - Page 18
Enlarge area of the Basic Copying tab, the user is presented with a selection of Reduce/Enlarge options. These options are set using the Reduce/Enlarge Presets selection in the System required to adjust the touch screen display brightness. DocuColor 240/250 Training and Information Guide 18 - Xerox DC240 | DocuColor 240/250 Training and Information Guide in PDF format. - Page 19
DocuColor 240/250 Productivity The machine is a multifunction device with 4 digital functions combined into one sleek integrated system. It is designed to support large workgroups in different production environments, reducing operating costs while improving the production and management of - Xerox DC240 | DocuColor 240/250 Training and Information Guide in PDF format. - Page 20
tasks with superior quality and functionality - A suite of software tools and services for system administrators and users that brings the power of the machine to the desktop - Online address book stores details such as e-mail addresses, etc... DocuColor 240/250 Training and Information Guide 20 - Xerox DC240 | DocuColor 240/250 Training and Information Guide in PDF format. - Page 21
DocuColor 240/250 Specifications This machine adheres to strict specifications, approvals and certifications. These specifications show what the machine is designed to do. If further specification information is required please contact your Xerox Representative. Machine Configurations All - Xerox DC240 | DocuColor 240/250 Training and Information Guide in PDF format. - Page 22
DocuColor 240/250 Warm-up Time Cold Start: 150 seconds or less. Document Handler Capacity 250 sheets of 80 gsm paper Document sizes 5.5"x8.5" to 11"x17"SEF or 5.5"x8.5" to 8.5"x11" LEF Paper Weights 60 gsm - 200 gsm Mixed Sizes Yes - when selected on the user interface and the lead edges have the - Xerox DC240 | DocuColor 240/250 Training and Information Guide in PDF format. - Page 23
Capacity lower tray: 3000 sheets of 20lb bond 8.5" x 11" size Paper Sizes: 4"x6" SEF to 12"x19" SEF Paper Weights: 17lb bond - 110lb index Stapling: 50 sheets of 24lb bond Staples: 5000 per cartridge Hole Punch: 2/4 hole or 2/3 hole punch option DocuColor 240/250 Training and Information Guide 23 - Xerox DC240 | DocuColor 240/250 Training and Information Guide in PDF format. - Page 24
Specifications North America Voltage: 120 VAC plus/minus 10% Frequency: 50/60 Hz plus/minus 3% Power Consumption: 2.112 KVA maximum Europe Voltage: 220-240 VAC plus/minus 10% Frequency: 50/60 Hz plus/minus 3% Power Consumption: 2.2 KVA maximum DocuColor 240/250 Training and Information Guide - Xerox DC240 | DocuColor 240/250 Training and Information Guide in PDF format. - Page 25
and instructions marked on, or supplied with the product. This WARNING Mark alerts users to areas Use the power cord to disconnect this product. To remove all electrical power to the product, disconnect the power cord from the power receptacle. DocuColor 240/250 Training and Information Guide - Xerox DC240 | DocuColor 240/250 Training and Information Guide in PDF format. - Page 26
air-spray cleaning aids on or in this equipment. Some pressurized air-spray containers contain explosive mixtures and are not suitable for use in electrical applications. Use of such cleaners can result in a risk of explosion and fire. DocuColor 240/250 Training and Information Guide 26 - Xerox DC240 | DocuColor 240/250 Training and Information Guide in PDF format. - Page 27
safe limits. If you need additional information about ozone, please request the Xerox publication Ozone by calling 1-800-828-6571 in the United States and Canada. In other markets, please contact your authorized local dealer or Service Provider. DocuColor 240/250 Training and Information Guide 27 - Xerox DC240 | DocuColor 240/250 Training and Information Guide in PDF format. - Page 28
DocuColor 240/250 Safety Standards This Xerox product is safety certified by Underwriters Laboratories Incorporated to Standards UL60950-1, first edition, and CSA International CAN/CSA C22.2 No.60950-1-03. Regulatory Information FCC Part 15 This equipment has been tested and found to comply - Xerox DC240 | DocuColor 240/250 Training and Information Guide in PDF format. - Page 29
the campaign for the sale of such bonds.) - use" or library reproduction provisions of the copyright law). Further information of these provisions may be obtained from the Copyright Office, Library of Congress, Washington, DC 20559 (circular R21) DocuColor 240/250 Training and Information Guide - Xerox DC240 | DocuColor 240/250 Training and Information Guide in PDF format. - Page 30
DocuColor 240/250 • Certificates of Citizenship or Naturalization. (Foreign naturalization certificates may be photographed.) • Passports (Foreign passports may be photographed.) • Immigration papers • Draft Registration cards • Selective Service Induction papers which bear any of the following - Xerox DC240 | DocuColor 240/250 Training and Information Guide in PDF format. - Page 31
for use by Xerox Service Representatives and are placed on or near panels or shields that require special tools for removal. Do not remove any of the panels. There are no operator serviceable areas inside these covers. Environmental Compliance DocuColor 240/250 Training and Information Guide 31 - Xerox DC240 | DocuColor 240/250 Training and Information Guide in PDF format. - Page 32
responsible products and services. Copier, printer, digital press, and fax products must meet energy efficiency and emissions criteria, and exhibit compatibility with recycled supplies. Currently, Environmental Choice has more than 1600 approved products and 140 licensees. Xerox has been a leader - Xerox DC240 | DocuColor 240/250 Training and Information Guide in PDF format. - Page 33
your system administrator if none of the templates have been set up. 6. If you need to change the scan settings, follow the instructions provided in your optional Network Controller documentation. 7. Touch the Start button on the Control Panel. DocuColor 240/250 Training and Information Guide 33 - Xerox DC240 | DocuColor 240/250 Training and Information Guide in PDF format. - Page 34
When you have made all your selections in the properties window select OK. 4. Select the number of prints or sets of prints you require and then select OK. Your job will now be sent to the printer. Your job will be delivered to the output tray. DocuColor 240/250 Training and Information Guide 34 - Xerox DC240 | DocuColor 240/250 Training and Information Guide in PDF format. - Page 35
the exact size of the paper you load into the paper tray. You can use the arrow buttons on the touch screen to change the X and Y dimension values for the paper you load. After you have changed your Paper Size information, touch the Save button. DocuColor 240/250 Training and Information Guide 35 - Xerox DC240 | DocuColor 240/250 Training and Information Guide in PDF format. - Page 36
closing the tray the elevator raises the paper stack ready for use. If enabled by your System Administrator, the Paper Tray settings the Paper Size and Paper Type by touching the All Services button on the control panel, then selecting Setup Menu DocuColor 240/250 Training and Information Guide 36 - Xerox DC240 | DocuColor 240/250 Training and Information Guide in PDF format. - Page 37
DocuColor 240/250 Loading paper in the Bypass Tray The bypass tray can hold up to 250 sheets of 20lb bond, from 4.0"x6.0" to 13"x19" paper in a variety of standard sized paper loaded in the trays to be automatically detected by the machine. DocuColor 240/250 Training and Information Guide 37 - Xerox DC240 | DocuColor 240/250 Training and Information Guide in PDF format. - Page 38
touch screen. Alternatively, you can change the Paper Size and Paper Type by touching the All Services button on the control panel, then selecting Setup Menu and Paper Tray Attributes on the touch Size value if you load a non-standard paper size. DocuColor 240/250 Training and Information Guide 38 - Xerox DC240 | DocuColor 240/250 Training and Information Guide in PDF format. - Page 39
DocuColor 240/250 How to Perform Maintenance Instructions for performing maintenance procedures are available in the Maintenance section of this document. DocuColor 240/250 Training and Information Guide 39 - Xerox DC240 | DocuColor 240/250 Training and Information Guide in PDF format. - Page 40
feature become available. 4. Enter the Quantity On your machine the maximum copy quantity is 9999. Use the numeric keypad to enter the number of copies. The number entered is displayed in the is displayed showing information about your copy job. DocuColor 240/250 Training and Information Guide 40 - Xerox DC240 | DocuColor 240/250 Training and Information Guide in PDF format. - Page 41
DocuColor 240/250 6. Identify your job in the Queue. Press the Job Status button on the control panel to display the print queue. Your job will be displayed in the queue. If there are no jobs in the queue your job may have already been processed. DocuColor 240/250 Training and Information Guide 41 - Xerox DC240 | DocuColor 240/250 Training and Information Guide in PDF format. - Page 42
and a specific copy paper size and the image will be modified to fit the selected paper or 2. Select the 100% Reduce/Enlarge ratio and Auto Paper Supply and the machine will automatically make copies that are the same size as the originals. DocuColor 240/250 Training and Information Guide 42 - Xerox DC240 | DocuColor 240/250 Training and Information Guide in PDF format. - Page 43
automatic detection of scanned paper sizes. When you have input the size of your document, you can use the auto reduce/enlarge or the auto paper supply features. So, for example, you can auto enlarge your document to fit a specific size of paper. DocuColor 240/250 Training and Information Guide 43 - Xerox DC240 | DocuColor 240/250 Training and Information Guide in PDF format. - Page 44
have the option to use the Binding Erase feature, which deletes the shadow from your copies that is caused by the center binding. When you have saved your selections, apply a light pressure to the spine of the document and press the Start button. DocuColor 240/250 Training and Information Guide 44 - Xerox DC240 | DocuColor 240/250 Training and Information Guide in PDF format. - Page 45
DocuColor 240/250 You can make 2-sided copies from 2 pages of a bound original. This feature allows you to assign pages when making you have saved your selections, apply a light pressure to the spine of the document and press the Start button. DocuColor 240/250 Training and Information Guide 45 - Xerox DC240 | DocuColor 240/250 Training and Information Guide in PDF format. - Page 46
from one or twosided originals using either the Document Handler or the document glass. The two-sided option enables you to select your output in book or calendar orientation. The 2 Sided Copying options can be accessed on the Basic Copying tab. DocuColor 240/250 Training and Information Guide 46 - Xerox DC240 | DocuColor 240/250 Training and Information Guide in PDF format. - Page 47
1>2 option if your originals are printed on one side and you want twosided copies. Use the 2>2 option if you want to make two sided copies from two-sided originals. Use the 2>1 option if you want to make one-sided copies from two-sided originals. DocuColor 240/250 Training and Information Guide 47 - Xerox DC240 | DocuColor 240/250 Training and Information Guide in PDF format. - Page 48
image so that it will fit onto your chosen paper. If this option is selected you must also select a specific paper tray. The Preset % buttons can be customized by your Administrator to display the reduction ratios that you most frequently use. DocuColor 240/250 Training and Information Guide 48 - Xerox DC240 | DocuColor 240/250 Training and Information Guide in PDF format. - Page 49
for copying. Use the touch screen keypad buttons to enter a percentage value from 25% to 400% in 1% increments. The Independent X-Y% option allows you to specify different height and width ratios to scale the height and width independently. DocuColor 240/250 Training and Information Guide 49 - Xerox DC240 | DocuColor 240/250 Training and Information Guide in PDF format. - Page 50
DocuColor 240/250 Image Quality Your machine can enhance the quality of your output using the image quality features. This includes features such as setting the machine to suit the type of input, controlling the lightness, darkness and sharpness of the image and removing any unwanted parts of the - Xerox DC240 | DocuColor 240/250 Training and Information Guide in PDF format. - Page 51
DocuColor 240/250 Lighten / Darken The Lighten/Darken feature enables you to lighten or darken the image on your copy. Press the , to copy more details from dark areas in the original or to suppress the lines from pasted or newspaper originals. DocuColor 240/250 Training and Information Guide 51 - Xerox DC240 | DocuColor 240/250 Training and Information Guide in PDF format. - Page 52
DocuColor 240/250 Image Quality Presets When you choose an Image Quality Preset option, an entire group of associated image quality brightness and hue of the original. Once you have made an Image Quality Preset selection, touch the Save button. DocuColor 240/250 Training and Information Guide 52 - Xerox DC240 | DocuColor 240/250 Training and Information Guide in PDF format. - Page 53
DocuColor 240/250 Contrast The Contrast feature controls the differences between the image densities on the copy and enables you to contrast settings produce more vivid blacks and whites for sharper text and lines but less detail in pictures. DocuColor 240/250 Training and Information Guide 53 - Xerox DC240 | DocuColor 240/250 Training and Information Guide in PDF format. - Page 54
DocuColor 240/250 Auto Exposure The Auto Exposure feature is accessed from the Image Quality tab. The Auto Exposure screen is shown below be erased. NOTE: The Auto Exposure option is not available when the Original Type option is set to Photo. DocuColor 240/250 Training and Information Guide 54 - Xerox DC240 | DocuColor 240/250 Training and Information Guide in PDF format. - Page 55
the default settings for output quality. Selecting the Enhanced button will add a glossy touch to your output. This option will cause a decrease in printing speed. DocuColor 240/250 Training and Information Guide 55 - Xerox DC240 | DocuColor 240/250 Training and Information Guide in PDF format. - Page 56
DocuColor 240/250 Output Format Booklet Creation The Booklet Creation feature enables the production of booklets or multi-page copies a Binding Shift, or create Subsets (sub-dividing a large booklet into subsets) on the Booklet Creation screen. DocuColor 240/250 Training and Information Guide 56 - Xerox DC240 | DocuColor 240/250 Training and Information Guide in PDF format. - Page 57
only • Front and Back • Covers can be printed inside and out Select the paper tray you want to use for the main body of the copies. The Covers feature is not available if the Auto paper supply option be enabled to add covers to your copy job. DocuColor 240/250 Training and Information Guide 57 - Xerox DC240 | DocuColor 240/250 Training and Information Guide in PDF format. - Page 58
DocuColor 240/250 Multiple Up The Multiple-up feature is ideal for handouts, storyboards or for archival purposes. Multiple-up allows the you must select Save so that you can program any other features you may require from the control panel. DocuColor 240/250 Training and Information Guide 58 - Xerox DC240 | DocuColor 240/250 Training and Information Guide in PDF format. - Page 59
will be printed on the stock you specify using the Paper Tray Settings button. The system selects the highest priority tray for the separator stock. Selecting the Paper Tray Settings button allows you to change the separator stock selection. DocuColor 240/250 Training and Information Guide 59 - Xerox DC240 | DocuColor 240/250 Training and Information Guide in PDF format. - Page 60
output poster sizes. The Enlargement % button allows you to enter specific height and width percentage values (from 100% to 400%) for your final poster size. NOTE: Be sure to touch the Save button after you have made your enlargement selection. DocuColor 240/250 Training and Information Guide 60 - Xerox DC240 | DocuColor 240/250 Training and Information Guide in PDF format. - Page 61
DocuColor 240/250 Repeat Image The Repeat Image feature allows you to copy a single image multiple times onto one page. Repeat Image You can specify from 1 to 23 repeats along the short side (Y) and from 1 to 33 repeats along the long side (X). DocuColor 240/250 Training and Information Guide 61 - Xerox DC240 | DocuColor 240/250 Training and Information Guide in PDF format. - Page 62
DocuColor 240/250 Annotation The Annotation option allows you to add stamp, date, and page number information to your copied button. The Annotation screen, shown above, allows you to access three separate options: • Stamp • Date • Page Number DocuColor 240/250 Training and Information Guide 62 - Xerox DC240 | DocuColor 240/250 Training and Information Guide in PDF format. - Page 63
be printed on the first page or all pages of your copied sets. You can also change the position and appearance of the stamped message using the Position and Detailed Settings buttons. DocuColor 240/250 Training and Information Guide 63 - Xerox DC240 | DocuColor 240/250 Training and Information Guide in PDF format. - Page 64
DocuColor 240/250 The Date Screen You can also make copies with a Date printed on the first page of the copied is the date that the copies are made. You can also change the position and appearance of the date using the Position and Size buttons. DocuColor 240/250 Training and Information Guide 64 - Xerox DC240 | DocuColor 240/250 Training and Information Guide in PDF format. - Page 65
to one or many copied pages. You can also change the position, style, and appearance of the page number using the Position, Style, and Size buttons. After making any annotation selections, be sure to touch the Save button to store your settings DocuColor 240/250 Training and Information Guide 65 - Xerox DC240 | DocuColor 240/250 Training and Information Guide in PDF format. - Page 66
DocuColor 240/250 Watermark The Watermark option allows you to add a lightly printed control number or a text message to copied output. This feature can be used to help track confidential documents. For example, you can use sequential numbering to associate distribution copies with specific - Xerox DC240 | DocuColor 240/250 Training and Information Guide in PDF format. - Page 67
DocuColor 240/250 The Control Number option allows you to input a Start Number that will be printed copies with the machine's Serial Number printed on each page. This feature is useful if you want to track the copies coming from a certain machine. DocuColor 240/250 Training and Information Guide 67 - Xerox DC240 | DocuColor 240/250 Training and Information Guide in PDF format. - Page 68
image onto the tabbed stock. You can change the amount of shift required by using the Shift Value arrow keys on the touch screen. For both shift options, you can specify the Tab Stock Size and Tab Stock Type using the buttons on the touch screen. DocuColor 240/250 Training and Information Guide 68 - Xerox DC240 | DocuColor 240/250 Training and Information Guide in PDF format. - Page 69
DocuColor 240/250 Output Orientation The Output Orientation option allows you to select whether copies are output facing up or output stack. This setting may not be available, depending on how your system administrator configures the machine. DocuColor 240/250 Training and Information Guide 69 - Xerox DC240 | DocuColor 240/250 Training and Information Guide in PDF format. - Page 70
DocuColor 240/250 Folding Depending on your finisher configuration, you can access the Folding button on the Output Format tab. The Folding of the folded copies. NOTE: Be sure to touch the Save button after you have made your folding selection. DocuColor 240/250 Training and Information Guide 70 - Xerox DC240 | DocuColor 240/250 Training and Information Guide in PDF format. - Page 71
DocuColor 240/250 Job Assembly Build Job Use this feature to build a job that requires different settings for each page, or a segment of pages. For example, on the touch screen to end the build job. The machine will complete the quantity selected. DocuColor 240/250 Training and Information Guide 71 - Xerox DC240 | DocuColor 240/250 Training and Information Guide in PDF format. - Page 72
DocuColor 240/250 Sample Set When copying a large number of sets, use the Sample Set feature to review a proof copy. You can ensure that the proof copy is exactly what you be produced. If the sample set is unacceptable, select the Cancel button. DocuColor 240/250 Training and Information Guide 72 - Xerox DC240 | DocuColor 240/250 Training and Information Guide in PDF format. - Page 73
DocuColor 240/250 Large Volume Documents The Large Volume Document feature allows you to copy sets of documents that cannot be scanning is in process. When you have finished scanning all of your document subsets, touch the Last Original button. DocuColor 240/250 Training and Information Guide 73 - Xerox DC240 | DocuColor 240/250 Training and Information Guide in PDF format. - Page 74
Inside screen is shown below. Use the Area Settings buttons to define the areas you want deleted from your copies. Use the Target areas of originals buttons to specify which sides of your 2 Sided originals you want to be targeted for deletion. DocuColor 240/250 Training and Information Guide 74 - Xerox DC240 | DocuColor 240/250 Training and Information Guide in PDF format. - Page 75
DocuColor 240/250 When you touch a button in the Area Settings section of the screen, the associated Delete Outside/Delete Inside - Area screen will open, as shown below. Use the Delete Outside/Delete Inside - Area screen to define each of the areas you want to use as targets for deletion. To define - Xerox DC240 | DocuColor 240/250 Training and Information Guide in PDF format. - Page 76
have the option to use the Binding Erase feature, which deletes the shadow from your copies that is caused by the center binding. When you have saved your selections, apply a light pressure to the spine of the document and press the Start button. DocuColor 240/250 Training and Information Guide 76 - Xerox DC240 | DocuColor 240/250 Training and Information Guide in PDF format. - Page 77
DocuColor 240/250 2 Sided Book Copying You can make 2-sided copies from 2 pages of a bound original. This feature allows you to assign you have saved your selections, apply a light pressure to the spine of the document and press the Start button. DocuColor 240/250 Training and Information Guide 77 - Xerox DC240 | DocuColor 240/250 Training and Information Guide in PDF format. - Page 78
automatic detection of scanned paper sizes. When you have input the size of your document, you can use the auto reduce/enlarge or the auto paper supply features. So, for example, you can auto enlarge your document to fit a specific size of paper. DocuColor 240/250 Training and Information Guide 78 - Xerox DC240 | DocuColor 240/250 Training and Information Guide in PDF format. - Page 79
and a specific copy paper size and the image will be modified to fit the selected paper or 2. Select the 100% Reduce/Enlarge ratio and Auto Paper Supply and the machine will automatically make copies that are the same size as the originals. DocuColor 240/250 Training and Information Guide 79 - Xerox DC240 | DocuColor 240/250 Training and Information Guide in PDF format. - Page 80
DocuColor 240/250 Edge Erase The Edge Erase feature allows you to adjust the amount of the image that is erased around the edges of top, bottom, left, and right edges. The amount to be erased from the center of the image can be also be specified. DocuColor 240/250 Training and Information Guide 80 - Xerox DC240 | DocuColor 240/250 Training and Information Guide in PDF format. - Page 81
shift the image to one of the edges or corners of the paper. You can also use the Fine Adjustment arrows on the screen to move your image. Variable Shift allows you to shift the image up to 2 inches to specified top/bottom and left/right values. DocuColor 240/250 Training and Information Guide 81 - Xerox DC240 | DocuColor 240/250 Training and Information Guide in PDF format. - Page 82
DocuColor 240/250 Image Rotation If the orientation of the paper loaded in the selected paper tray differs from that of the document causes the image of the original to be rotated to match the orientation of the paper in the selected paper tray. DocuColor 240/250 Training and Information Guide 82 - Xerox DC240 | DocuColor 240/250 Training and Information Guide in PDF format. - Page 83
If the Output Color is set to Full Color, then the complementary colors are reversed on the printed image. This feature is useful for documents that have a substantial amount of dark background and/or light text and images, saving on toner usage. DocuColor 240/250 Training and Information Guide 83 - Xerox DC240 | DocuColor 240/250 Training and Information Guide in PDF format. - Page 84
DocuColor 240/250 Original Orientation The Original Orientation options allow you to specify the orientation of loaded documents in order glass or document feeder. Once you have selected your Original Orientation option, touch the Save button. DocuColor 240/250 Training and Information Guide 84 - Xerox DC240 | DocuColor 240/250 Training and Information Guide in PDF format. - Page 85
from one or twosided originals using either the Document Handler or the document glass. The two-sided option enables you to select your output in book or calendar orientation. The 2 Sided Copying options can be accessed on the Scan Options tab. DocuColor 240/250 Training and Information Guide 85 - Xerox DC240 | DocuColor 240/250 Training and Information Guide in PDF format. - Page 86
1>2 option if your originals are printed on one side and you want twosided copies. Use the 2>2 option if you want to make two sided copies from two-sided originals. Use the 2>1 option if you want to make one-sided copies from two-sided originals. DocuColor 240/250 Training and Information Guide 86 - Xerox DC240 | DocuColor 240/250 Training and Information Guide in PDF format. - Page 87
. You may have to select the All Services button first. 3. Select the template that to change the scan settings, follow the instructions provided in your optional Network Controller Documentation. use the appropriate software to open the file. DocuColor 240/250 Training and Information Guide 87 - Xerox DC240 | DocuColor 240/250 Training and Information Guide in PDF format. - Page 88
the features. This is why you should use the print drivers that accompany this printer. The Properties of the print driver enable you to select all the options you want to apply to your document. It is your "remote control panel" for the printer. DocuColor 240/250 Training and Information Guide 88 - Xerox DC240 | DocuColor 240/250 Training and Information Guide in PDF format. - Page 89
DocuColor 240/250 Print Drivers There are numerous print drivers for this printer to enable it to be used on all the popular computer operating systems. You can download the latest print drivers from the Xerox website at www.xerox.com. For Windows users there are around 20 different drivers. Your - Xerox DC240 | DocuColor 240/250 Training and Information Guide in PDF format. - Page 90
are using a Windows platform now and already have the drivers loaded on this workstation you can try out the Help feature. 1. Select Print from the File menu option at the top of your screen. A Print window will be displayed. 2. Select the Xerox DocuColor 240/250 print driver from the Printer - Name - Xerox DC240 | DocuColor 240/250 Training and Information Guide in PDF format. - Page 91
DocuColor 240/250 Finishing Options Simple Catch Tray Your copies will be delivered to the Simple Catch Tray face down, collated ..... If UNCOLLATED is selected, your output will be stacked in the output tray in stacks, 111...., 222...., 333..... DocuColor 240/250 Training and Information Guide 91 - Xerox DC240 | DocuColor 240/250 Training and Information Guide in PDF format. - Page 92
DocuColor 240/250 Offsetting Catch Tray Your copies will be delivered to the Offsetting Catch Tray face down, collated or 123..... If UNCOLLATED is selected, your output will be stacked in the output tray in stacks, 111...., 222...., 333..... DocuColor 240/250 Training and Information Guide 92 - Xerox DC240 | DocuColor 240/250 Training and Information Guide in PDF format. - Page 93
DocuColor 240/250 Advanced Finisher This output device provides a wide range of finishing options. The Right Top Tray is used for stacked output, and can receive up to 500 sheets of paper. The Right Bottom Tray is used with a stapling option. DocuColor 240/250 Training and Information Guide 93 - Xerox DC240 | DocuColor 240/250 Training and Information Guide in PDF format. - Page 94
be automatically selected when the Document Feeder is used. The Collated/Stapling/Punching button provides the options of collation, stapling, and hole punching. Select Uncollated for your copies to be sorted into stacks 1,1,1...2,2,2....3,3,3. DocuColor 240/250 Training and Information Guide 94 - Xerox DC240 | DocuColor 240/250 Training and Information Guide in PDF format. - Page 95
11" x 17" paper can be stapled in a set although if covers, inserts or heavier paper is used this number will reduce. The staple cartridge holds 5,000 staples. Your machine will be set to either 2 paper and can be combined with a stapling option. DocuColor 240/250 Training and Information Guide 95 - Xerox DC240 | DocuColor 240/250 Training and Information Guide in PDF format. - Page 96
be automatically selected when the Document Feeder is used. The Collated/Stapling/Punching button provides the options of collation, stapling, and hole punching. Select Uncollated for your copies to be sorted into stacks 1,1,1...2,2,2....3,3,3. DocuColor 240/250 Training and Information Guide 96 - Xerox DC240 | DocuColor 240/250 Training and Information Guide in PDF format. - Page 97
to 11"x17". These trays cannot be used for envelopes or tabbed stock. Stock guide, squeeze the clamp mechanism and slide the guide to touch the edge of the stock. To position the front and rear guides, squeeze the clamp mechanism and slide the guide to touch the edge of the stock. DocuColor 240/250 - Xerox DC240 | DocuColor 240/250 Training and Information Guide in PDF format. - Page 98
it takes the elevator to fully rise is used to determine the amount of paper in the tray. The trays do not automatically measure the size of stock loaded in the trays. NOTE: Your machine will not warn you if the wrong sized stock is loaded. DocuColor 240/250 Training and Information Guide 98 - Xerox DC240 | DocuColor 240/250 Training and Information Guide in PDF format. - Page 99
DocuColor 240/250 Tray 5 (Bypass Tray) The Bypass Tray is a paper tray on the left hand side of your machine. It can be folded away when not in use. It is primarily intended for use side guide to determine the size of the stock. When stock is loaded into the Bypass Tray, a pop-up window may appear - Xerox DC240 | DocuColor 240/250 Training and Information Guide in PDF format. - Page 100
DocuColor 240/250 Tray 6 (High Capacity Feeder) The High Capacity Feeder is primarily intended for use as a large quantity feeder and accommodates stock from Executive (7.25" x 10.5") LEF to 8.5" x 11" LEF. The High Capacity Feeder can hold paper of weights between 64 gsm to 220 gsm, and can hold a - Xerox DC240 | DocuColor 240/250 Training and Information Guide in PDF format. - Page 101
be used. The label stock should be left in the printing environment for 72 hours before using it in the printer to allow it to adjust to the ambient temperature. Leave labels sealed in their plastic wrapping until they are loaded in the printer. DocuColor 240/250 Training and Information Guide - Xerox DC240 | DocuColor 240/250 Training and Information Guide in PDF format. - Page 102
DocuColor 240/250 Label Usage Hints Load labels face up into the Bypass Tray, or face down into any other tray. Do not fan the label sheets before use unless the package instructs you to do so. If jamming or multi-sheet feeding occurs shuffle the labels before loading. Transparency Stock - Xerox DC240 | DocuColor 240/250 Training and Information Guide in PDF format. - Page 103
DocuColor 240/250 Envelopes Envelopes can only be loaded into the Bypass Tray. Place the envelopes into the Bypass tray face up. The flaps should ALWAYS be closed and on the leading (right) edge. DocuColor 240/250 Training and Information Guide 103 - Xerox DC240 | DocuColor 240/250 Training and Information Guide in PDF format. - Page 104
each other. Handling of Paper Stock For problem free printing and copying, observe the following when loading paper stock into the paper trays: • Do not use folded or wrinkled papers. • Do not beneficial with certain stocks in dry environments. DocuColor 240/250 Training and Information Guide 104 - Xerox DC240 | DocuColor 240/250 Training and Information Guide in PDF format. - Page 105
all the trays and the confirmed size and type of stock loaded in each tray. A user can select which tray to use from this list. The chosen tray is highlighted in blue. If the auto tray switching the other when stock in the active tray runs out. DocuColor 240/250 Training and Information Guide 105 - Xerox DC240 | DocuColor 240/250 Training and Information Guide in PDF format. - Page 106
tray, the Paper Tray Settings window will appear, allowing you button on the All Services screen. Then touch settings for specific paper you may be using. Access specific paper, select the paper in the list, then touch the Change Settings button. DocuColor 240/250 Training and Information Guide 106 - Xerox DC240 | DocuColor 240/250 Training and Information Guide in PDF format. - Page 107
DocuColor 240/250 The following options are available for you to more specifically define the paper you use: Plain (64-105gsm): Plain A (64-80gsm) Plain B (81-104gsm) Plain C - lightweight coated Plain (S1) special 1 - can be set by a Xerox Service Representative Plain (S2) special 2 - can be set by - Xerox DC240 | DocuColor 240/250 Training and Information Guide in PDF format. - Page 108
A (64-80gsm) Plain B (81-104gsm) Plain C - lightweight coated Plain (S1) special 1 - can be set by a Xerox Service Representative Plain (S2) special 2 - can be set by a Xerox Service Representative Recycled A (64-104gsm) Recycled B (81-104gsm) DocuColor 240/250 Training and Information Guide 108 - Xerox DC240 | DocuColor 240/250 Training and Information Guide in PDF format. - Page 109
A (64-80gsm) Plain B (81-104gsm) Plain C - lightweight coated Plain (S1) special 1 - can be set by a Xerox Service Representative Plain (S2) special 2 - can be set by a Xerox Service Representative Recycled A (64-104gsm) Recycled B (81-104gsm) DocuColor 240/250 Training and Information Guide 109 - Xerox DC240 | DocuColor 240/250 Training and Information Guide in PDF format. - Page 110
DocuColor 240/250 Loading Paper and Media Different types of stock can be used on your machine. This topic will show the different types of stock available for use and how to load them. Whenever you change paper in a paper tray, you will need to change the paper type and paper size values on - Xerox DC240 | DocuColor 240/250 Training and Information Guide in PDF format. - Page 111
touch the Save button. The following paragraphs will provide you with instructions to use when loading specific paper types, such as transparencies, drilled paper, tabs, heavyweight envelopes: • C4 (LEF): 229mm x 324mm • C5 (LEF): 229mm x 162mm DocuColor 240/250 Training and Information Guide 111 - Xerox DC240 | DocuColor 240/250 Training and Information Guide in PDF format. - Page 112
DocuColor 240/250 Auditron Overview The Auditron feature of the machine is used for auditing purposes. This feature electronically records the number of copies or prints made for each user account and controls the access and use of the printer/copier. Enable the Auditron to: • Create, change, and - Xerox DC240 | DocuColor 240/250 Training and Information Guide in PDF format. - Page 113
DocuColor 240/250 Auditron Setup To setup Auditron you must first create user accounts and then enable Auditron. Users will then be required to enter the password setup with their account to perform certain machine functions. You can create up to 1000 accounts. All user accounts must have the - Xerox DC240 | DocuColor 240/250 Training and Information Guide in PDF format. - Page 114
DocuColor 240/250 Account Management To setup Auditron you must create user accounts. Users any password between 4 - 12 digits long. • Account Name: Set any account name up to 31 characters long, using letters and symbols. • Color Access . DocuColor 240/250 Training and Information Guide 114 - Xerox DC240 | DocuColor 240/250 Training and Information Guide in PDF format. - Page 115
System Settings screen, select Login Setup/Auditron Administration. To create an account, select Create/Check User Account. Select the Number for which you want to register a user, and select Create/Delete. The Number is a user control number. DocuColor 240/250 Training and Information Guide 115 - Xerox DC240 | DocuColor 240/250 Training and Information Guide in PDF format. - Page 116
the output color field. • Color: You can set from 1 to 9,999,999 pages (7 digits) in 1 sheet increments. • Black: You can set from 1 to 9,999,999 pages (7 digits) in 1 sheet increments. Selecting Next causes the input to switch to the next item. DocuColor 240/250 Training and Information Guide 116 - Xerox DC240 | DocuColor 240/250 Training and Information Guide in PDF format. - Page 117
DocuColor 240/250 Delete and Reset Data Information for individual user accounts can be deleted and reset. When you reset, the current cumulative number of pages for a selected user will return to zero and returned to 0. A reset cannot be undone. DocuColor 240/250 Training and Information Guide 117 - Xerox DC240 | DocuColor 240/250 Training and Information Guide in PDF format. - Page 118
. • Local Machine Access: The Auditron administration is carried out using the authenticated users already registered on the machine. • Auditron Mode: For the services for which you want to enable the administration feature, select On. DocuColor 240/250 Training and Information Guide 118 - Xerox DC240 | DocuColor 240/250 Training and Information Guide in PDF format. - Page 119
being input. Use this feature error is logged. Select Failed Access Log, select On and with the numeric keypad enter the number of failures. Store User Details: You can set the destination to save authentication information. Select NVM or hard disk. DocuColor 240/250 Training and Information Guide - Xerox DC240 | DocuColor 240/250 Training and Information Guide in PDF format. - Page 120
administrative control and accounting for the machine. For a user of the machine, you can control the use of output color, or set a limit on the number of pages. For each registered user, you can also check the cumulative number of pages. DocuColor 240/250 Training and Information Guide 120 - Xerox DC240 | DocuColor 240/250 Training and Information Guide in PDF format. - Page 121
240/250 Delete and Reset Account Data You can delete all registered information for all registered users in a single operation, or reset the auditron. You can access the Reset User Accounts button on the Login Setup / Auditron Administration screen. DocuColor 240/250 Training and Information Guide - Xerox DC240 | DocuColor 240/250 Training and Information Guide in PDF format. - Page 122
: Resets the Color Access settings for all users to Free Access. All Account Limits: Resets the maximum number of pages for all users to the default (9,999,999 pages). Print the Auditron Report: An auditron report of all services is printed. DocuColor 240/250 Training and Information Guide 122 - Xerox DC240 | DocuColor 240/250 Training and Information Guide in PDF format. - Page 123
are password protected so that they cannot be accidentally changed or corrupted. Use this menu to: • Set-up the initial settings and system configuration User Accounts, the Administrator Copy Meter, User Details Setup, Password Entry, and Login Setup. DocuColor 240/250 Training and Information Guide - Xerox DC240 | DocuColor 240/250 Training and Information Guide in PDF format. - Page 124
DocuColor 240/250 Accessing the System Settings menu Entry to the System Settings Menu is via the Log In/Out button on the control panel. The System Administration - Login window is shown here. Use the keypad to enter a 5 digit system functions. DocuColor 240/250 Training and Information Guide 124 - Xerox DC240 | DocuColor 240/250 Training and Information Guide in PDF format. - Page 125
Administrator Password Maximum Login Attempts Login Setup / Auditron Administration Create/Check User Accounts Reset User Accounts System Administrator Copy Meter User Details Setup Password Entry from Control Panel Login Setup/Auditron Mode DocuColor 240/250 Training and Information Guide 125 - Xerox DC240 | DocuColor 240/250 Training and Information Guide in PDF format. - Page 126
The tasks performed at the machine are identified by the machine mode used, for example Copy or Print Report. For print tasks you have submitted to your machine via the print driver, the job type is identified by the filename or document title. DocuColor 240/250 Training and Information Guide 126 - Xerox DC240 | DocuColor 240/250 Training and Information Guide in PDF format. - Page 127
DocuColor 240/250 Other Job Lists On selecting the Job Status button the Current and Pending Jobs list is automatically displayed. To on the screen. When you touch a job listed on this screen, you can view detailed information about that job. DocuColor 240/250 Training and Information Guide 127 - Xerox DC240 | DocuColor 240/250 Training and Information Guide in PDF format. - Page 128
options, and memory options. The Software Version screen lists the software version installed on your machine. Your machine contains different pieces of software for different functions. The software versions will vary for each of the functions. DocuColor 240/250 Training and Information Guide 128 - Xerox DC240 | DocuColor 240/250 Training and Information Guide in PDF format. - Page 129
associated fault condition. • Empty - The tray is empty. The last size, type and color used in the tray are displayed as the attributes. The information displayed on the Tray Status screen is automatically updated if the status of any tray changes. DocuColor 240/250 Training and Information Guide - Xerox DC240 | DocuColor 240/250 Training and Information Guide in PDF format. - Page 130
DocuColor 240/250 Billing Meters The Billing Meters feature provides access to machine usage and billing information. The meters Status button on the Control Panel. 2. Touch the Billing Meter/Print Report tab. 3. Touch the Billing Meter button. DocuColor 240/250 Training and Information Guide 130 - Xerox DC240 | DocuColor 240/250 Training and Information Guide in PDF format. - Page 131
DocuColor 240/250 Print Report / List A variety of useful reports are available on the Print Report/List screen. Perform the steps below to access the control panel. NOTE: The reports available will differ depending on your machine configuration. DocuColor 240/250 Training and Information Guide 131 - Xerox DC240 | DocuColor 240/250 Training and Information Guide in PDF format. - Page 132
on the control panel. Overwriting is performed after every copy job that includes more than one set, and after each scan job is transferred to the network controller. The "standby" status indicates the completion of the overwriting process. DocuColor 240/250 Training and Information Guide 132 - Xerox DC240 | DocuColor 240/250 Training and Information Guide in PDF format. - Page 133
occurring on your machine. Access to the Faults tab is via the Machine Status button on the control panel. To print the report, touch the Error History Report button on the touch screen, then press the Start button on the control panel. DocuColor 240/250 Training and Information Guide 133 - Xerox DC240 | DocuColor 240/250 Training and Information Guide in PDF format. - Page 134
DocuColor 240/250 Consumables View the status of the machine consumables to gain an indication of when the customer replaceable information shown is based on your machine's average daily usage and the customer replaceable unit's life-span. DocuColor 240/250 Training and Information Guide 134 - Xerox DC240 | DocuColor 240/250 Training and Information Guide in PDF format. - Page 135
DocuColor 240/250 Using Color The following sections describe the color features available on the DocuColor 240/250. Output Color You can select one of several Output Color options from the Basic Copying tab, or select the More... option to see all of the available selections. DocuColor 240/250 - Xerox DC240 | DocuColor 240/250 Training and Information Guide in PDF format. - Page 136
only Black toner is used. The Dual Color option enables the copier to make copies in two preset colors. The color of colored areas and black areas of the document can be specified. The Single Color setting allows Red, Green, Blue, Cyan, Magenta, or Yellow to be selected. DocuColor 240/250 Training - Xerox DC240 | DocuColor 240/250 Training and Information Guide in PDF format. - Page 137
DocuColor 240/250 Color Shift The Color Shift feature allows you to shift all of the copy colors toward the adjacent hue. green colors shift toward the yellow hue. Again, all colors between these original colors also shift in the same direction. DocuColor 240/250 Training and Information Guide 137 - Xerox DC240 | DocuColor 240/250 Training and Information Guide in PDF format. - Page 138
DocuColor 240/250 Color Balance You can access the Color Balance button on the Image Quality tab. The Color Balance feature levels of all four process colors (Yellow, Magenta, Cyan, and Black) for their low, medium and high density ranges. DocuColor 240/250 Training and Information Guide 138 - Xerox DC240 | DocuColor 240/250 Training and Information Guide in PDF format. - Page 139
DocuColor 240/250 Color Sharpness/Saturation You can access the Sharpness/Color Saturation button on the Image Quality tab. The Sharpness to adjust the overall richness of color on the copy. There are five levels of adjustment for each feature. DocuColor 240/250 Training and Information Guide 139 - Xerox DC240 | DocuColor 240/250 Training and Information Guide in PDF format. - Page 140
DocuColor 240/250 Maintenance Locating the Serial Number When ordering supplies or contacting Xerox for assistance you will be asked to supply your machine serial button on the Machine Status tab. 3. The machine serial number is displayed. DocuColor 240/250 Training and Information Guide 140 - Xerox DC240 | DocuColor 240/250 Training and Information Guide in PDF format. - Page 141
DocuColor 240/250 Billing Meters The Billing Meters feature provides access to machine usage and billing information. The meters Meter button. Customers can view the various billing meters, and the machine serial number for tracking purposes. DocuColor 240/250 Training and Information Guide 141 - Xerox DC240 | DocuColor 240/250 Training and Information Guide in PDF format. - Page 142
to order Toner (black, cyan, magenta and yellow) and Staples. Contact the Customer Parts Center at 1-800-828-5881 to purchase Drum Cartridge A1, Drum Cartridge A2, Drum Cartridge A3, Drum Cartridge A4, the Waste Toner Container, and the Fuser. DocuColor 240/250 Training and Information Guide 142 - Xerox DC240 | DocuColor 240/250 Training and Information Guide in PDF format. - Page 143
or another suitable non-abrasive glass cleaner, to clean the glass area. Use a lint-free cloth, lightly dampened with water, Xerox Cleaning Fluid or Xerox Film Remover, to clean the under side of the Document Cover and in the Document Handler. DocuColor 240/250 Training and Information Guide 143 - Xerox DC240 | DocuColor 240/250 Training and Information Guide in PDF format. - Page 144
and smudges, clean the touch screen and control panel with a soft, lint-free cloth, lightly dampened with water. Use a lightly dampened cloth to clean the Document Handler, output trays, paper trays and the outside areas of your machine. DocuColor 240/250 Training and Information Guide 144 - Xerox DC240 | DocuColor 240/250 Training and Information Guide in PDF format. - Page 145
the guides to just touch the edges of the paper stack. 2. Having adjusted the paper tray, you need to change the paper tray setting. 3. To adjust the paper tray settings, touch the All Services button and Paper Color. 7. Touch the Save button. DocuColor 240/250 Training and Information Guide 145 - Xerox DC240 | DocuColor 240/250 Training and Information Guide in PDF format. - Page 146
DocuColor 240/250 Loading Paper and Media Instructions for loading paper and media can be found in the How To Load Paper and Media section of this document. DocuColor 240/250 Training and Information Guide 146 - Xerox DC240 | DocuColor 240/250 Training and Information Guide in PDF format. - Page 147
Dispose of the staple cartridge according to the instructions contained in the new staple cartridge box. 3. use of staple cartridges not recommended by Xerox may impair quality and performance. Use only staple cartridges recommended for the machine. DocuColor 240/250 Training and Information Guide - Xerox DC240 | DocuColor 240/250 Training and Information Guide in PDF format. - Page 148
cartridge, and then lift to remove it. 3. Dispose of the staple cartridge according to the instructions contained in the new staple cartridge box. 4. Open a new staple cartridge. Holding the tabs position and close the Finisher Front Door. DocuColor 240/250 Training and Information Guide 148 - Xerox DC240 | DocuColor 240/250 Training and Information Guide in PDF format. - Page 149
and displays an error message. 10. Touch the Confirm button. 11. To continue automatic gradation adjustment for other screen types, repeat steps 3 to 10 as required. 12. Exit the Auto Gradation Adjustment screens and make a copy or print to confirm the image quality. DocuColor 240/250 Training and - Xerox DC240 | DocuColor 240/250 Training and Information Guide in PDF format. - Page 150
Place the new drum cartridge in the machine following the guides with the side marked front facing the front. 10. Press both ends of the drum cartridge to place it in a horizontal position. 11. Immediately close the Drum Drawer to protect the other drums from light. DocuColor 240/250 Training and - Xerox DC240 | DocuColor 240/250 Training and Information Guide in PDF format. - Page 151
the Release Handle to its original position. 13. Return the R1-R4 handle to the original position and close the front door. 14. Insert the used drum cartridge into an empty container for recycling. DocuColor 240/250 Training and Information Guide 151 - Xerox DC240 | DocuColor 240/250 Training and Information Guide in PDF format. - Page 152
into the appropriate toner location. CAUTION: Never use a vacuum cleaner when you clean spilled toner. It can cause explosion as the toner fills the vacuum cleaner and gets sparks. Use a broom or a cloth moistened with a neutral detergent. DocuColor 240/250 Training and Information Guide 152 - Xerox DC240 | DocuColor 240/250 Training and Information Guide in PDF format. - Page 153
DocuColor 240/250 Replacing the Fuser This procedure shows you how to remove a used Fuser and replace it with a new Fuser. The machine will tell you when you need to install a new one. The Fuser can be recycled so please follow the disposal instructions you receive with the new cartridge. 1. Make - Xerox DC240 | DocuColor 240/250 Training and Information Guide in PDF format. - Page 154
touch or scratch the surface of the drum. Doing so may result in unsatisfactory printing. 12. Return the R1-R4 handle to the original position and close the front door. 13. Insert the used Charge Corotron into an empty container for recycling. DocuColor 240/250 Training and Information Guide 154 - Xerox DC240 | DocuColor 240/250 Training and Information Guide in PDF format. - Page 155
. 5. Hold the used waste toner container firmly with both hands and put it into the provided plastic bag. 6. Hold the center part on the top of a new container and insert it until it comes to a stop. 7. Close the waste toner container cover. 8. Close the Front Door. DocuColor 240/250 Training and - Xerox DC240 | DocuColor 240/250 Training and Information Guide in PDF format. - Page 156
DocuColor 240/250 Further Assistance For additional help visit our Customer Web Site at www.xerox.com or contact the Xerox Welcome and Support Center quoting the machine serial number. The customer support number and machine serial number can be viewed by: 1. Touching the Machine Status button on - Xerox DC240 | DocuColor 240/250 Training and Information Guide in PDF format. - Page 157
DocuColor 240/250 Troubleshooting Problem Solving Some problems can be resolved by rebooting your machine. Power the machine OFF and ON using the ON/OFF switch at the front of your machine. CAUTION: Wait approximately 20 seconds before turning the machine back ON. Be aware that any - Xerox DC240 | DocuColor 240/250 Training and Information Guide in PDF format. - Page 158
DocuColor 240/250 Fault Codes If an error caused the printing to end abnormally, or a malfunction occurred in the machine, then an error code is displayed. If an error code appears that is not listed in the table below, or if an error persists after following the listed solution, then contact - Xerox DC240 | DocuColor 240/250 Training and Information Guide in PDF format. - Page 159
the relevant remedy, Contact your Xerox Customer Support Center. Cause: Finisher malfunctioned. Remedy: Power-cycle the machine. If the machine is not improved by performing the relevant remedy, Contact your Xerox Customer Support Center. DocuColor 240/250 Training and Information Guide 159 - Xerox DC240 | DocuColor 240/250 Training and Information Guide in PDF format. - Page 160
Fault Code 016-210 016-219 016-220 016-454 016-704 016-708 016-710 016-712 016-713 DocuColor 240/250 Cause/Remedy Cause: An error occurred on the software settings. Remedy: Powercycle the machine. If the machine is not improved by performing the relevant remedy, Contact your Xerox Customer Support - Xerox DC240 | DocuColor 240/250 Training and Information Guide in PDF format. - Page 161
to use service. Remedy: Check with your Auditron Administrator. Cause: Maximum number of pages for this service has been reached. Remedy: Check with your Auditron Administrator. Cause: Can not connect to the SMTP server. Remedy: Contact the SMTP DocuColor 240/250 Training and Information Guide 161 - Xerox DC240 | DocuColor 240/250 Training and Information Guide in PDF format. - Page 162
Remove unnecessary data from the hard disk to increase free disk space. Cause: A hard disk error occurred during image processing. Remedy: The hard disk might be defective. When replacing a hard disk, contact your Xerox Customer Support Center. DocuColor 240/250 Training and Information Guide 162 - Xerox DC240 | DocuColor 240/250 Training and Information Guide in PDF format. - Page 163
Code 016-778 016-779 016-780 016-786 016-788 016-789 016-791 016-792 DocuColor 240/250 Cause/Remedy Cause: Conversion processing of scanned image was interrupted, because of insufficient disk space. Remedy: Remove unnecessary data from the hard disk to increase free disk space. Cause: An error - Xerox DC240 | DocuColor 240/250 Training and Information Guide in PDF format. - Page 164
Fault Code 016-793 016-794 016-795 021-750 027-452 027-453 027-700 027-701 027-702 027-703 DocuColor 240/250 Cause/Remedy Cause: or maintenance request again after a short time. If the error persists, contact your Xerox Customer Support Center. Cause: IP address already exists. Remedy: Change the - Xerox DC240 | DocuColor 240/250 Training and Information Guide in PDF format. - Page 165
Fault Code 027-720 027-721 027-722 027-723 027-725 027-727 027-728 027-750 DocuColor 240/250 Cause/Remedy Cause: Unable to find the server of an application interface destination. Remedy: Check DNS server address. Or check whether an application interface (CentreWare Flow Service) installed on the - Xerox DC240 | DocuColor 240/250 Training and Information Guide in PDF format. - Page 166
in the document feeder. Remedy: Contact your Xerox Customer Support Center. Refer to 062-210. Cause: A communications error occurred between the document scan unit and the document feeder. Remedy: Contact your Xerox Customer Support Center. DocuColor 240/250 Training and Information Guide 166 - Xerox DC240 | DocuColor 240/250 Training and Information Guide in PDF format. - Page 167
Fault Code 062-278 062-790 063-210 065-210 065-215 065-219 071-210 072-210 DocuColor 240/250 Cause/Remedy Cause: An error occurred in the document feeder. Remedy: Powercycle the machine. If the machine is not improved by performing the relevant remedy, contact your Xerox Customer Support Center. - Xerox DC240 | DocuColor 240/250 Training and Information Guide in PDF format. - Page 168
Code 073-210 074-210 075-211 078-250 116-210 116-212 116-704 DocuColor 240/250 Cause/Remedy Cause: The Tray 3 malfunctioned. Remedy: Check paper loaded in the Tray 3, and power-cycle the machine. If the machine is not improved by performing the relevant remedy, contact your Xerox Customer Support - Xerox DC240 | DocuColor 240/250 Training and Information Guide in PDF format. - Page 169
Fault Code 116-705 116-701 116-713 116-780 116-790 123-400 124-705 124-706 124-709 127-210 DocuColor 240/250 Cause/Remedy Refer to 016-795. Cause: 2 not improved by performing the relevant remedy, contact your Xerox Customer Support Center. DocuColor 240/250 Training and Information Guide 169 - Xerox DC240 | DocuColor 240/250 Training and Information Guide in PDF format. - Page 170
the problem persists, call for service. Cause: An auto-recoverable internal error occurred, and the machine restarted automatically. Remedy: Select the [Close] button. The machine is operating normally now. If the error persists, call your Xerox Customer Support Center. DocuColor 240/250 Training - Xerox DC240 | DocuColor 240/250 Training and Information Guide in PDF format. - Page 171
DocuColor 240/250 Jam Clearance Paper Jams Bottom Left Cover Paper Jams This section describes how to clear paper jams that occur pieces of paper inside the machine. 5. Close the Tray 6 Top Cover and gently move Tray 6 to its original position. DocuColor 240/250 Training and Information Guide 171 - Xerox DC240 | DocuColor 240/250 Training and Information Guide in PDF format. - Page 172
the horizontal position, then pull out the transfer module. Warning: Never touch a labeled area (found on the fuser unit or nearby) indicating "High Temperature" transfer module completely and turn Handle 2 to the left. 7. Close the front cover. DocuColor 240/250 Training and Information Guide 172 - Xerox DC240 | DocuColor 240/250 Training and Information Guide in PDF format. - Page 173
the instructions displayed on the screen. Output Tray Paper Jams This section describes how to clear paper jams that occur in the Output Tray. 1. Remove jammed paper from the Output Tray. 2. If paper is torn, check for any torn pieces of paper inside the machine. DocuColor 240/250 Training - Xerox DC240 | DocuColor 240/250 Training and Information Guide in PDF format. - Page 174
of paper inside the machine. 5. Check whether paper is jammed at the lower part of the machine. If there is jammed paper, remove it. NOTE: If paper the problem. 2. Remove the jammed paper. 3. Push the tray in gently until it comes to a stop DocuColor 240/250 Training and Information Guide 174 - Xerox DC240 | DocuColor 240/250 Training and Information Guide in PDF format. - Page 175
DocuColor 240/250 Finisher Area 1 Paper Jams This section describes how to clear paper jams that occur in Area 1 of the 3 to the down position. 3. Remove any paper. 4. Return Handle 3 to its original position. 5. Close the Finisher Front Door DocuColor 240/250 Training and Information Guide 175 - Xerox DC240 | DocuColor 240/250 Training and Information Guide in PDF format. - Page 176
DocuColor 240/250 Finisher Area 4 Paper Jams This section describes how to clear paper jams that occur in Area 4 of the Finisher. 1. 2. Turn Knob 4a to the right. 3. Remove any sheets from the Booklet Maker Tray. 4. Close the Finisher Front Door DocuColor 240/250 Training and Information Guide 176 - Xerox DC240 | DocuColor 240/250 Training and Information Guide in PDF format. - Page 177
originals, use the document glass to copy a new set. NOTE: If using computer fanfold forms ensure that the perforations down each side of the sheet have been removed. When removed the forms can be loaded either short edge feed or long edge feed. DocuColor 240/250 Training and Information Guide 177 - Xerox DC240 | DocuColor 240/250 Training and Information Guide in PDF format. - Page 178
guides are against the edges of the loaded paper. • Check that the Bypass Tray paper attributes are set correctly. • Check that the paper is within specification.(8.5"x11" to 12"x19", 255 gsm maximum, up to 250 the paper from the tray and reload. DocuColor 240/250 Training and Information Guide 178 - Xerox DC240 | DocuColor 240/250 Training and Information Guide in PDF format. - Page 179
. 3. Check that the envelopes are within specification. For more information about envelope specifications go to the Stock Type, Envelope topic in the Paper and Media section. NOTE: Some wrinkle is expected on the back of the fed envelope. DocuColor 240/250 Training and Information Guide 179 - Xerox DC240 | DocuColor 240/250 Training and Information Guide in PDF format. - Page 180
DocuColor 240/250 Problem Statement If you are experiencing difficulties using your machine check the suggestions below for problem solving advice. Message will not clear If the fault stacked correctly Check to see if the paper tray guides are locked into position against the paper. Pages in the - Xerox DC240 | DocuColor 240/250 Training and Information Guide in PDF format. - Page 181
on. Documents will not feed correctly If you are experiencing problems feeding certain types of document ensure that the document media is suitable for the Document Handler. Alternatively you can place the documents on the Document Glass. DocuColor 240/250 Training and Information Guide 181 - Xerox DC240 | DocuColor 240/250 Training and Information Guide in PDF format. - Page 182
DocuColor 240/250 Help Copyright Statement ©2005 by Xerox Corporation. All rights reserved. NetWare is a registered trademark of Novell, Inc. AppleTalk, EtherTalk, and Macintosh are trademarks of Apple Computer, Inc. Microsoft, MS-DOS, Windows NT are registered trademarks of Microsoft Corporation. - Xerox DC240 | DocuColor 240/250 Training and Information Guide in PDF format. - Page 183
product. You can use Auditron to track overall machine usage, individual usage and usage of each feature separately. Auditron Administrator - a designated user, whose responsibility is to converts the image of the document into a digital image. DocuColor 240/250 Training and Information Guide 183 - Xerox DC240 | DocuColor 240/250 Training and Information Guide in PDF format. - Page 184
used by the machine when the user does not specify settings. Dialing Characters - special characters which apply only to Xerox machines that support fax mailboxes. Digital Copier - a copier that scans an image only once to make one or many copies. DIMM - Dual In-line Memory Module DocuColor 240/250 - Xerox DC240 | DocuColor 240/250 Training and Information Guide in PDF format. - Page 185
- a walk up fax service which sends the scanned image over a telephone line that is attached directly to the machine. Error Sheet - if enabled, error sheets are generated when to the exterior of the machine and used to track machine usage. DocuColor 240/250 Training and Information Guide 185 - Xerox DC240 | DocuColor 240/250 Training and Information Guide in PDF format. - Page 186
. Internet Fax - a walk up fax service that will send the facsimile to another internet fax machine or PC. IOT - Image Output Terminal. Contains the Charge, Exposure, Development, Transfer, Cleaning and Fusing elements of the Xerographic Process DocuColor 240/250 Training and Information Guide 186 - Xerox DC240 | DocuColor 240/250 Training and Information Guide in PDF format. - Page 187
DocuColor 240/250 IP - Internet Protocol. Job Progress Screen - a pop-up screen that is displayed on the User Interface when the Start button is pushed. This window provides information about the active job. Job Queue - lists jobs being processed by the machine. The Job Queue can be accessed via the - Xerox DC240 | DocuColor 240/250 Training and Information Guide in PDF format. - Page 188
options. Printer Jam - a media misfeed when the machine is printing a document. Print to Edge - this feature allows the machine to print an image on the paper up to the very edge of the paper stock. Protocol - the rules that control the transmitting and receiving of data. DocuColor 240/250 Training - Xerox DC240 | DocuColor 240/250 Training and Information Guide in PDF format. - Page 189
Fax - a walk up fax service which uses a Third Party Fax Server. Sharpness - sharpness adjusts the amount of edge definition on the output. If the image appears slightly out of focus, increasing the Sharpness value may make the image clearer. DocuColor 240/250 Training and Information Guide 189 - Xerox DC240 | DocuColor 240/250 Training and Information Guide in PDF format. - Page 190
DocuColor 240/250 Short Edge Feed (SEF) - the short edge of the paper is positioned to enter the machine first. Sleep Mode - a condition of reduced power consumption while the machine is inactive. SMTP - Simple Mail Transfer user Format Toner - DocuColor 240/250 Training and Information Guide 190 - Xerox DC240 | DocuColor 240/250 Training and Information Guide in PDF format. - Page 191
Specifications, 24 ENERGY STAR, 32 Fault Codes Machine Weight, 21 Paper Tray 1, 21 Problem Solving, 157 Problem Statement, 180 Product Overview Specifications, 21 Table of Contents, 2 Troubleshooting, 157 Tutorials, 40 Using Color, 135 Warm-up Time, 22 DocuColor 240/250 Training and Information Guide
-
 1
1 -
 2
2 -
 3
3 -
 4
4 -
 5
5 -
 6
6 -
 7
7 -
8
-
9
-
10
-
11
-
12
-
13
-
14
-
15
-
16
-
17
-
18
-
19
-
20
-
21
-
22
-
23
-
24
-
25
-
26
-
27
-
28
-
29
-
30
-
31
-
32
-
33
-
34
-
35
-
36
-
37
-
38
-
39
-
40
-
41
-
42
-
43
-
44
-
45
-
46
-
47
-
48
-
49
-
50
-
51
-
52
-
53
-
54
-
55
-
56
-
57
-
58
-
59
-
60
-
61
-
62
-
63
-
64
-
65
-
66
-
67
-
68
-
69
-
70
-
71
-
72
-
73
-
74
-
75
-
76
-
77
-
78
-
79
-
80
-
81
-
82
-
83
-
84
-
85
-
86
-
87
-
88
-
89
-
90
-
91
-
92
-
93
-
94
-
95
-
96
-
97
-
98
-
99
-
100
-
101
-
102
-
103
-
104
-
105
-
106
-
107
-
108
-
109
-
110
-
111
-
112
-
113
-
114
-
115
-
116
-
117
-
118
-
119
-
120
-
121
-
122
-
123
-
124
-
125
-
126
-
127
-
128
-
129
-
130
-
131
-
132
-
133
-
134
-
135
-
136
-
137
-
138
-
139
-
140
-
141
-
142
-
143
-
144
-
145
-
146
-
147
-
148
-
149
-
150
-
151
-
152
-
153
-
154
-
155
-
156
-
157
-
158
-
159
-
160
-
161
-
162
-
163
-
164
-
165
-
166
-
167
-
168
-
169
-
170
-
171
-
172
-
173
-
174
-
175
-
176
-
177
-
178
-
179
-
180
-
181
-
182
-
183
-
184
-
185
-
186
-
187
-
188
-
189
-
190
-
191
 |
 |
DocuColor
®
240/250
Training and Information Guide