Xerox DC240 DocuColor 240/250 Training and Information Guide in PDF format. - Page 175
Finisher Area 1 Paper Jams, Return Handle 1D, Handle 1B, and Handle 1A to their original positions.
 |
View all Xerox DC240 manuals
Add to My Manuals
Save this manual to your list of manuals |
Page 175 highlights
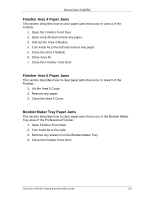
DocuColor 240/250 Finisher Area 1 Paper Jams This section describes how to clear paper jams that occur in Area 1 of the Finisher. 1. Open Finisher Front Door 2. Move Handle 1A to the right. 3. Remove any paper. 4. If the paper cannot be removed, move Handle 1B to the right. 5. Remove any paper. 6. Move Handle 1D to the left. 7. Turn Knob 1C and remove any paper. 8. Return Handle 1D, Handle 1B, and Handle 1A to their original positions. 9. Close the Finisher Front Door Finisher Area 2 Paper Jams This section describes how to clear paper jams that occur in Area 2 of the Finisher. 1. Open Finisher Front Door. 2. Open Area 2a and Area 2b and remove any paper. 3. Turn Knob 2C if necessary. 4. Close Area 2a and Area 2b. 5. Close the Finisher Front Door Finisher Area 3 Paper Jams This section describes how to clear paper jams that occur in Area 3 of the Finisher. 1. Open Finisher Front Door. 2. Move Handle 3 to the down position. 3. Remove any paper. 4. Return Handle 3 to its original position. 5. Close the Finisher Front Door DocuColor 240/250 Training and Information Guide 175
-
 1
1 -
2
-
3
-
4
-
5
-
6
-
7
-
8
-
9
-
10
-
11
-
12
-
13
-
14
-
15
-
16
-
17
-
18
-
19
-
20
-
21
-
22
-
23
-
24
-
25
-
26
-
27
-
28
-
29
-
30
-
31
-
32
-
33
-
34
-
35
-
36
-
37
-
38
-
39
-
40
-
41
-
42
-
43
-
44
-
45
-
46
-
47
-
48
-
49
-
50
-
51
-
52
-
53
-
54
-
55
-
56
-
57
-
58
-
59
-
60
-
61
-
62
-
63
-
64
-
65
-
66
-
67
-
68
-
69
-
70
-
71
-
72
-
73
-
74
-
75
-
76
-
77
-
78
-
79
-
80
-
81
-
82
-
83
-
84
-
85
-
86
-
87
-
88
-
89
-
90
-
91
-
92
-
93
-
94
-
95
-
96
-
97
-
98
-
99
-
100
-
101
-
102
-
103
-
104
-
105
-
106
-
107
-
108
-
109
-
110
-
111
-
112
-
113
-
114
-
115
-
116
-
117
-
118
-
119
-
120
-
121
-
122
-
123
-
124
-
125
-
126
-
127
-
128
-
129
-
130
-
131
-
132
-
133
-
134
-
135
-
136
-
137
-
138
-
139
-
140
-
141
-
142
-
143
-
144
-
145
-
146
-
147
-
148
-
149
-
150
-
151
-
152
-
153
-
154
-
155
-
156
-
157
-
158
-
159
-
160
-
161
-
162
-
163
-
164
-
165
-
166
-
167
-
168
-
169
-
 170
170 -
 171
171 -
 172
172 -
 173
173 -
 174
174 -
 175
175 -
 176
176 -
 177
177 -
 178
178 -
 179
179 -
 180
180 -
181
-
182
-
183
-
184
-
185
-
186
-
187
-
188
-
189
-
190
-
191
 |
 |
