Xerox DC240 DocuColor 240/250 Training and Information Guide in PDF format. - Page 18
Machine Setup, Set Date and Time, Reduce \ Enlarge Presets, Display Brightness - user guide
 |
View all Xerox DC240 manuals
Add to My Manuals
Save this manual to your list of manuals |
Page 18 highlights
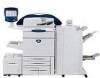
DocuColor 240/250 Machine Setup Your machine is designed to enable machine and feature default settings to be customized to meet your requirements. This module identifies the key default settings that you can change to customize the machine for your convenience. Changing these settings will not take long to complete but will save you time when using the machine. There are 2 steps to accessing the System Administration menu: 1. Select the Log In/Out button on the control panel. 2. Use the number keypad to enter the default password - 11111. Select Confirm on the touch screen. NOTE: 11111 is the factory set default password. It is recommend that you change this password. Set Date and Time Set the date format, either M/D/Y or D/M/Y or Y/M/D, and enter the correct date. Set the correct time using either the 12 or 24 hour clock. The current date and time are displayed on confirmation pages and activity reports. Reduce \ Enlarge Presets When the More... button is selected on the Reduce/Enlarge area of the Basic Copying tab, the user is presented with a selection of Reduce/Enlarge options. These options are set using the Reduce/Enlarge Presets selection in the System Administration menu. Set the Reduce/Enlarge percentages to reflect your business needs. Display Brightness Depending on where your machine is located, you may wish to adjust the touch screen display in order to minimize glare and improve the touch screen readability. The touch screen display brightness knob is located on the left side of the Control Panel. Rotate the knob as required to adjust the touch screen display brightness. DocuColor 240/250 Training and Information Guide 18
-
 1
1 -
2
-
3
-
4
-
5
-
6
-
7
-
8
-
9
-
10
-
11
-
12
-
 13
13 -
 14
14 -
 15
15 -
 16
16 -
 17
17 -
 18
18 -
 19
19 -
 20
20 -
 21
21 -
 22
22 -
 23
23 -
24
-
25
-
26
-
27
-
28
-
29
-
30
-
31
-
32
-
33
-
34
-
35
-
36
-
37
-
38
-
39
-
40
-
41
-
42
-
43
-
44
-
45
-
46
-
47
-
48
-
49
-
50
-
51
-
52
-
53
-
54
-
55
-
56
-
57
-
58
-
59
-
60
-
61
-
62
-
63
-
64
-
65
-
66
-
67
-
68
-
69
-
70
-
71
-
72
-
73
-
74
-
75
-
76
-
77
-
78
-
79
-
80
-
81
-
82
-
83
-
84
-
85
-
86
-
87
-
88
-
89
-
90
-
91
-
92
-
93
-
94
-
95
-
96
-
97
-
98
-
99
-
100
-
101
-
102
-
103
-
104
-
105
-
106
-
107
-
108
-
109
-
110
-
111
-
112
-
113
-
114
-
115
-
116
-
117
-
118
-
119
-
120
-
121
-
122
-
123
-
124
-
125
-
126
-
127
-
128
-
129
-
130
-
131
-
132
-
133
-
134
-
135
-
136
-
137
-
138
-
139
-
140
-
141
-
142
-
143
-
144
-
145
-
146
-
147
-
148
-
149
-
150
-
151
-
152
-
153
-
154
-
155
-
156
-
157
-
158
-
159
-
160
-
161
-
162
-
163
-
164
-
165
-
166
-
167
-
168
-
169
-
170
-
171
-
172
-
173
-
174
-
175
-
176
-
177
-
178
-
179
-
180
-
181
-
182
-
183
-
184
-
185
-
186
-
187
-
188
-
189
-
190
-
191
 |
 |
