Xerox DC240 DocuColor 240/250 Training and Information Guide in PDF format. - Page 153
Replacing the Fuser, Close the Transfer Module.
 |
View all Xerox DC240 manuals
Add to My Manuals
Save this manual to your list of manuals |
Page 153 highlights
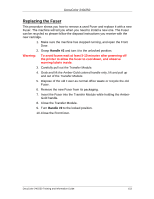
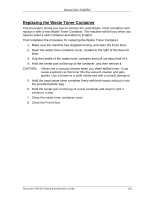
DocuColor 240/250 Replacing the Fuser This procedure shows you how to remove a used Fuser and replace it with a new Fuser. The machine will tell you when you need to install a new one. The Fuser can be recycled so please follow the disposal instructions you receive with the new cartridge. 1. Make sure the machine has stopped running, and open the Front Door. 2. Grasp Handle #2 and turn it to the unlocked position. Warning: To avoid burns wait at least 5-10 minutes after powering off the printer to allow the fuser to cool down, and observe warning labels inside. 3. Carefully pull out the Transfer Module. 4. Grab and lift the Amber-Gold colored handle only, lift and pull up and out of the Transfer Module. 5. Dispose of the old Fuser as normal office waste or recycle the old Fuser. 6. Remove the new Fuser from its packaging. 7. Insert the Fuser into the Transfer Module while holding the AmberGold handle. 8. Close the Transfer Module. 9. Turn Handle #2 to the locked position. 10. Close the Front Door. DocuColor 240/250 Training and Information Guide 153
-
 1
1 -
2
-
3
-
4
-
5
-
6
-
7
-
8
-
9
-
10
-
11
-
12
-
13
-
14
-
15
-
16
-
17
-
18
-
19
-
20
-
21
-
22
-
23
-
24
-
25
-
26
-
27
-
28
-
29
-
30
-
31
-
32
-
33
-
34
-
35
-
36
-
37
-
38
-
39
-
40
-
41
-
42
-
43
-
44
-
45
-
46
-
47
-
48
-
49
-
50
-
51
-
52
-
53
-
54
-
55
-
56
-
57
-
58
-
59
-
60
-
61
-
62
-
63
-
64
-
65
-
66
-
67
-
68
-
69
-
70
-
71
-
72
-
73
-
74
-
75
-
76
-
77
-
78
-
79
-
80
-
81
-
82
-
83
-
84
-
85
-
86
-
87
-
88
-
89
-
90
-
91
-
92
-
93
-
94
-
95
-
96
-
97
-
98
-
99
-
100
-
101
-
102
-
103
-
104
-
105
-
106
-
107
-
108
-
109
-
110
-
111
-
112
-
113
-
114
-
115
-
116
-
117
-
118
-
119
-
120
-
121
-
122
-
123
-
124
-
125
-
126
-
127
-
128
-
129
-
130
-
131
-
132
-
133
-
134
-
135
-
136
-
137
-
138
-
139
-
140
-
141
-
142
-
143
-
144
-
145
-
146
-
147
-
 148
148 -
 149
149 -
 150
150 -
 151
151 -
 152
152 -
 153
153 -
 154
154 -
 155
155 -
 156
156 -
 157
157 -
 158
158 -
159
-
160
-
161
-
162
-
163
-
164
-
165
-
166
-
167
-
168
-
169
-
170
-
171
-
172
-
173
-
174
-
175
-
176
-
177
-
178
-
179
-
180
-
181
-
182
-
183
-
184
-
185
-
186
-
187
-
188
-
189
-
190
-
191
 |
 |
